Canon REALiS WUX500 Pro AV MULTIMEDIA PROJECTOR WUX500 Users Manual - Page 32
Remote Control, POWER button, BLANK button, ASPECT button, KEYSTONE button, D.ZOOM button
 |
View all Canon REALiS WUX500 Pro AV manuals
Add to My Manuals
Save this manual to your list of manuals |
Page 32 highlights
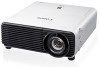
Before Use Remote Control The projector can be operated using buttons on the remote control or the side control on the projector. The remote control allows you to operate all functions of the projector. (4) KEYSTONE button (P58) (8) Corrects keystone distortion. The [Keystone] setting enables both (1) horizontal/vertical keystone correction (by adjusting top/bottom/left/right (2) (9) length) and corner correction. (5) D.ZOOM button Zooms the image in or out digitally. [ ] button: Zooms the image in (up to (3) 12x). [ ] button: Zooms the image out (1x minimum). buttons: (4) Move the zoom-in location. (6) IMAGE button (P61) Switches the image mode (image quality). (5) (7) GAMMA button (P78) Adjusts the gamma of the image. (8) INPUT button (P50) Switches the input signal. (6) (9) AUTO PC button (P52) Adjusts tracking etc. automatically in (7) accordance with the signal from a computer when the analog PC input is selected. (1) POWER button (P47, P62) Turns the projector on or off. (2) BLANK button (P63) Toggles between display / non-display of image. (3) ASPECT button (P56, P70) Changes the aspect ratio mode. 32
-
 1
1 -
2
-
3
-
4
-
5
-
6
-
7
-
8
-
9
-
10
-
11
-
12
-
13
-
14
-
15
-
16
-
17
-
18
-
19
-
20
-
21
-
22
-
23
-
24
-
25
-
26
-
 27
27 -
 28
28 -
 29
29 -
 30
30 -
 31
31 -
 32
32 -
 33
33 -
 34
34 -
 35
35 -
 36
36 -
 37
37 -
38
-
39
-
40
-
41
-
42
-
43
-
44
-
45
-
46
-
47
-
48
-
49
-
50
-
51
-
52
-
53
-
54
-
55
-
56
-
57
-
58
-
59
-
60
-
61
-
62
-
63
-
64
-
65
-
66
-
67
-
68
-
69
-
70
-
71
-
72
-
73
-
74
-
75
-
76
-
77
-
78
-
79
-
80
-
81
-
82
-
83
-
84
-
85
-
86
-
87
-
88
-
89
-
90
-
91
-
92
-
93
-
94
-
95
-
96
-
97
-
98
-
99
-
100
-
101
-
102
-
103
-
104
-
105
-
106
-
107
-
108
-
109
-
110
-
111
-
112
-
113
-
114
-
115
-
116
-
117
-
118
-
119
-
120
-
121
-
122
-
123
-
124
-
125
-
126
-
127
-
128
-
129
-
130
-
131
-
132
-
133
-
134
-
135
-
136
-
137
-
138
-
139
-
140
-
141
-
142
-
143
-
144
-
145
-
146
-
147
-
148
-
149
-
150
-
151
-
152
-
153
-
154
-
155
-
156
-
157
-
158
-
159
-
160
-
161
-
162
-
163
-
164
-
165
-
166
-
167
-
168
-
169
-
170
-
171
-
172
-
173
-
174
-
175
-
176
-
177
-
178
-
179
-
180
-
181
-
182
-
183
-
184
-
185
-
186
-
187
-
188
-
189
-
190
 |
 |
