Canon SELPHY ES1 SELPHY ES1 User Guide - Page 31
Multi Photo Print
 |
UPC - 013803065541
View all Canon SELPHY ES1 manuals
Add to My Manuals
Save this manual to your list of manuals |
Page 31 highlights
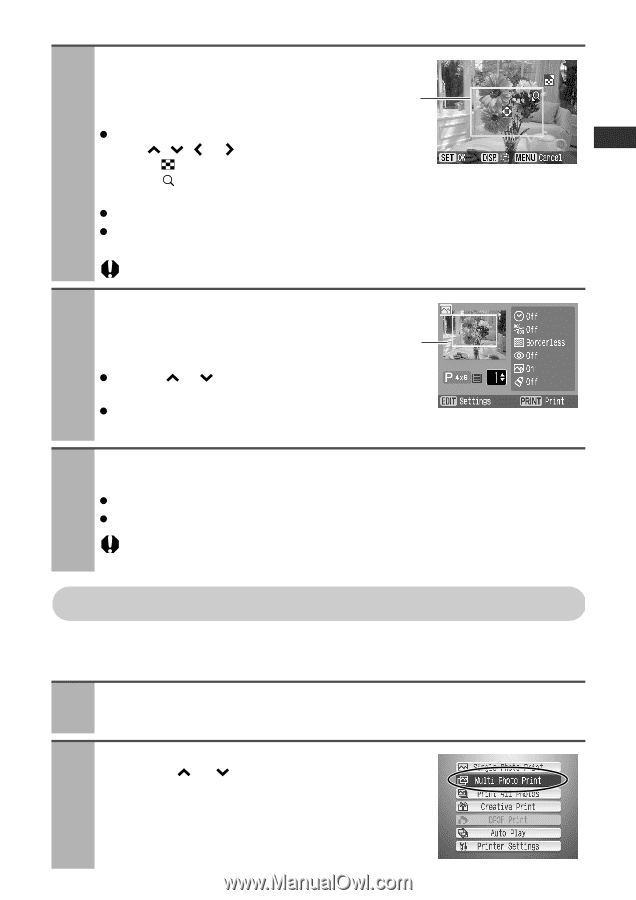
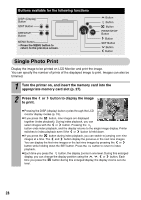
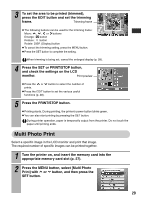
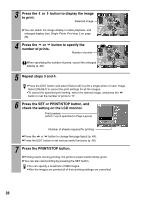
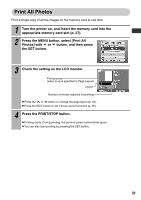
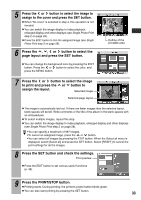
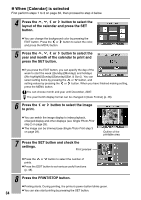
3 To set the area to be printed (trimmed), press the EDIT button and set the trimming frame. Trimming frame z The following buttons can be used for the trimming frame: Move: , , or buttons Enlarge: button Reduce: button Rotate: DISP. (Display) button z To cancel the trimming setting, press the MENU button. z Press the SET button to complete the setting. When trimming is being set, cancel the enlarged display (p. 28). 4 Press the SET or PRINT/STOP button, and check the settings on the LCD monitor. Print preview z Press the or button to select the number of prints. z Press the EDIT button to set the various useful functions (p. 48). 5 Press the PRINT/STOP button. z Printing starts. During printing, the printer's power button blinks green. z You can also start printing by pressing the SET button. During printer operation, paper is temporarily output from the printer. Do not touch the paper until printing ends. Multi Photo Print Select a specific image in the LCD monitor and print that image. The required number of specific images can be printed together. 1 Turn the printer on, and insert the memory card into the appropriate memory card slot (p. 27). 2 Press the MENU button, select [Multi Photo Print] with or button, and then press the SET button. 29
-
 1
1 -
2
-
3
-
4
-
5
-
6
-
7
-
8
-
9
-
10
-
11
-
12
-
13
-
14
-
15
-
16
-
17
-
18
-
19
-
20
-
21
-
22
-
23
-
24
-
25
-
 26
26 -
 27
27 -
 28
28 -
 29
29 -
 30
30 -
 31
31 -
 32
32 -
 33
33 -
 34
34 -
 35
35 -
 36
36 -
37
-
38
-
39
-
40
-
41
-
42
-
43
-
44
-
45
-
46
-
47
-
48
-
49
-
50
-
51
-
52
-
53
-
54
-
55
-
56
-
57
-
58
-
59
-
60
-
61
-
62
-
63
-
64
-
65
-
66
-
67
-
68
-
69
-
70
-
71
-
72
-
73
-
74
-
75
-
76
-
77
 |
 |