Canon SX20 PowerShot SX20 IS Camera User Guide - Page 148
Customizing Display Information - aspect ratio setting
 |
UPC - 628586116580
View all Canon SX20 manuals
Add to My Manuals
Save this manual to your list of manuals |
Page 148 highlights
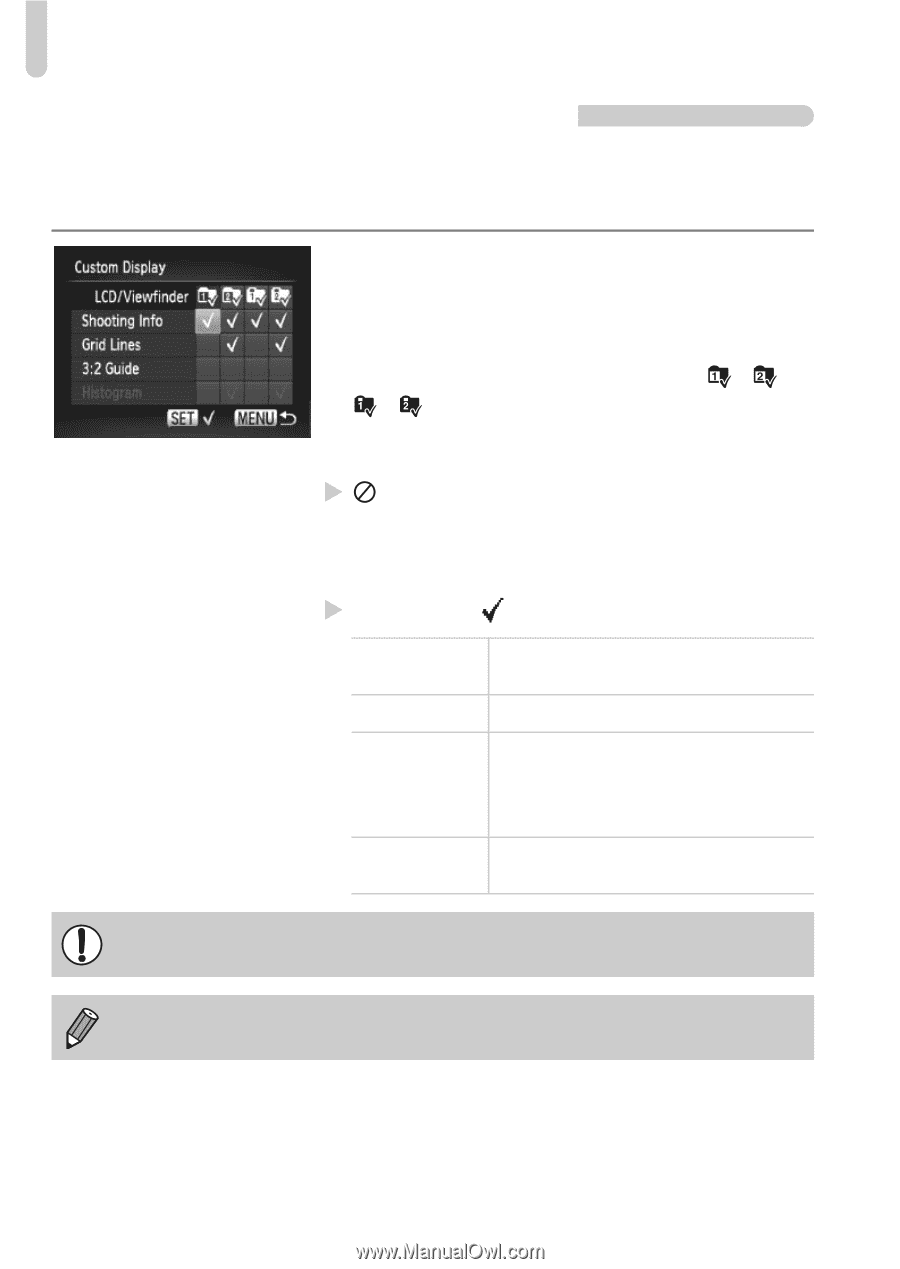
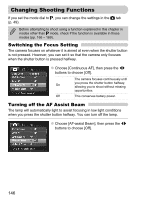
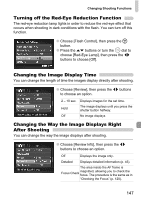
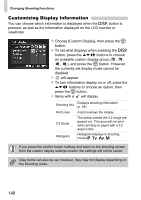
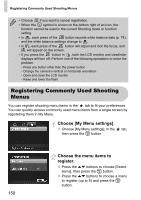
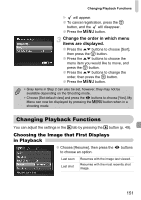
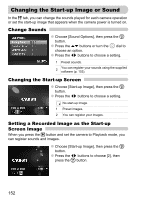
Changing Shooting Functions Customizing Display Information You can choose which information is displayed when the l button is pressed, as well as the information displayed on the LCD monitor or viewfinder. ● Choose [Custom Display], then press the m button. ● To set what displays when pressing the l button, press the opqr buttons to choose an available custom display group ( , , , ), and press the m button. However, the currently set display mode cannot be disabled. X will appear. ● To turn information display on or off, press the opqr buttons to choose an option, then press the m button. X Items with a will display. Shooting Info Displays shooting information (p. 44). Grid Lines A grid overlays the display. 3:2 Guide The areas outside the 3:2 range are grayed out. This area will not print when printing on paper with a 3:2 aspect ratio. Histogram Histogram displays in shooting modes G, M, B, D. If you press the shutter button halfway and return to the shooting screen from the custom display settings screen, the settings will not be saved. Gray items can also be set, however, they may not display depending on the Shooting mode. 148
-
 1
1 -
2
-
3
-
4
-
5
-
6
-
7
-
8
-
9
-
10
-
11
-
12
-
13
-
14
-
15
-
16
-
17
-
18
-
19
-
20
-
21
-
22
-
23
-
24
-
25
-
26
-
27
-
28
-
29
-
30
-
31
-
32
-
33
-
34
-
35
-
36
-
37
-
38
-
39
-
40
-
41
-
42
-
43
-
44
-
45
-
46
-
47
-
48
-
49
-
50
-
51
-
52
-
53
-
54
-
55
-
56
-
57
-
58
-
59
-
60
-
61
-
62
-
63
-
64
-
65
-
66
-
67
-
68
-
69
-
70
-
71
-
72
-
73
-
74
-
75
-
76
-
77
-
78
-
79
-
80
-
81
-
82
-
83
-
84
-
85
-
86
-
87
-
88
-
89
-
90
-
91
-
92
-
93
-
94
-
95
-
96
-
97
-
98
-
99
-
100
-
101
-
102
-
103
-
104
-
105
-
106
-
107
-
108
-
109
-
110
-
111
-
112
-
113
-
114
-
115
-
116
-
117
-
118
-
119
-
120
-
121
-
122
-
123
-
124
-
125
-
126
-
127
-
128
-
129
-
130
-
131
-
132
-
133
-
134
-
135
-
136
-
137
-
138
-
139
-
140
-
141
-
142
-
 143
143 -
 144
144 -
 145
145 -
 146
146 -
 147
147 -
 148
148 -
 149
149 -
 150
150 -
 151
151 -
 152
152 -
 153
153 -
154
-
155
-
156
-
157
-
158
-
159
-
160
-
161
-
162
-
163
-
164
-
165
-
166
-
167
-
168
-
169
-
170
-
171
-
172
-
173
-
174
-
175
-
176
-
177
-
178
-
179
-
180
 |
 |