Canon i475D i475D Quick Start Guide - Page 26
Print Head Maintenance - printer head replacement
 |
View all Canon i475D manuals
Add to My Manuals
Save this manual to your list of manuals |
Page 26 highlights
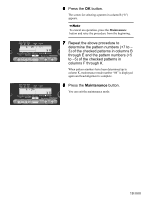
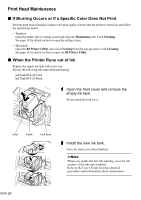
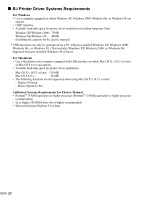
Print Head Maintenance „ If Blurring Occurs or If a Specific Color Does Not Print Perform print head cleaning to improve the print quality. Ensure that the printer is turned on and follow the instructions below. • Windows Open the printer driver settings screen and click the Maintenance tab. Click Cleaning. See page 14 for details on how to open the setting screen. • Macintosh Open the BJ Printer Utility, and select Cleaning from the pop-up menu. Click Cleaning. See page 16 for details on how to open the BJ Printer Utility. „ When the Printer Runs out of Ink Replace the empty ink tank with a new one. Specify the following ink tanks when purchasing. Ink Tank BCI-24 Color Ink Tank BCI-24 Black 1 Open the front cover and remove the empty ink tank. Do not touch the lock lever. color black lock lever 2 Install the new ink tank. Close the front cover when finished. When you enable the low ink warning, reset the ink counter of the ink tank installed. Refer to the User's Guide for more detailed procedures and information about maintenance. 24
-
 1
1 -
2
-
3
-
4
-
5
-
6
-
7
-
8
-
9
-
10
-
11
-
12
-
13
-
14
-
15
-
16
-
17
-
18
-
19
-
20
-
 21
21 -
 22
22 -
 23
23 -
 24
24 -
 25
25 -
 26
26 -
 27
27 -
 28
28 -
 29
29 -
 30
30 -
 31
31
 |
 |
