Canon i900D i900D Direct Printing Guide - Page 43
Troubleshooting - waste ink tank
 |
View all Canon i900D manuals
Add to My Manuals
Save this manual to your list of manuals |
Page 43 highlights
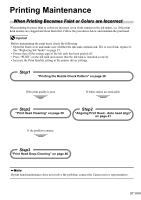
Troubleshooting Let's take a look at countermeasures against troubles which may occur during use of the printer. Here, we will discuss errors indicated on the LCD, problems that might occur during direct printing from the digital camera, and problems that are also likely to occur while using the Photo Viewer. If you cannot find the symptom corresponding to a certain problem, refer to the User's Guide. z "A Message is Displayed on the LCD" on page 42 z "Ink does not come out/ Printing is Blurred/ Colors are Wrong/ White Streaks" on page 44 z "Printed Surface is Scratched" on page 44 z "Cannot Print Properly from the Digital Camera" on page 45 z "An Error Message is Displayed While Using the Photo Viewer" on page 46 A Message is Displayed on the LCD If a message is displayed on the LCD, take the corresponding countermeasure described below. Message No images. Waste ink tank almost full. Read-write mode enabled. Failed to align print head Cannot communicate with digital camera. Try This Image data edited/processed on the computer should be printed from the computer, not from the camera. Press the Resume button to recover from the error. You can print images for a while but you cannot print any more image when the waste ink tank becomes full. Contact a Canon service representative. The memory card utility started on the computer has write-enabled the card slot. When the card slot is write-enabled, the printer cannot print images. When you have finished writing data to the card, select the read-only mode. For the cancellation procedure, see "Setting up the Card Slot as the Memory Card Drive of the Computer" on page 29. Press the Resume button and follow the procedure below. (1) Open the front cover and check if there is ink left. If there is no ink left, replace the ink tanks See "Replacing Ink Tanks" on page 35. (2) Print the nozzle check pattern to verify that the print nozzles are clean. See "Printing the Nozzle Check Pattern" on page 38. (3) Move the printer so that the paper output is not in direct sunlight and try automatic print head aligning again. (4) If the error persists, adjust the print head manually. Disconnect the camera connection cable, press the Resume button, and then connect the cable once more. The digital camera should be turned on automatically. If not, turn it on manually. 42
-
 1
1 -
2
-
3
-
4
-
5
-
6
-
7
-
8
-
9
-
10
-
11
-
12
-
13
-
14
-
15
-
16
-
17
-
18
-
19
-
20
-
21
-
22
-
23
-
24
-
25
-
26
-
27
-
28
-
29
-
30
-
31
-
32
-
33
-
34
-
35
-
36
-
37
-
 38
38 -
 39
39 -
 40
40 -
 41
41 -
 42
42 -
 43
43 -
 44
44 -
 45
45 -
 46
46 -
 47
47 -
 48
48
 |
 |
