Canon imageCLASS MF4450 imageCLASS MF4570dn/MF4450 Basic Operation Guide - Page 8
Contents - laser
 |
View all Canon imageCLASS MF4450 manuals
Add to My Manuals
Save this manual to your list of manuals |
Page 8 highlights
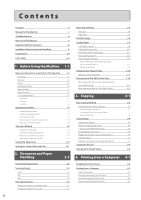
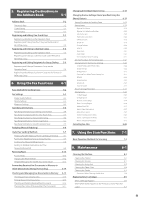
Contents Contents ii Manuals for the Machine v Available Features vi How to Use This Manual vi Important Safety Instructions vii Installation Requirements and Handling xi Legal Notices xiii Laser Safety xvii 1. Before Using the Machine 1-1 Names and Functions on Each Part of the Machine Front Side Back Side Interior Multi-purpose Tray Paper Cassette Operation Panel LCD (Standby Mode) Copy Mode Fax Mode Scan Mode Navigating the Menu Entering the Menu Screen Scrolling Through Menu Items Selecting a Menu Item Specifying values using the navigation keys Returning to the Default Screen Text Input Method Changing the Entry Mode Entering Text, Symbols, and Numbers Moving the Cursor (Entering a Space) Deleting text, symbols, or numbers Setting the Sleep Timer Setting the Current Date and Time 1-2 1-2 1-3 1-3 1-4 1-4 1-5 1-6 1-6 1-6 1-6 1-7 1-7 1-7 1-7 1-8 1-8 1-9 1-9 1-9 1-9 1-9 1-10 1-11 2. Document and Paper Handling 2-1 Paper Requirements Paper Size Paper Type Printable Range Loading Paper In the Paper Cassette In the Multi-Purpose Tray Precautions when Loading Paper Paper Loading Capacity Paper Loading Orientation When printing paper with a letterhead or logo (previously printed paper) Printing on Envelopes Setting a Paper Size and Type Setting a Custom Paper Size Selecting Print Side (MF4570dn Only) When setting this item to (the default setting) When setting this item to 3. Copying Basic Copying Method Checking and Canceling Copy Jobs Canceling using the Stop Key Checking and Canceling using the Status Monitor/Cancel Key Copy Settings Adjusting the Density Selecting Image Quality (Copy) 2-Sided Copying (MF4570dn Only) Enlarging/Reducing Copies Multiple Documents onto One Sheet (N on 1) Collating Copies Emphasize the Outline of an Image (Sharpness) Copying an ID Card Changing the Default Values 2-6 2-6 2-7 2-8 2-9 2-9 2-11 2-12 2-12 2-13 2-13 2-13 2-14 2-14 2-16 2-16 2-16 3-1 3-2 3-3 3-3 3-3 3-4 3-4 3-4 3-5 3-6 3-6 3-7 3-7 3-8 3-9 4. Printing from a Computer 4-1 Document Requirements 2-2 Installing the Printer Driver 4-2 Scanning Range 2-2 Printing from a Computer 4-3 Copy FAX Scan Placing Documents 2-2 Scaling Documents 4-3 2-3 Printing Multiple Pages on One Sheet 4-3 2-3 2-sided Printing (MF4570dn Only) 4-4 2-4 Checking and Canceling Print Jobs 4-5 Placing Documents on the Platen Glass 2-4 Loading Document in the Feeder 2-4 ii
-
 1
1 -
2
-
 3
3 -
 4
4 -
 5
5 -
 6
6 -
 7
7 -
 8
8 -
 9
9 -
 10
10 -
 11
11 -
 12
12 -
 13
13 -
14
-
15
-
16
-
17
-
18
-
19
-
20
-
21
-
22
-
23
-
24
-
25
-
26
-
27
-
28
-
29
-
30
-
31
-
32
-
33
-
34
-
35
-
36
-
37
-
38
-
39
-
40
-
41
-
42
-
43
-
44
-
45
-
46
-
47
-
48
-
49
-
50
-
51
-
52
-
53
-
54
-
55
-
56
-
57
-
58
-
59
-
60
-
61
-
62
-
63
-
64
-
65
-
66
-
67
-
68
-
69
-
70
-
71
-
72
-
73
-
74
-
75
-
76
-
77
-
78
-
79
-
80
-
81
-
82
-
83
-
84
-
85
-
86
-
87
-
88
-
89
-
90
-
91
-
92
-
93
-
94
-
95
-
96
-
97
-
98
-
99
-
100
-
101
-
102
-
103
-
104
-
105
-
106
-
107
-
108
-
109
-
110
-
111
-
112
-
113
-
114
-
115
-
116
-
117
-
118
-
119
-
120
-
121
-
122
-
123
-
124
-
125
-
126
-
127
-
128
-
129
-
130
-
131
-
132
-
133
-
134
-
135
-
136
-
137
-
138
-
139
-
140
-
141
-
142
-
143
-
144
-
145
-
146
-
147
-
148
-
149
-
150
-
151
-
152
-
153
-
154
-
155
-
156
-
157
-
158
-
159
-
160
-
161
-
162
-
163
-
164
 |
 |