Canon imageFORMULA P-150 Portable Scanner User Manual - Page 34
Connecting the Scanner to a Computer, Starting CaptureOnTouch, Scan with Start Button
 |
View all Canon imageFORMULA P-150 Portable Scanner manuals
Add to My Manuals
Save this manual to your list of manuals |
Page 34 highlights
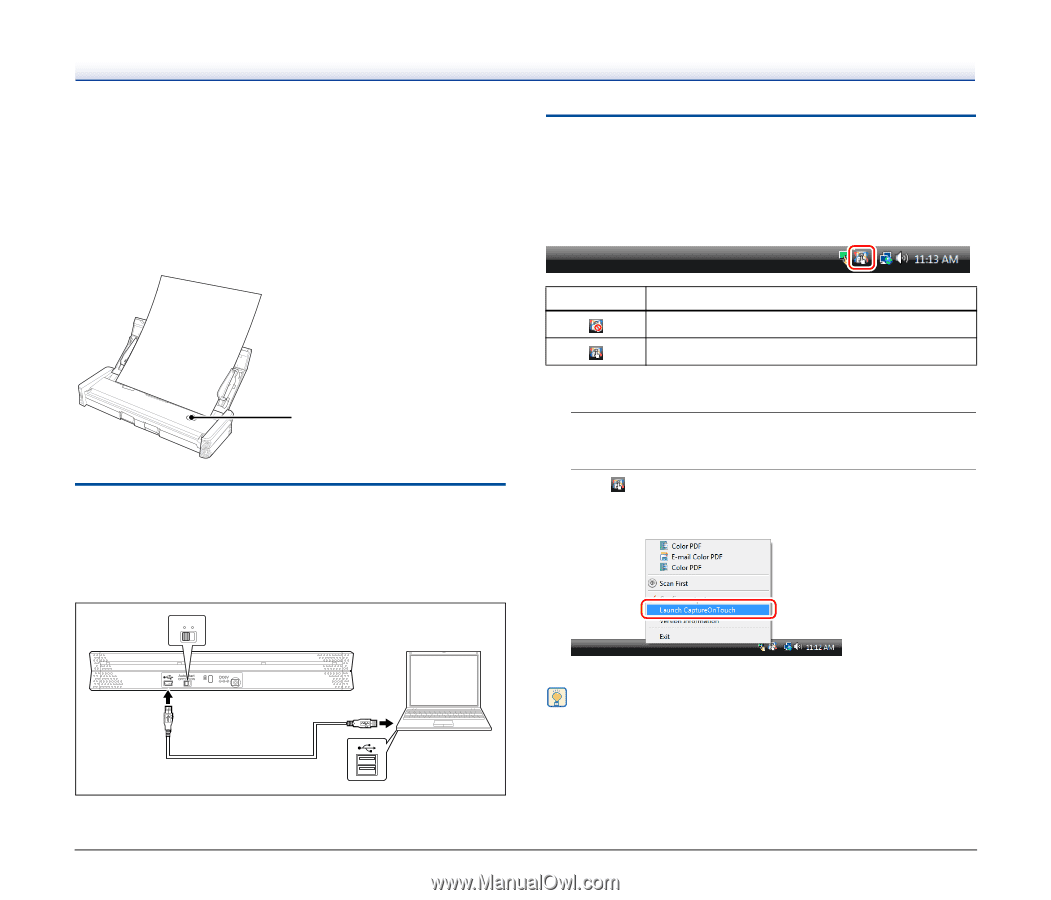
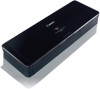
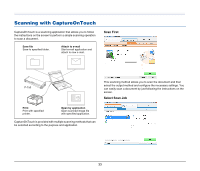
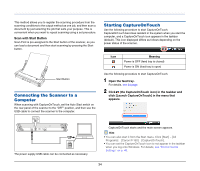
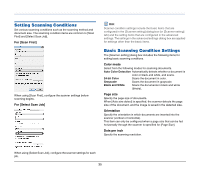
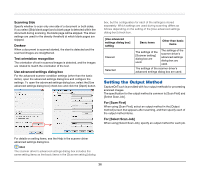
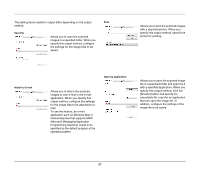
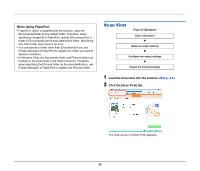
This method allows you to register the scanning procedure from the scanning conditions to the output method as one job, and then scan a document by just selecting the job that suits your purpose. This is convenient when you want to repeat scanning using a set procedure. Scan with Start Button Scan First is pre-assigned to the Start button of the scanner, so you can load a document and then start scanning by pressing the Start button. LTRA4 B5 A5 A5 B5 A4 LTR Start Button Connecting the Scanner to a Computer When scanning with CaptureOnTouch, set the Auto Start switch on the rear panel of the scanner to the "OFF" position, and then use the USB cable to connect the scanner to the computer. Auto Start OFF ON The power supply USB cable can be connected as necessary. Starting CaptureOnTouch Use the following procedure to start CaptureOnTouch. CaptureOnTouch becomes resident in the system when you start the computer, and a CaptureOnTouch icon appears in the taskbar (default). This icon displayed differs as follows depending on the power status of the scanner. Icon Meaning Power is OFF (feed tray is closed) Power is ON (feed tray is open) Use the following procedure to start CaptureOnTouch. 1 Open the feed tray. For details, see 24 page. 2 Click (the CaptureOnTouch icon) in the taskbar and click [Launch CaptureOnTouch] in the menu that appears. CaptureOnTouch starts and the main screen appears. Hint • You can also start it from the Start menu. Click [Start] - [All Programs] - [Canon P-150] - [CaptureOnTouch]. • You can set the CaptureOnTouch icon to not appear in the taskbar when you log onto Windows. For details, see "Environmental Settings" on p. 45. 34
-
 1
1 -
2
-
3
-
4
-
5
-
6
-
7
-
8
-
9
-
10
-
11
-
12
-
13
-
14
-
15
-
16
-
17
-
18
-
19
-
20
-
21
-
22
-
23
-
24
-
25
-
26
-
27
-
28
-
 29
29 -
 30
30 -
 31
31 -
 32
32 -
 33
33 -
 34
34 -
 35
35 -
 36
36 -
 37
37 -
 38
38 -
 39
39 -
40
-
41
-
42
-
43
-
44
-
45
-
46
-
47
-
48
-
49
-
50
-
51
-
52
-
53
-
54
-
55
-
56
-
57
-
58
-
59
-
60
-
61
-
62
-
63
-
64
-
65
-
66
-
67
-
68
-
69
-
70
-
71
-
72
-
73
-
74
 |
 |