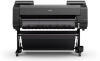
Canon imagePROGRAF GP-4000 imagePROGRAF GP-4000 / GP-2000 Setup Guide - Page 6
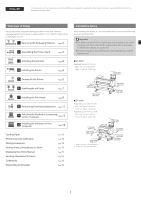
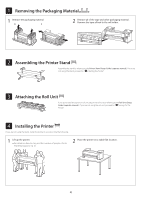
Removing the Packaging Material, 2 Assembling the Printer Stand, 3 Attaching the Roll Unit, 4
 |
View all Canon imagePROGRAF GP-4000 manuals
Add to My Manuals
Save this manual to your list of manuals |
Page 6 highlights
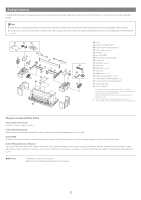
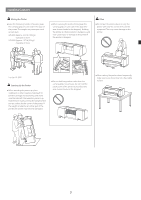
1 Removing the Packaging Material 1 Remove the packaging material. 2 Remove all of the tape and other packaging material. Remove the tape affixed to the roll holder. 2 Assembling the Printer Stand Assemble the stand by referring to the Printer Stand Setup Guide (separate manual). If you are not using the stand, proceed to " 4 Installing the Printer". 3 Attaching the Roll Unit If you purchased the optional roll unit, attach the roll unit by referring to the Roll Unit Setup Guide (separate manual). If you are not using the roll unit, proceed to " 5 Turning On the Printer". 4 Installing the Printer If you are not using the stand, install the printer in a location like the following. 1 Lift up the printer. ●For details on how to carry and the number of people, refer to "Handling Cautions" (p. 3). 2 Place the printer on a stable flat location. 4
-
 1
1 -
 2
2 -
 3
3 -
 4
4 -
 5
5 -
 6
6 -
 7
7 -
 8
8 -
 9
9 -
 10
10 -
 11
11 -
 12
12 -
13
-
14
-
15
-
16
-
17
-
18
-
19
-
20
-
21
-
22
-
23
-
24
-
25
-
26
-
27
-
28
-
29
-
30
-
31
-
32
-
33
-
34
-
35
-
36
-
37
-
38
-
39
-
40
-
41
-
42
-
43
-
44
-
45
-
46
-
47
-
48
-
49
-
50
-
51
-
52
-
53
-
54
-
55
-
56
-
57
-
58
-
59
-
60
-
61
-
62
-
63
-
64
-
65
-
66
 |
 |
