Canon imagePROGRAF W2200S Network User Guide - Page 24
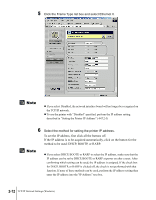
then select IP Address, Subnet Mask, or, Default G/W.
 |
View all Canon imagePROGRAF W2200S manuals
Add to My Manuals
Save this manual to your list of manuals |
Page 24 highlights
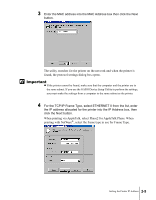
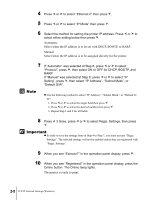
4 Press or to select "Ethernet II" then press . 5 Press or to select "IP Mode" then press . 6 Select the method for setting the printer IP address. Press or to select either setting below then press . Automatic: Select when the IP address is to be set with DHCP, BOOTP, or RARP. Manual: Select when the IP address is to be assigned directly for the printer. 7 If "Automatic" was selected at Step 6, press or to select "Protocol", press , then select ON or OFF for DHCP, BOOTP, and RARP. If "Manual" was selected at Step 6, press or to select "IP Setting", press , then select "IP Address", "Subnet Mask", or "Default G/W". Note z Use the following method to select "IP Address", "Subnet Mask", or "Default G/ W": 1. Press or to select the target field then press . 2. Press or to select the desired number then press . 3. Repeat Step 1 and 2 for all fields. 8 Press 3 times, press or to select Regis. Settings, then press . Important z In order to save the settings done in Step 4 to Step 7, you must execute "Regis. Settings". The selected settings will not be enabled unless they are registered with "Regis. Settings". 9 When you see "Execute?" in the operation panel display, press . 10 When you see "Registered!" in the operation panel display, press the Online button. The Online lamp lights. The printer is ready to print. 2-8 TCP/IP Network Settings (Windows)
-
 1
1 -
2
-
3
-
4
-
5
-
6
-
7
-
8
-
9
-
10
-
11
-
12
-
13
-
14
-
15
-
16
-
17
-
18
-
 19
19 -
 20
20 -
 21
21 -
 22
22 -
 23
23 -
 24
24 -
 25
25 -
 26
26 -
 27
27 -
 28
28 -
 29
29 -
30
-
31
-
32
-
33
-
34
-
35
-
36
-
37
-
38
-
39
-
40
-
41
-
42
-
43
-
44
-
45
-
46
-
47
-
48
-
49
-
50
-
51
-
52
-
53
-
54
-
55
-
56
-
57
-
58
-
59
-
60
-
61
-
62
-
63
-
64
-
65
-
66
-
67
-
68
-
69
-
70
-
71
-
72
-
73
-
74
-
75
-
76
-
77
-
78
-
79
-
80
-
81
-
82
-
83
-
84
-
85
-
86
-
87
-
88
-
89
-
90
-
91
-
92
-
93
-
94
-
95
-
96
-
97
-
98
-
99
-
100
-
101
-
102
-
103
-
104
-
105
-
106
-
107
 |
 |