Canon imagePROGRAF W2200S Network User Guide - Page 25
Setting TCP/IP Protocol for the Printer, Setting TCP/IP Protocol with a Web Browser (Remote UI)
 |
View all Canon imagePROGRAF W2200S manuals
Add to My Manuals
Save this manual to your list of manuals |
Page 25 highlights
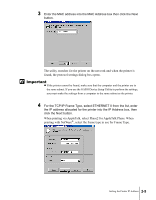
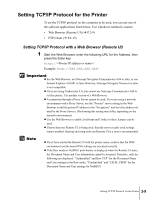
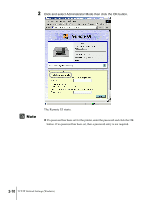
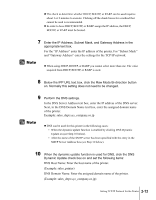
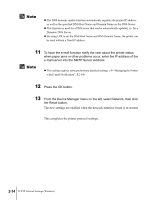
Setting TCP/IP Protocol for the Printer To set the TCP/IP protocol on the computer to be used, you can use one of the software applications listed below. Use whichever method is easiest: • Web Browser (Remote UI) (Æ P.2-9) • FTP Client (Æ P.2-15) Setting TCP/IP Protocol with a Web Browser (Remote UI) 1 Start the Web Browser, enter the following URL for the Address, then press the Enter key. http:/// Example: http://XXX.XXX.XXX.XXX/ Important z For the Web Browser, use Netscape Navigator/Communicator 4.04 or later, or use Internet Explorer 4.01SP1 or later. However, Netscape Navigator Version 6 or later is not compatible. z If you are using TurboLinux 4.0, you cannot use Netscape Communicator 4.08 to set this printer. Use another version of a Web Browser. z A connection through a Proxy Server cannot be used. If you are using a network environment with a Proxy Server, use the "Proxies" server setting in the Web Browser to add the printer IP address to the "Exceptions" text box (the address not used by the Proxy Server). (Performing this setting may differ, depending on the network environment.) z Use the Web Browser to enable JavaScript and Cookie so these features can be used. z If more than one Remote UI is being used, then the most recently used settings remain enabled. Starting and using only one Remote UI at a time is recommended. Note z If you have started the Remote UI with the printer name, confirm that the DNS environment and the board DNS settings are executed correctly. z If the Raw mode or NetBEUI print history is displayed when the Remote UI starts, the Document Name and User information cannot be acquired. Therefore, only the following are displayed: "Unidentified" and Raw TCP" for the Document Name and User settings in the Raw mode, "Unidentified" and "LSLM_USER" for the Document Name and User settings for NetBEUI. Setting TCP/IP Protocol for the Printer 2-9
-
 1
1 -
2
-
3
-
4
-
5
-
6
-
7
-
8
-
9
-
10
-
11
-
12
-
13
-
14
-
15
-
16
-
17
-
18
-
19
-
 20
20 -
 21
21 -
 22
22 -
 23
23 -
 24
24 -
 25
25 -
 26
26 -
 27
27 -
 28
28 -
 29
29 -
 30
30 -
31
-
32
-
33
-
34
-
35
-
36
-
37
-
38
-
39
-
40
-
41
-
42
-
43
-
44
-
45
-
46
-
47
-
48
-
49
-
50
-
51
-
52
-
53
-
54
-
55
-
56
-
57
-
58
-
59
-
60
-
61
-
62
-
63
-
64
-
65
-
66
-
67
-
68
-
69
-
70
-
71
-
72
-
73
-
74
-
75
-
76
-
77
-
78
-
79
-
80
-
81
-
82
-
83
-
84
-
85
-
86
-
87
-
88
-
89
-
90
-
91
-
92
-
93
-
94
-
95
-
96
-
97
-
98
-
99
-
100
-
101
-
102
-
103
-
104
-
105
-
106
-
107
 |
 |