Canon imageRUNNER ADVANCE C5240 imageRUNNER ADVANCE C5200 Srs Setup Guide - Page 55
Storing Data in a Computer, Preparations for Scanning, Installing the Printer Driver
 |
View all Canon imageRUNNER ADVANCE C5240 manuals
Add to My Manuals
Save this manual to your list of manuals |
Page 55 highlights
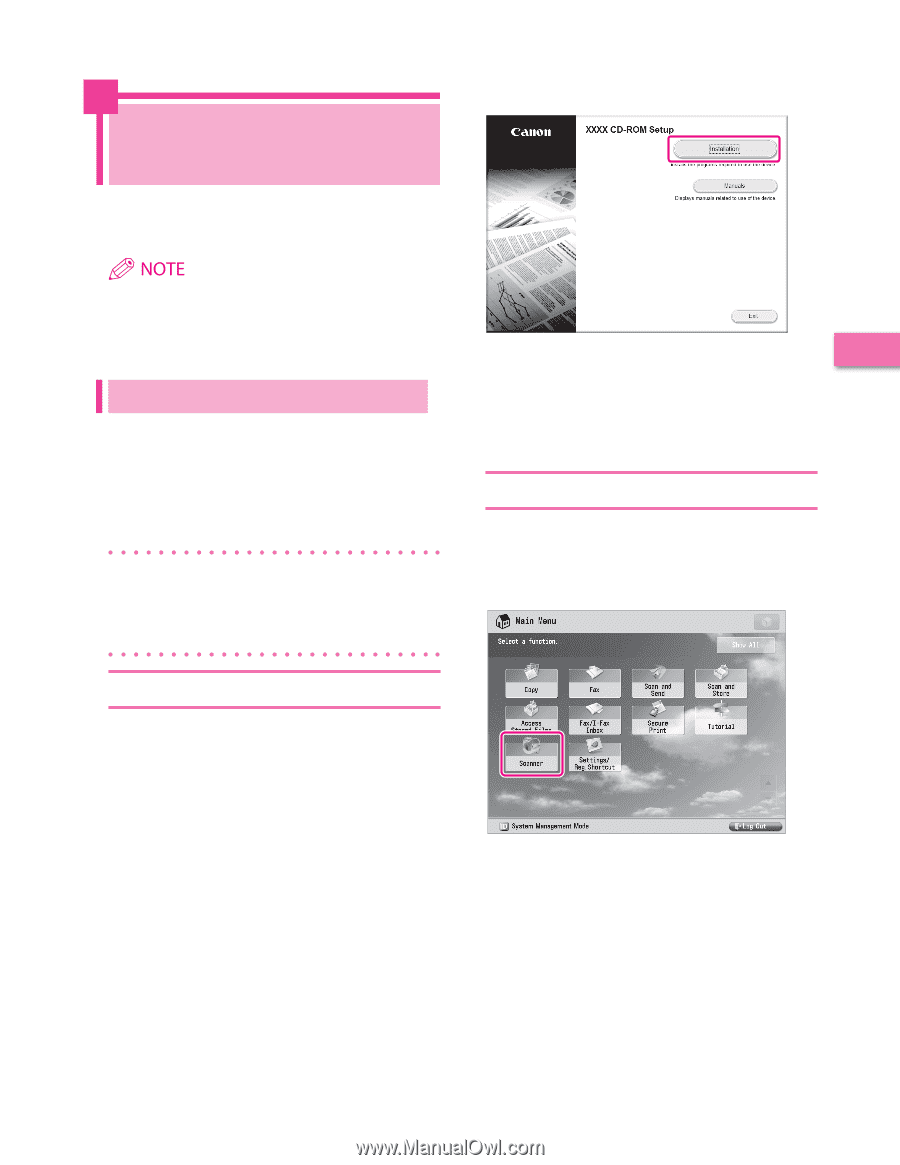
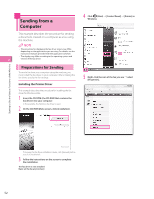
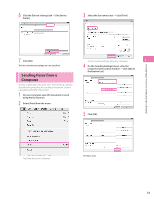
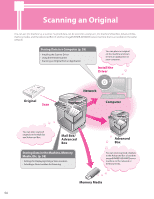
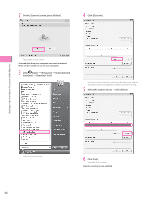
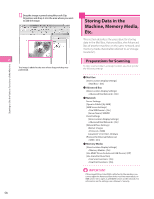
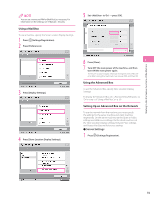
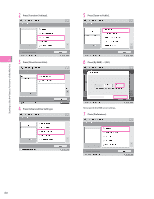
Starting to Use the Various Functions of the Machine Storing Data in a Computer This example describes the procedure for specifying the settings required to scan and scanning an original into a computer. • Remote scanning methods may differ, depending on the applications you are using. For details, see the instruction manuals provided with the application software. • The window displayed may differ according to the operating system etc. Preparations for Scanning To use the Scan function of the machine, it is necessary to install the scanner driver (software for specifying scanner settings). The scanner driver can be installed from the same User Software CD-ROM used for installing the printer driver. After that, specify the settings to use the remote scanner on the machine. In this example, the following settings are specified: [Scanner] screen of the machine: [Online] [ScanGear Tool] on your computer: The name of your scanner Installing the Printer Driver This example describes the procedure for installing the scanner driver for Windows Vista. 1 Insert the CD-ROM in your computer. Color Network ScanGear is used here. 2 On the CD-ROM Menu screen, click [Installation]. To browse the Network ScanGear Installation Guide, click [Manuals] before you click [Installation]. 2 3 Follow the instructions on the screen to complete the installation. The scanner driver is now installed. Next, enable remote scanning. Setting Scanning Online To use the Scan function, it is necessary to enable remote scanning on the machine and enable the network scanner to use on your computer. 1 Press [Scanner]. 55
-
 1
1 -
2
-
3
-
4
-
5
-
6
-
7
-
8
-
9
-
10
-
11
-
12
-
13
-
14
-
15
-
16
-
17
-
18
-
19
-
20
-
21
-
22
-
23
-
24
-
25
-
26
-
27
-
28
-
29
-
30
-
31
-
32
-
33
-
34
-
35
-
36
-
37
-
38
-
39
-
40
-
41
-
42
-
43
-
44
-
45
-
46
-
47
-
48
-
49
-
 50
50 -
 51
51 -
 52
52 -
 53
53 -
 54
54 -
 55
55 -
 56
56 -
 57
57 -
 58
58 -
 59
59 -
 60
60 -
61
-
62
-
63
-
64
-
65
-
66
-
67
-
68
-
69
-
70
-
71
-
72
-
73
-
74
-
75
-
76
-
77
-
78
-
79
-
80
-
81
-
82
-
83
-
84
-
85
-
86
-
87
-
88
 |
 |