Casio EX-S880RD Owners Manual - Page 49
Replacing the Memory Card, Load a memory card into the camera., Close the battery cover.
 |
UPC - 079767622848
View all Casio EX-S880RD manuals
Add to My Manuals
Save this manual to your list of manuals |
Page 49 highlights
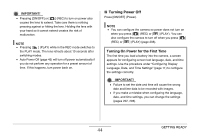
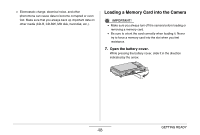
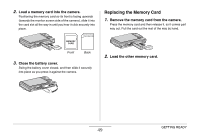
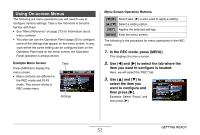
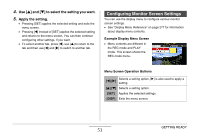
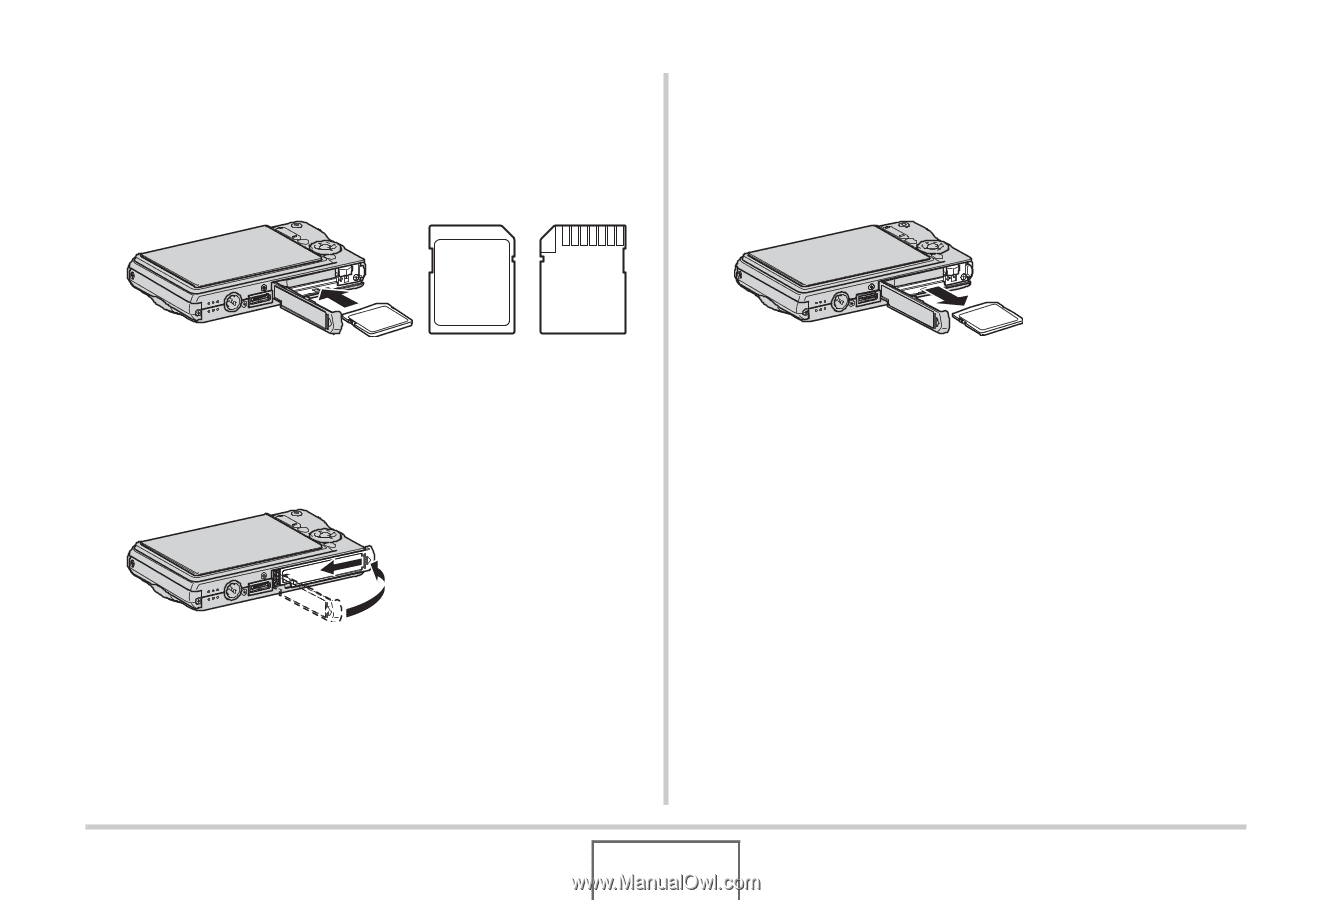
2. Load a memory card into the camera. Positioning the memory card so its front is facing upwards (towards the monitor screen side of the camera), slide it into the card slot all the way in until you hear it click securely into place. Replacing the Memory Card 1. Remove the memory card from the camera. Press the memory card and then release it, so it comes part way out. Pull the card out the rest of the way by hand. MEMCOARRYD MEMORY CARD Front Back 3. Close the battery cover. Swing the battery cover closed, and then slide it securely into place as you press it against the camera. MEMCOARRYD 2. Load the other memory card. GETTING READY 49
-
 1
1 -
2
-
3
-
4
-
5
-
6
-
7
-
8
-
9
-
10
-
11
-
12
-
13
-
14
-
15
-
16
-
17
-
18
-
19
-
20
-
21
-
22
-
23
-
24
-
25
-
26
-
27
-
28
-
29
-
30
-
31
-
32
-
33
-
34
-
35
-
36
-
37
-
38
-
39
-
40
-
41
-
42
-
43
-
 44
44 -
 45
45 -
 46
46 -
 47
47 -
 48
48 -
 49
49 -
 50
50 -
 51
51 -
 52
52 -
 53
53 -
 54
54 -
55
-
56
-
57
-
58
-
59
-
60
-
61
-
62
-
63
-
64
-
65
-
66
-
67
-
68
-
69
-
70
-
71
-
72
-
73
-
74
-
75
-
76
-
77
-
78
-
79
-
80
-
81
-
82
-
83
-
84
-
85
-
86
-
87
-
88
-
89
-
90
-
91
-
92
-
93
-
94
-
95
-
96
-
97
-
98
-
99
-
100
-
101
-
102
-
103
-
104
-
105
-
106
-
107
-
108
-
109
-
110
-
111
-
112
-
113
-
114
-
115
-
116
-
117
-
118
-
119
-
120
-
121
-
122
-
123
-
124
-
125
-
126
-
127
-
128
-
129
-
130
-
131
-
132
-
133
-
134
-
135
-
136
-
137
-
138
-
139
-
140
-
141
-
142
-
143
-
144
-
145
-
146
-
147
-
148
-
149
-
150
-
151
-
152
-
153
-
154
-
155
-
156
-
157
-
158
-
159
-
160
-
161
-
162
-
163
-
164
-
165
-
166
-
167
-
168
-
169
-
170
-
171
-
172
-
173
-
174
-
175
-
176
-
177
-
178
-
179
-
180
-
181
-
182
-
183
-
184
-
185
-
186
-
187
-
188
-
189
-
190
-
191
-
192
-
193
-
194
-
195
-
196
-
197
-
198
-
199
-
200
-
201
-
202
-
203
-
204
-
205
-
206
-
207
-
208
-
209
-
210
-
211
-
212
-
213
-
214
-
215
-
216
-
217
-
218
-
219
-
220
-
221
-
222
-
223
-
224
-
225
-
226
-
227
-
228
-
229
-
230
-
231
-
232
-
233
-
234
-
235
-
236
-
237
-
238
-
239
-
240
-
241
-
242
-
243
-
244
-
245
-
246
-
247
-
248
-
249
-
250
-
251
-
252
-
253
-
254
-
255
-
256
-
257
-
258
-
259
-
260
-
261
-
262
-
263
-
264
-
265
-
266
-
267
-
268
-
269
-
270
-
271
-
272
-
273
-
274
-
275
-
276
-
277
-
278
-
279
-
280
-
281
-
282
-
283
-
284
-
285
-
286
-
287
-
288
-
289
-
290
-
291
-
292
-
293
 |
 |
49
GETTING READY
2.
Load a memory card into the camera.
Positioning the memory card so its front is facing
u
p
w
ards
(to
w
ards the monitor screen side of the camera), slide it into
the card slot all the
w
ay in
u
ntil yo
u
hear it click sec
u
rely into
place.
3.
Close the battery cover.
S
w
ing the
b
attery co
v
er closed, and then slide it sec
u
rely
into place as yo
u
press it against the camera.
Replacing the Memory Card
1.
Remove the memory card from the camera.
Press the memory card and then release it, so it comes part
w
ay o
u
t. P
u
ll the card o
u
t the rest of the
w
ay
b
y hand.
2.
Load the other memory card.
MEMORY
CARD
MEMORY
CARD
Front
Back
MEMORY
CARD