Casio LK100 User Guide - Page 20
Samba - lighted keyboard manual
 |
UPC - 718122208418
View all Casio LK100 manuals
Add to My Manuals
Save this manual to your list of manuals |
Page 20 highlights
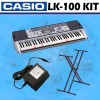
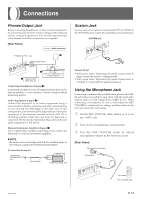
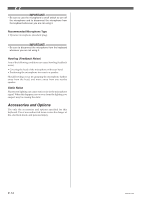
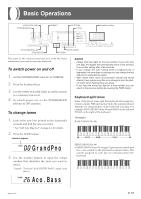
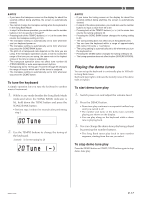
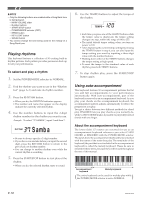
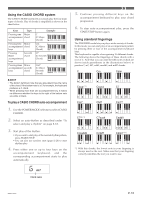
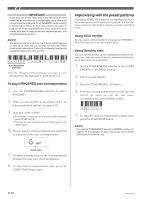
❚ NOTE • Only the following buttons are enabled while a Song Bank tune is being played. • MAIN VOLUME slider • Number buttons • START/STOP button • POWER/MODE selector (OFF) • DEMO button • KEY LIGHT button • SPEAK button • You cannot change the tone being used for the melody of a Song Bank tune. Playing rhythms This keyboard features a collection of 50 exciting built-in rhythm patterns. Each pattern provides percussion back up for all your performances. To select and play a rhythm 1. Set the POWER/MODE selector to NORMAL. 2. Find the rhythm you want to use in the "Rhythm List" (page A-2) and note its rhythm number. 3. Press the RHYTHM button. • When you do, the RHYTHM indicator appears. • The number and name that appear on the display indicate the currently selected rhythm. 4. Use the number buttons to input the 2-digit rhythm number for the rhythm you want to use. Example: To select "37 SAMBA", input 3 and then 7. Samb a • Be sure to always specify a 2-digit number. • If you discover a mistake before you input the second digit, press the RHYTHM button to return to the previously set rhythm number. • You can change to another rhythm even while the current rhythm is sounding. 5. Press the START/STOP button to start play of the rhythm. • When you do, the selected rhythm starts to sound. 6. Use the TEMPO buttons to adjust the tempo of the rhythm. • Each time you press one of the TEMPO buttons while the tempo value is displayed, the tempo setting changes one step, within the range of 040 to 255. • The initial default tempo setting when you turn on power is 120. • After displaying the current tempo setting by pressing the TEMPO button in step 6, you can also input the tempo setting you want by inputting a three-digit value with the number buttons. • Holding down either of the TEMPO buttons changes the tempo setting at high speed. • To reset the tempo to the standard value of each rhythm, press both TEMPO buttons. 7. To stop rhythm play, press the START/STOP button again. Using auto-accompaniment This keyboard features 50 accompaniment patterns that let you add full accompaniments to your performances automatically. With auto-accompaniment, part of the keyboard is reserved as an accompaniment keyboard. As you play your chords on the accompaniment keyboard, the accompaniment pattern adjusts automatically to follow the progression you play. You get a choice between two different methods for chord play. FINGERED lets you play chords as you normally do, while CASIO CHORD makes it possible to play fully formed chords with one finger. About the accompaniment keyboard The lower (left) 1.5 octaves are reserved for use as an accompaniment keyboard whenever you select CASIO CHORD or FINGERED with the POWER/MODE selector. The panel above the accompaniment keyboard keys is marked with the names of the notes they play. The remainder of the keyboard (the part that is not included in the accompaniment keyboard) is called the melody keyboard. Please be sure to remember these terms, because they will be used throughout the rest of this manual. Accompaniment keyboard Melody keyboard ( ) The entire keyboard can be used for melody play while the POWER/MODE selector is set to NORMAL. E-18 662A-E-020A
-
 1
1 -
2
-
3
-
4
-
5
-
6
-
7
-
8
-
9
-
10
-
11
-
12
-
13
-
14
-
 15
15 -
 16
16 -
 17
17 -
 18
18 -
 19
19 -
 20
20 -
 21
21 -
 22
22 -
 23
23 -
 24
24 -
 25
25 -
26
-
27
-
28
-
29
-
30
-
31
-
32
-
33
-
34
-
35
-
36
-
37
-
38
-
39
-
40
 |
 |