Cisco UC560-FXO-K9 Quick Start Guide - Page 11
Follow the same steps to attach the other bracket to the opposite
 |
View all Cisco UC560-FXO-K9 manuals
Add to My Manuals
Save this manual to your list of manuals |
Page 11 highlights
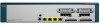
To mount the UC 560 in a rack, follow these steps: STEP 1 Attach a rack-mount bracket to one side of the chassis with the supplied screws and secure the bracket tightly. Do not overtorque the screws. The recommended torque is 6 to 8 in-lb (0.7 to 0.9 N-m). STEP 2 Follow the same steps to attach the other bracket to the opposite side. STEP 3 After the brackets are attached to the unit, use suitable screws to securely attach the brackets to any standard 19-inch rack. Left bracket for 19-inch rack Right bracket for 19-inch rack 195677 Cisco Unified Communications 500 Series Model UC 560 Quick Start Guide 9
-
 1
1 -
2
-
3
-
4
-
5
-
 6
6 -
 7
7 -
 8
8 -
 9
9 -
 10
10 -
 11
11 -
 12
12 -
 13
13 -
 14
14 -
 15
15 -
 16
16 -
17
-
18
-
19
-
20
-
21
-
22
-
23
-
24
-
25
 |
 |

Cisco Unified Communications 500 Series Model UC 560 Quick Start Guide
9
To mount the UC 560 in a rack, follow these steps:
S
TEP
1
Attach a rack–mount bracket to one side of the chassis with the
supplied screws and secure the bracket tightly.
Do not overtorque the screws. The recommended torque is 6 to 8
in-lb (0.7 to 0.9 N-m).
S
TEP
2
Follow the same steps to attach the other bracket to the opposite
side.
S
TEP
3
After the brackets are attached to the unit, use suitable screws to
securely attach the brackets to any standard 19-inch rack.
195677
Left bracket
for 19-inch rack
Right bracket
for 19-inch rack