Cisco VC220 User Manual - Page 8
Mounting Your Cisco VC 220 Camera, following: 00:21:29:72:7D:2C.
 |
View all Cisco VC220 manuals
Add to My Manuals
Save this manual to your list of manuals |
Page 8 highlights
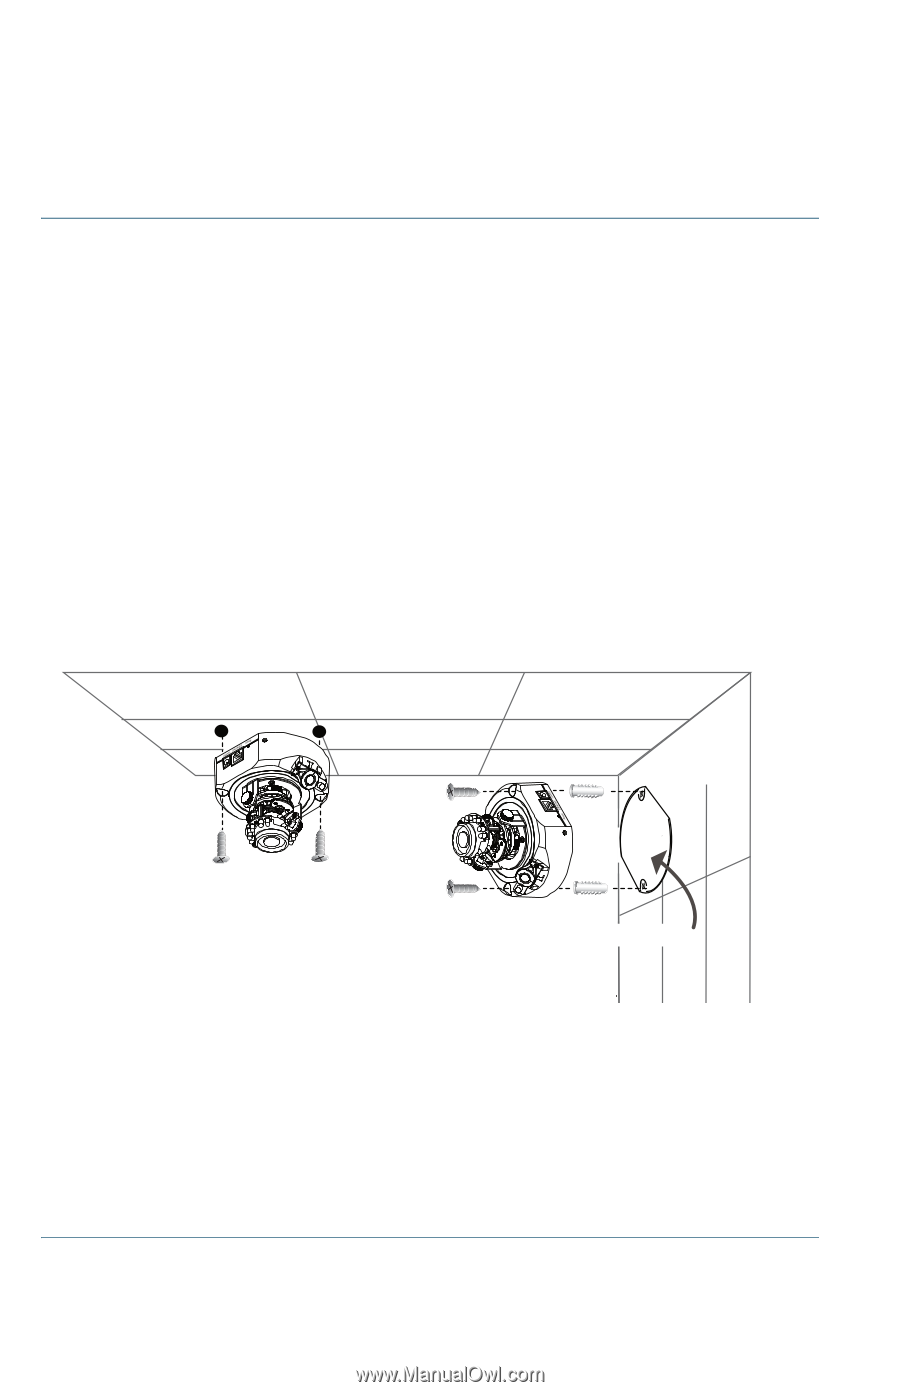
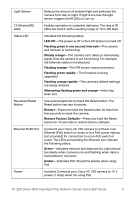
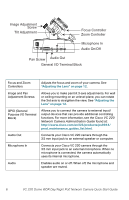
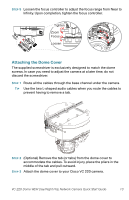
Mounting Your Cisco VC 220 Camera If you have more than one camera, make a note of the MAC address found on the side of your camera. You may want to refer to the MAC address later to identify multiple cameras. Your MAC address will be something like the following: 00:21:29:72:7D:2C. STEP 1 Use the screwdriver to detach the dome cover from the camera base. STEP 2 For a ceiling mount, insert the supplied two screws in the corresponding holes on each side of the camera base and secure them with a screwdriver. Consider using Steps 4 and 5 to make the mount more secure. For a wall mount, attach the alignment template to the wall. STEP 3 Drill two pilot holes into the ceiling/wall through the two circles on the template. STEP 4 Hammer the supplied plastic anchors into the holes. STEP 5 Align the two holes on each side of the camera base with the two plastic anchors on the wall, insert the supplied screws to corresponding holes, and secure them with a screwdriver. Alignment template Your Cisco VC 220 camera is now ready for network setup. NOTE The wall mount screws come with anchors that can be used for drywall or concrete. The screw size is a metric M4 with a length of 31.75 mm. The anchor is the same length and internal diameter to accept the screw. For non-metric countries, the equivalent screw size is #8 x 1 ¼ inch. The anchor size is #8-#10 with a length of 1 ¼ inch. 8 VC 220 Dome WDR Day/Night PoE Network Camera Quick Start Guide
-
 1
1 -
2
-
 3
3 -
 4
4 -
 5
5 -
 6
6 -
 7
7 -
 8
8 -
 9
9 -
 10
10 -
 11
11 -
 12
12 -
 13
13 -
14
-
15
-
16
 |
 |