Cisco WS-CE500-24TT Administration Guide - Page 132
Configuring the IPS Policy, Reset, Manual Signature Updates, Upload, IPS > IPS Policy
 |
UPC - 882658054068
View all Cisco WS-CE500-24TT manuals
Add to My Manuals
Save this manual to your list of manuals |
Page 132 highlights
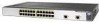
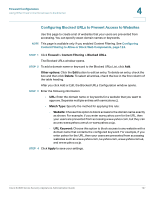
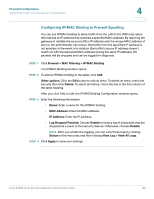
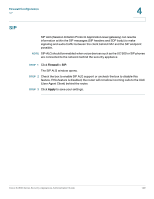
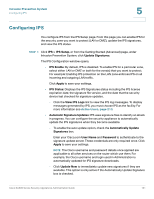
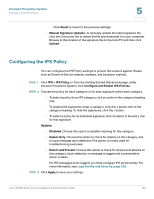
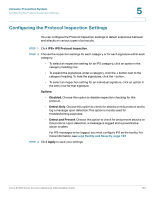
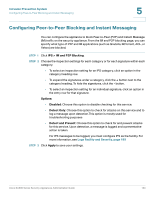
Intrusion Prevention System Configuring the IPS Policy 5 - Click Reset to revert to the previous settings. • Manual Signature Updates: To manually update the latest signature file, click the Cisco.com link to obtain the file and download it to your computer. Browse to the location of the signature file on the local PC and then click Upload. Configuring the IPS Policy You can configure the IPS Policy settings to protect the network against threats such as Denial-of-Service attacks, malware, and backdoor exploits. STEP 1 Click IPS > IPS Policy, or from the Getting Started (Advanced) page, under Intrusion Prevention System, click Configure and Enable IPS Policies. STEP 2 Choose the policy for each category or for each signature within each category. • To select a policy for an IPS category, click an option in the category heading row. • To expand the signatures under a category, click the + button next to the category heading. To hide the signatures, click the - button. • To select a policy for an individual signature, click an option in the entry row for that signature. Options: • Disabled: Choose this option to disable checking for this category. • Detect Only: Choose this option to check for attacks on this category and to log a message upon detection.This option is mostly used for troubleshooting purposes. • Detect and Prevent: Choose this option to check for and prevent attacks on this category. Upon detection, a message is logged and a preventative action is taken. For IPS messages to be logged, you must configure IPS as the facility. For more information, see Logs Facility and Severity, page 189. STEP 3 Click Apply to save your settings. Cisco SA500 Series Security Appliances Administration Guide 132
-
 1
1 -
2
-
3
-
4
-
5
-
6
-
7
-
8
-
9
-
10
-
11
-
12
-
13
-
14
-
15
-
16
-
17
-
18
-
19
-
20
-
21
-
22
-
23
-
24
-
25
-
26
-
27
-
28
-
29
-
30
-
31
-
32
-
33
-
34
-
35
-
36
-
37
-
38
-
39
-
40
-
41
-
42
-
43
-
44
-
45
-
46
-
47
-
48
-
49
-
50
-
51
-
52
-
53
-
54
-
55
-
56
-
57
-
58
-
59
-
60
-
61
-
62
-
63
-
64
-
65
-
66
-
67
-
68
-
69
-
70
-
71
-
72
-
73
-
74
-
75
-
76
-
77
-
78
-
79
-
80
-
81
-
82
-
83
-
84
-
85
-
86
-
87
-
88
-
89
-
90
-
91
-
92
-
93
-
94
-
95
-
96
-
97
-
98
-
99
-
100
-
101
-
102
-
103
-
104
-
105
-
106
-
107
-
108
-
109
-
110
-
111
-
112
-
113
-
114
-
115
-
116
-
117
-
118
-
119
-
120
-
121
-
122
-
123
-
124
-
125
-
126
-
 127
127 -
 128
128 -
 129
129 -
 130
130 -
 131
131 -
 132
132 -
 133
133 -
 134
134 -
 135
135 -
 136
136 -
 137
137 -
138
-
139
-
140
-
141
-
142
-
143
-
144
-
145
-
146
-
147
-
148
-
149
-
150
-
151
-
152
-
153
-
154
-
155
-
156
-
157
-
158
-
159
-
160
-
161
-
162
-
163
-
164
-
165
-
166
-
167
-
168
-
169
-
170
-
171
-
172
-
173
-
174
-
175
-
176
-
177
-
178
-
179
-
180
-
181
-
182
-
183
-
184
-
185
-
186
-
187
-
188
-
189
-
190
-
191
-
192
-
193
-
194
-
195
-
196
-
197
-
198
-
199
-
200
-
201
-
202
-
203
-
204
-
205
-
206
-
207
-
208
-
209
-
210
-
211
-
212
-
213
-
214
-
215
-
216
-
217
-
218
-
219
-
220
-
221
-
222
-
223
-
224
-
225
-
226
-
227
-
228
-
229
-
230
-
231
-
232
-
233
-
234
-
235
-
236
-
237
-
238
-
239
-
240
 |
 |
