Cisco WS-CE500-24TT Administration Guide - Page 141
Configuring the User Database for the IPsec Remote Access VPN
 |
UPC - 882658054068
View all Cisco WS-CE500-24TT manuals
Add to My Manuals
Save this manual to your list of manuals |
Page 141 highlights
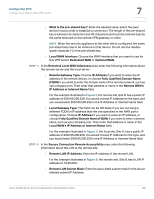
Configuring VPN Configuring an IPsec VPN Tunnel for Remote Access with a VPN Client 7 • What is the pre-shared Key?: Enter the desired value, which the peer device must provide to establish a connection. The length of the pre-shared key is between 8 characters and 49 characters and must be entered exactly the same here and on the remote client. NOTE Do not use the double-quote character (") in the pre-shared key. • Local WAN Interface: If you have configured two WANs, choose the interface that you want to use for this VPN tunnel. If you have only one WAN configured, choose Dedicated WAN. STEP 4 In the Remote & Local WAN Addresses area, enter the following information about the remote server and the local server: • Remote Gateway Type: Choose Fully Qualified Domain Name (FQDN), and then enter a name Remote WAN's IP Address or Internet Name field to identify the VPN client to the gateway. • Local Gateway Type: This field can be left blank if you are not using a different FQDN or IP address than the one specified in the WAN port's configuration. Choose IP Address if you want to enter an IP address, or choose Fully Qualified Domain Name (FQDN) if you want to enter a domain name, such as vpn.company.com. Then enter that address or name in the Local WAN's IP Address or Internet Name field. STEP 5 Click Apply to save your settings. NOTE Next steps: • If you are using the Getting Started (Advanced) page, click Getting Started > Advanced to return to the list of configuration tasks for IPsec Remote Access VPN. • Required: Configure the VPN users. - To add users to the user database, continue with the procedure Configuring the User Database for the IPsec Remote Access VPN, page 142. - To allow Extended Authentication (XAUTH) from user records stored on an external authentication server such as a RADIUS server, see Configuring the IKE Policies for IPsec VPN, page 144. • To review or update the configured VPN policy click IPsec > VPN Policies. For more information, see Configuring the IPsec VPN Policies, page 148. Cisco SA500 Series Security Appliances Administration Guide 141
-
 1
1 -
2
-
3
-
4
-
5
-
6
-
7
-
8
-
9
-
10
-
11
-
12
-
13
-
14
-
15
-
16
-
17
-
18
-
19
-
20
-
21
-
22
-
23
-
24
-
25
-
26
-
27
-
28
-
29
-
30
-
31
-
32
-
33
-
34
-
35
-
36
-
37
-
38
-
39
-
40
-
41
-
42
-
43
-
44
-
45
-
46
-
47
-
48
-
49
-
50
-
51
-
52
-
53
-
54
-
55
-
56
-
57
-
58
-
59
-
60
-
61
-
62
-
63
-
64
-
65
-
66
-
67
-
68
-
69
-
70
-
71
-
72
-
73
-
74
-
75
-
76
-
77
-
78
-
79
-
80
-
81
-
82
-
83
-
84
-
85
-
86
-
87
-
88
-
89
-
90
-
91
-
92
-
93
-
94
-
95
-
96
-
97
-
98
-
99
-
100
-
101
-
102
-
103
-
104
-
105
-
106
-
107
-
108
-
109
-
110
-
111
-
112
-
113
-
114
-
115
-
116
-
117
-
118
-
119
-
120
-
121
-
122
-
123
-
124
-
125
-
126
-
127
-
128
-
129
-
130
-
131
-
132
-
133
-
134
-
135
-
 136
136 -
 137
137 -
 138
138 -
 139
139 -
 140
140 -
 141
141 -
 142
142 -
 143
143 -
 144
144 -
 145
145 -
 146
146 -
147
-
148
-
149
-
150
-
151
-
152
-
153
-
154
-
155
-
156
-
157
-
158
-
159
-
160
-
161
-
162
-
163
-
164
-
165
-
166
-
167
-
168
-
169
-
170
-
171
-
172
-
173
-
174
-
175
-
176
-
177
-
178
-
179
-
180
-
181
-
182
-
183
-
184
-
185
-
186
-
187
-
188
-
189
-
190
-
191
-
192
-
193
-
194
-
195
-
196
-
197
-
198
-
199
-
200
-
201
-
202
-
203
-
204
-
205
-
206
-
207
-
208
-
209
-
210
-
211
-
212
-
213
-
214
-
215
-
216
-
217
-
218
-
219
-
220
-
221
-
222
-
223
-
224
-
225
-
226
-
227
-
228
-
229
-
230
-
231
-
232
-
233
-
234
-
235
-
236
-
237
-
238
-
239
-
240
 |
 |
