Craftsman 16636 Owners Manual - Page 7
Operating, Procedures - sears
 |
View all Craftsman 16636 manuals
Add to My Manuals
Save this manual to your list of manuals |
Page 7 highlights
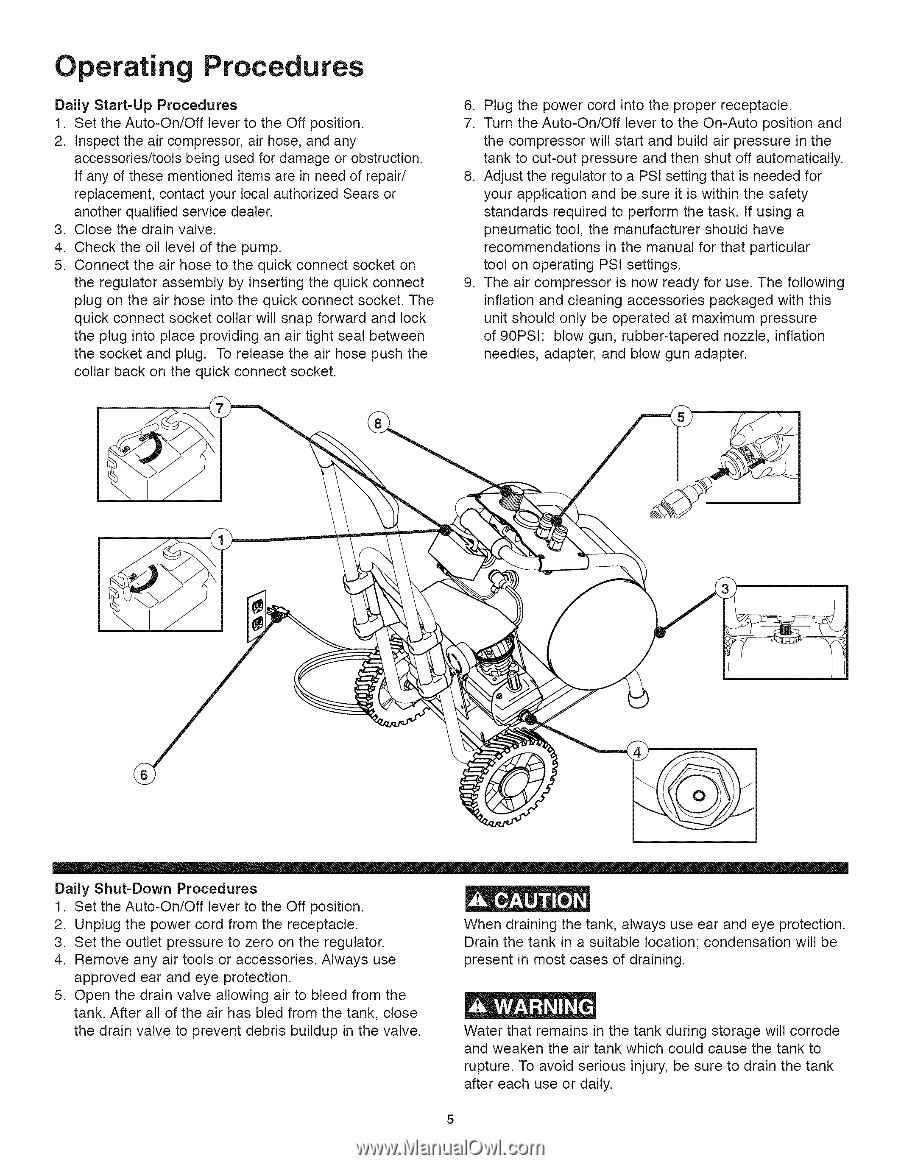
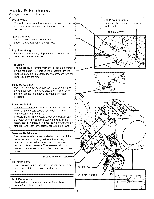
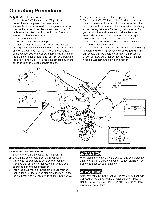
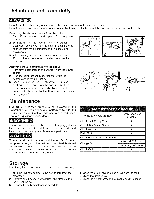
Operating Procedures Daily Start=Up Procedures 1. Set the Auto-On/Off lever to the Off position. 2. Inspect the air compressor, air hose, and any accessories/tools being used for damage or obstruction. If any of these mentioned items are in need of repair/ replacement, contact your local authorized Sears or another qualified service dealer. 3. Close the drain valve. 4. Check the oil level of the pump. 5. Connect the air hose to the quick connect socket on the regulator assembly by inserting the quick connect plug on the air hose into the quick connect socket. The quick connect socket collar will snap forward and lock the plug into place providing an air tight seal between the socket and plug. To release the air hose push the collar back on the quick connect socket. 6. Plug the power cord into the proper receptacle. 7. Turn the Auto-On/Off lever to the On-Auto position and the compressor will start and build air pressure in the tank to cut-out pressure and then shut off automatically. 8. Adjust the regulator to a PSI setting that is needed for your application and be sure it is within the safety standards required to perform the task. If using a pneumatic tool, the manufacturer should have recommendations in the manual for that particular tool on operating PSI settings. 9. The air compressor is now ready for use. The following inflation and cleaning accessories packaged with this unit should only be operated at maximum pressure of 90PSI: blow gun, rubber-tapered nozzle, inflation needles, adapter, and blow gun adapter. Daily Shut=Down Procedures 1. Set the Auto-On/Off lever to the Off position. 2. Unplug the power cord from the receptacle. 3. Set the outlet pressure to zero on the regulator. 4. Remove any air tools or accessories. Always use approved ear and eye protection. 5. Open the drain valve allowing air to bleed from the tank. After all of the air has bled from the tank, close the drain valve to prevent debris buildup in the valve. When draining the tank, always use ear and eye protection. Drain the tank in a suitable location; condensation will be present in most cases of draining. Water that remains in the tank during storage will corrode and weaken the air tank which could cause the tank to rupture. To avoid serious injury, be sure to drain the tank after each use or daily.
-
 1
1 -
 2
2 -
 3
3 -
 4
4 -
 5
5 -
 6
6 -
 7
7 -
 8
8 -
 9
9 -
 10
10 -
 11
11 -
 12
12 -
13
-
14
-
15
-
16
-
17
-
18
-
19
-
20
-
21
-
22
-
23
-
24
-
25
-
26
-
27
-
28
 |
 |