Craftsman 16636 Owners Manual - Page 8
Detaching, dolly
 |
View all Craftsman 16636 manuals
Add to My Manuals
Save this manual to your list of manuals |
Page 8 highlights
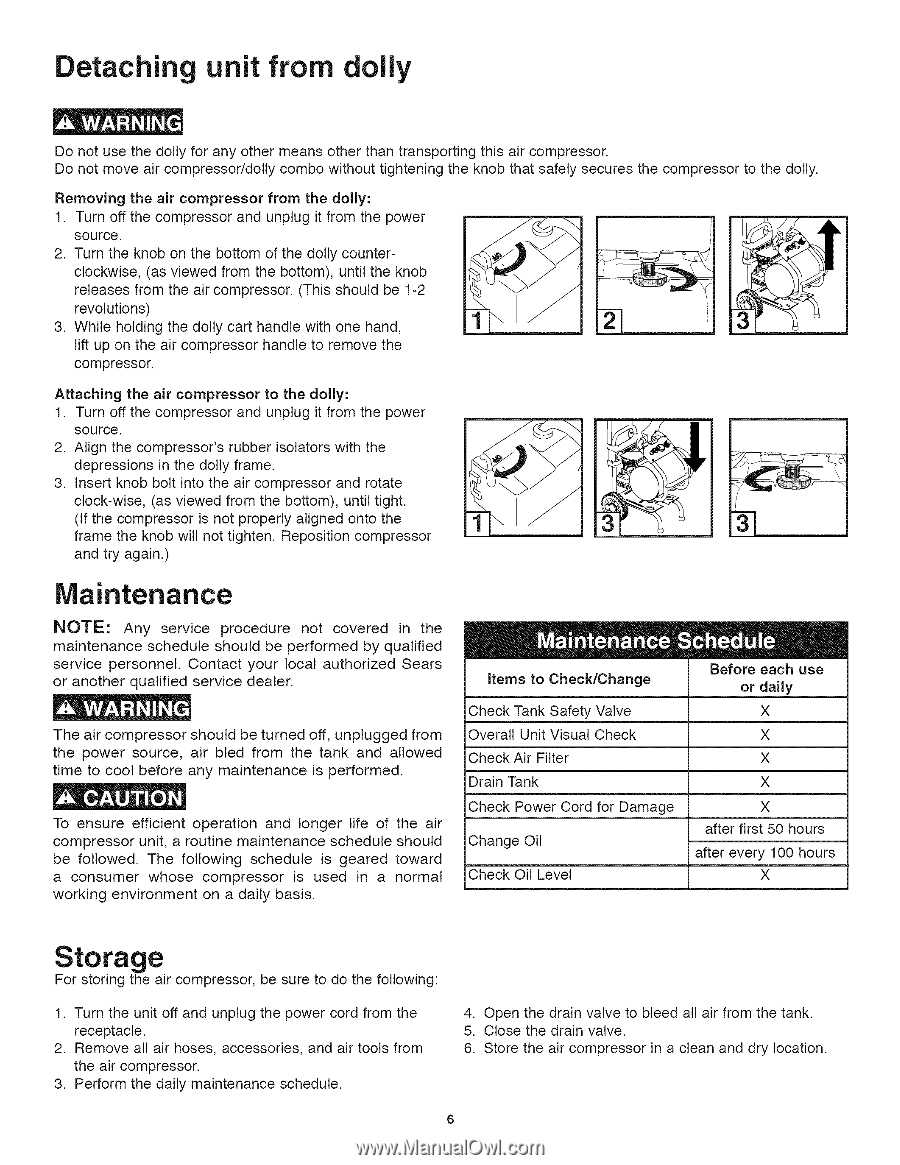
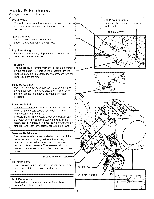
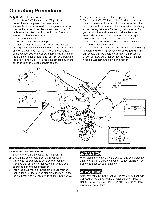
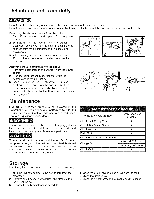
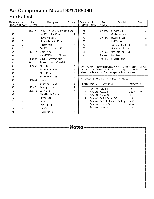
Detaching unit from dolly Do not use the dolly for any other means other than transporting this air compressor. Do not move air compressor/dolly combo without tightening the knob that safely secures the compressor to the dolly. Removing the air compressor from the dolly: 1. Turn off the compressor and unplug it from the power source. 2. Turn the knob on the bottom of the dolly counter- clockwise, (as viewed from the bottom), until the knob releases from the air compressor. (This should be 1-2 revolutions) 3. While holding the dolly cart handle with one hand, lift up on the air compressor handle to remove the compressor. Attaching the air compressor to the dolly: 1. Turn off the compressor and unplug it from the power source. 2. Align the compressor's rubber isolators with the depressions in the dolly frame. 3. Insert knob bolt into the air compressor and rotate clock-wise, (as viewed from the bottom), until tight. (If the compressor is not properly aligned onto the frame the knob will not tighten. Reposition compressor and try again.) Maintenance NOTE: Any service procedure not covered in the maintenance schedule should be performed by qualified service personnel. Contact your local authorized Sears or another qualified service dealer. The air compressor should be turned off, unplugged from the power source, air bled from the tank and allowed time to cool before any maintenance is performed. To ensure efficient operation and longer life of the air compressor unit, a routine maintenance schedule should be followed. The following schedule is geared toward a consumer whose compressor is used in a normal working environment on a daily basis. Items to Check/Change Check Tank Safety Valve Overall Unit Visual Check Check Air Filter Drain Tank Check Power Cord for Damage Change Oil Check Oil Level Before each use or daily X X X X X after first 50 hours after every 100 hours X Storage For storing the air compressor, be sure to do the following: 1. Turn the unit off and unplug the power cord from the receptacle. 2. Remove all air hoses, accessories, and air tools from the air compressor. 3. Perform the daily maintenance schedule. 4. Open the drain valve to bleed all air from the tank. 5. Close the drain valve. 6. Store the air compressor in a clean and dry location.
-
 1
1 -
2
-
 3
3 -
 4
4 -
 5
5 -
 6
6 -
 7
7 -
 8
8 -
 9
9 -
 10
10 -
 11
11 -
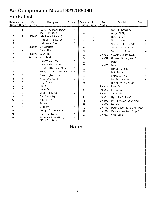 12
12 -
 13
13 -
14
-
15
-
16
-
17
-
18
-
19
-
20
-
21
-
22
-
23
-
24
-
25
-
26
-
27
-
28
 |
 |