Craftsman 21513 Operation Manual - Page 7
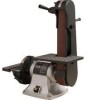
Abrasive, Belt Finishing, Sharpening, Horizontal, Belt Sanding
 |
View all Craftsman 21513 manuals
Add to My Manuals
Save this manual to your list of manuals |
Page 7 highlights
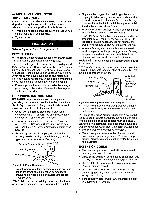
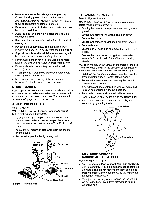
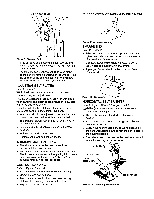
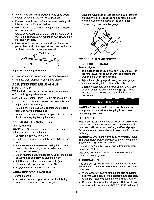
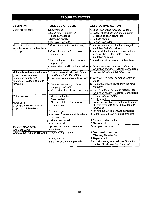
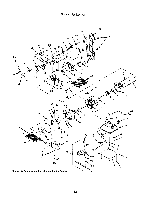
sting Bolt Locking Move the workpiece against belt. Belt will follow contour. Figure 9 - Tracking Belt • If the abrasive belt moves to the left, turn the bolt counterclockwise. If belt moves to the right, turn the bolt clockwise. • Lock the position when the belt is tracking properly so the belt will remain centered on the wheels. Hold the position of the bolt with the 4ram hex wrench. Tighten locking nut to secure bolt position. ADJUSTING BELT PLATEN Refer to Figure 7. WARNING: Disconnect sander from power source before making any adjustments, The platen is used to properly support the workpiece when sanding. The platen is constructed of heavy steel to provide adequate support. Operating with the belt platen in place will allow the operator to sand or grind straight, even lines. • The platen should be adjusted so the belt does not contact the platen until work is fed into the belt. • To adjust belt platen, loosen and remove knobs to remove belt cover. • Loosen socket head bolts and adjust belt platen position. • Tighten bolts and secure platen. • Replace belt cover and tighten knobs. ABRASIVE BELT FINISHING • The abrasive belts can be used to sand wood, deburr metal, or polish plastic. • The belt are most efficient when used with the table. The 2" belt size is convenient for getting into corners and concave curved edges. The 1" belt size is convenient for getting into tight spots. CONTOUR SANDING Refer to Figures 7 and 10. • Belt platen can be removed for contour sending, • Remove knobs and belt cover. • Remove socket head bolt and washers holding platen to belt housing. Remove belt platen. • Replace belt cover and knobs. Figure 10 - Contour Sanding SHARPENING Refer to Figure 11, • Adjust belt table to desired sharpening angle and tighten securely. Use belt sander to notch the back of an auxiliary piece of wood. • Using a C-clamp, attach auxiliary piece of wood to table. It acts as a support while sharpening. • Top edge of wood should be less than '/,e" from abrasive belt. Figure 11 - Sharpening HORIZONTAL BELT SANDING Refer to Figures 12 and 13, pages 7 and 8. WARNING: Disconnect sander from power source before making any adjustments. • The belt housing can be tilted to a horizontal position. • Remove the belt table by removing the socket head bolt and flat washer. • Loosen the housing lock bolt, tilt the belt housing to the horizontal position, and tighten the bolt to secure the housing position. • The drive wheel of the belt can be used as a contact wheel for sanding curved surfaces. Belt Housir Flat Washer Socket Head Bolt "_ Figure 12 - Adjusting Belt Housing Lock Bolt 7
-
 1
1 -
 2
2 -
 3
3 -
 4
4 -
 5
5 -
 6
6 -
 7
7 -
 8
8 -
 9
9 -
 10
10 -
 11
11 -
 12
12 -
13
-
14
-
15
-
16
-
17
-
18
-
19
-
20
-
21
-
22
-
23
-
24
 |
 |
