Craftsman 21805 Operation Manual - Page 23
Bevel Indicator
 |
View all Craftsman 21805 manuals
Add to My Manuals
Save this manual to your list of manuals |
Page 23 highlights
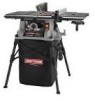
TO CHANGE BLADE DEPTH See Figure 22. The blade depth ehould be set SOthat the outer points of the blade are higher than the workpiece by approximately 1/8 in. to 1/4 in. but the lowest points (gullets) are below the top surface. • Push the bevel locking lever to the left for elevation mode. • Raise the blade by turning the height/bevel adjusting handwheel counterclockwise or lower it by turning the handle clockwise, GULLET E ANGLE TO CHANGE BLADE ANGLE Fig. 22 See Figure23. NOTE: A 90 ° cut has a 0° bevel and a 45 ° cut has a 45 ° bevel. • Unplug the saw, Loosen bevel control by pushing the bevel leek lever all the way to the right. Adjustthe bevel angle by pushing the wheel intowardthe saw then turning it. Turningthe wheel counterclockwise {ncreasesthe angle of the blade, bringing it closer to45 °. Turning it clockwise decreases the angle, br{nging the blade closer to 90% lighten bevel control by pushing the bevel lock lever to the left. Fig, 23 TO ADJUST THE BEVEL INDICATOR See Figure 24. If the bevel indicator is not at zero when the saw blade is at 90 °, adjust the indicator by loosening the screw and setting it at 0_ on the bevel scale. Retighten the screw. ANGLED BLADE CLAMP BEVEL INDICATOR HEIGHT/BEVEL ADJUSTING BEVEL HANDWHEEL LOCKINGLEVER Fig. 24 23
-
 1
1 -
2
-
3
-
4
-
5
-
6
-
7
-
8
-
9
-
10
-
11
-
12
-
13
-
14
-
15
-
16
-
17
-
 18
18 -
 19
19 -
 20
20 -
 21
21 -
 22
22 -
 23
23 -
 24
24 -
 25
25 -
 26
26 -
 27
27 -
 28
28 -
29
-
30
-
31
-
32
-
33
-
34
-
35
-
36
-
37
-
38
-
39
-
40
-
41
-
42
-
43
-
44
-
45
-
46
-
47
-
48
 |
 |
