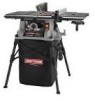
Craftsman 21805 Operation Manual - Page 28
See See s37
 |
View all Craftsman 21805 manuals
Add to My Manuals
Save this manual to your list of manuals |
Page 28 highlights
• Place a support (the same height as saw table) behind the saw for the cut work. • Make sure the wood is clear of the blade before turning on the saw. • Use a push block or push stick to move the wood through the cut past the blade. Never push a small piece of wood into the blade with your hand, always use a push stick. The use of push blocks, push sticks, and featherbeards are necessary when making non-through cuts. • Stand to the side of the wood as it contacts the blade to reduce the chance of injury should kickback occur. Never stand directly in the line of cut. • Make sure the wood is clear of the blade before turning on the saw. • Let the blade build up to full speed before feeding the workpiece into the blade. • When the cut is made, turn the saw off. Wait for the blade to come to a complete stop before removing the workplace. RIPCUT BLADE RIP FENCE SCALE MAKING A MITER CUT See Figure36. It is recommended you make test cuts on scrap wood. A All, WARNING: Make sure the blade guard assembly is installed and working property to avoid possible serious injury. • Remove the rip fence by lifting the locking handle. • Set the miter gauge to the desired angle and tighten the lock knob. • Place a support (the same height as saw table) behind the saw for the cut work. • Make sure the wood is clear of the blade before turning on the saw. • Let the blade build up to full speed before moving the workplace into the blade. • Feed the workpiece into the blade until the cut has been completed. MITERGAUGE ANGLED MITERCUT BLADE STRAIGHT HEIGHT/BEVEL ADJUSTING HANDWHEEL Fig. 36 MAKING A BEVEL CROSS CUT See Figures37 - 38. It is recommended that you place the piece to be saved on the left side of the blade and that you make atest cut on scrap wood. ,_ WARNING: Make sure the blade guard assembly is installed and working properly to avoid possible serious injury. Fig, 35 • Unlockthe bevel locking lever. • Remove the rip fence by lifting the locking handle. • Turn the height/bevel adjusting handwheel until the bevel indicator is at the desired angle. Push the bevel locking lever securely to the left to lock the angle. • Set the blade to the correct depth for the workpiece. 28
-
 1
1 -
2
-
3
-
4
-
5
-
6
-
7
-
8
-
9
-
10
-
11
-
12
-
13
-
14
-
15
-
16
-
17
-
18
-
19
-
20
-
21
-
22
-
 23
23 -
 24
24 -
 25
25 -
 26
26 -
 27
27 -
 28
28 -
 29
29 -
 30
30 -
 31
31 -
 32
32 -
 33
33 -
34
-
35
-
36
-
37
-
38
-
39
-
40
-
41
-
42
-
43
-
44
-
45
-
46
-
47
-
48
 |
 |
