Craftsman 27675 Operation Manual - Page 7

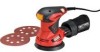
Double Insulated - sander

Page 7 highlights

SAFETY SYMBOLS FOR YOUR TOOL The label on your tool may include the following symbols. V Volts A Hz W rain Amps Hertz Watts Minutes _., ...no RPM SPM OPM Z Alternating current Direct current No-load speed Class II construction, Double Insulated Revolutionsper minute Strokes per minute Orbits per minute Indicates danger, warning or caution. It means attention! Your safety is involved. SERVICE SAFETY 1. If any part of this tool is missing or should break, bend, or fail in any way; or should any electrical component fail to perform properly: SHUT OFF the power switch and remove the tool's plug from the power source and have the missing, damaged or failed parts replaced BEFORE resuming operation. 2. Tool service must be performed only at a Sears Service Center. Service or maintenance performed by unqualified personnel could result in a risk of injury, 3. When servicing a tool, use only identical replacement parts. Follow instructions in the maintenance section of this manual. Use of unauthorized parts or failure to follow maintenance instructionsmay create a risk of electric shock or injury. SAFETY RULES FOR POWER SANDERS 1. HOLD TOOL by insulated gripping surfaces when sanding where tool may contact hidden wiring, such as walls, floors, or its own power (-ord. Contact with a "live" wire will make exposed metals parts of the tool "live" and shock the operator. 2. INSPECT FOR AND REMOVE all nails, screws, staples or any embedded pieces of metal from surface to be sanded. These protrusions coulcldamage the sandpaper, the cushion of the sander and cause loss of control. Following this rule will reduce the risk of serious personal injury and damage to the sander. 3. NEVER use this or any power sander for wet sanding or liquid polishing. Failure to follow this rule will increase the risk of electric shock. 4. ALWAYS clamp the workpiece securely so it will not move under the sander. Unsecured work could be thrown towards the operator, causing injury. 5. DO NOT force the sander. The weight of the sander supplies adequate pressure. Let the sander and the grit on the sandpaper do the work. 6. DO NOT sand in any one place for too long. The sander's rapid action may remove too much material and make the surface uneven. 7

  • 1
  • 2
  • 3
  • 4
  • 5
  • 6
  • 7
  • 8
  • 9
  • 10
  • 11
  • 12
  • 13
  • 14
  • 15
  • 16
  • 17
  • 18
  • 19
  • 20
  • 21
  • 22
  • 23
  • 24
  • 25
  • 26
  • 27
  • 28
  • 29
  • 30
  • 31
  • 32
  • 33
  • 34
  • 35
  • 36
  • 37
  • 38
  • 39
  • 40
  • 41
  • 42
  • 43
  • 44
  • 45
  • 46
  • 47
  • 48
  • 49
  • 50
  • 51

SAFETY
SYMBOLS
FOR YOUR TOOL
The label on your tool may include the following
symbols.
V
.......................................................................
Volts
A
......................................................................
Amps
Hz
....................................................................
Hertz
W
.....................................................................
Watts
rain
..................................................................
Minutes
_.,
....................................................................
Alternating
current
..................................................................
Direct
current
no
....................................................................
No-load speed
[]
....................................................................
Class II
construction,
Double Insulated
RPM
..........................................................
Revolutions
per minute
SPM
............................................................
Strokes per minute
OPM
..........................................................
Orbits per minute
Z_
....................................................................
Indicates danger, warning or
caution.
It
means attention! Your safety is involved.
SERVICE
SAFETY
1.
If any part of this tool is missing or should break, bend, or fail in any way;
or should any electrical component
fail to perform properly: SHUT OFF the
power switch and remove the tool's plug from the power source and have the
missing, damaged or failed parts replaced
BEFORE
resuming operation.
2.
Tool service must be performed only at a Sears Service Center. Service
or
maintenance performed by unqualified personnel could result in a risk of injury,
3. When servicing a tool, use only identical replacement
parts. Follow
instructions
in the maintenance
section of this manual.
Use of unauthorized
parts or
failure
to follow
maintenance
instructions
may
create a risk of
electric
shock or injury.
SAFETY
RULES
FOR
POWER
SANDERS
1.
HOLD TOOL by insulated gripping surfaces
when sanding where tool
may
contact
hidden
wiring, such as walls,
floors,
or its own power
(-ord.
Contact with a
"live"
wire will
make
exposed
metals parts of the tool
"live"
and shock the operator.
2. INSPECT
FOR AND REMOVE all
nails, screws,
staples
or any
embedded
pieces
of metal
from
surface to be
sanded.
These protrusions coulcl
damage
the sandpaper,
the cushion of the
sander
and cause loss of control. Following this
rule
will reduce the
risk
of
serious
personal injury and
damage
to the sander.
3. NEVER use this or
any
power sander
for
wet sanding
or liquid polishing.
Failure to
follow
this rule will increase the risk of
electric
shock.
4. ALWAYS clamp the workpiece
securely
so
it will not
move
under the
sander.
Unsecured work could be thrown towards the operator, causing injury.
5. DO NOT force the sander. The weight of the
sander supplies
adequate
pressure. Let the sander and the grit on the sandpaper
do
the work.
6. DO NOT sand in any one place
for
too long. The sander's rapid
action may
remove too much material and make the surface uneven.
7