Creative SB0100 User Guide - Page 21
Recording and Content Authoring, Positioning Your Speakers, Recording and Content, Authoring
 |
View all Creative SB0100 manuals
Add to My Manuals
Save this manual to your list of manuals |
Page 21 highlights
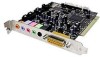
Recording and Content Authoring Positioning Your Speakers ❑ If you are a musician with semi-professional requirements, you may want to upgrade your Sound Blaster Live! card with either the Optical Digital I/O card (plus Digital I/O Module), or the Live! Drive IR. ❑ For either options, you will be given: • A set of SPDIF (RCA) and Optical input/output jacks for recording to and from external digital devices; • MIDI input/output connectors for connection to MIDI devices; • A Digital DIN connector for connection to digital speakers such as the FourPointSurround or DeskTop Theater 5.1 Digital Speaker Systems; • A second analog Line In allows you to connect to an additional input device (e.g. a CD player) for recording. ❑ The Live! Drive IR fits into the standard 5¼" drive bay of your computer and thus allows you easy access to these connectors from its front panel. The Headphones and Microphone inputs utilise ¼" jacks for high-quality connectivity. If you are using four speakers, place them so that they form the corners of a square with you exactly in the centre (as in Figure 1-5) and that they are angled toward you. Make sure the computer monitor is not blocking the path of your front speakers. If you have a centre speaker, place it on top of your monitor, also angled toward you. You may want to adjust the relative positions of the speakers until you get the audio experience you like best. If you have a subwoofer, place the unit in a corner of the room for the best bass experience. Subwoofer Computer monitor Front left speaker You Front right speaker Rear left speaker Rear right speaker Figure 1-5: Recommended speaker positions for the 4-speaker configuration. Installing Sound Blaster Live! Player 5.1 1-9
-
 1
1 -
2
-
3
-
4
-
5
-
6
-
7
-
8
-
9
-
10
-
11
-
12
-
13
-
14
-
15
-
 16
16 -
 17
17 -
 18
18 -
 19
19 -
 20
20 -
 21
21 -
 22
22 -
 23
23 -
 24
24 -
 25
25 -
 26
26 -
27
-
28
-
29
-
30
-
31
-
32
-
33
-
34
-
35
-
36
-
37
-
38
-
39
-
40
-
41
-
42
-
43
-
44
-
45
-
46
-
47
-
48
-
49
-
50
-
51
-
52
-
53
-
54
-
55
-
56
-
57
-
58
-
59
-
60
-
61
-
62
-
63
-
64
-
65
-
66
 |
 |
