Cub Cadet Z-Force S Commercial 60 Z-Force S Commercial 48 Operator's Manual - Page 28
Replacing the Belt, Mower Blade Care
 |
View all Cub Cadet Z-Force S Commercial 60 manuals
Add to My Manuals
Save this manual to your list of manuals |
Page 28 highlights
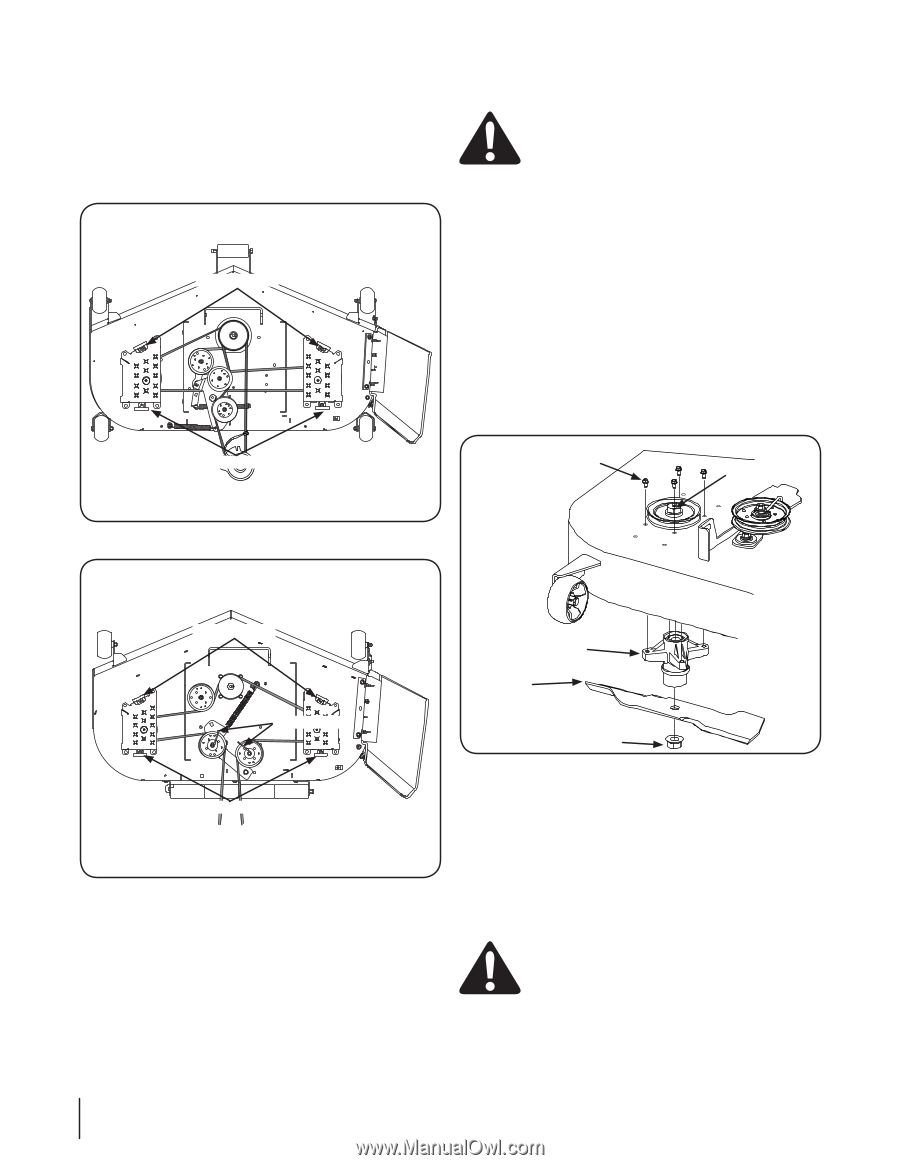
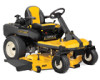
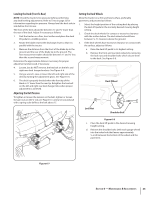
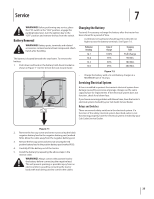
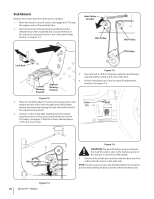
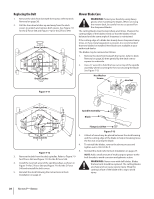
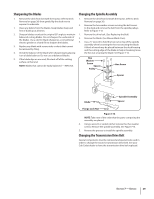
Replacing the Belt 1. Remove the deck from beneath the tractor, (refer to Deck Removal on page 26). 2. Pull the four draw latches up and away from the deck covers to unlatch and remove both covers. See Figure 7-11 for the Z-Force S60 and Figure 7-12 for the Z-Force S48. Draw Latches Draw Latches Mower Blade Care WARNING! Protect your hands by using heavy gloves when handling the blades. When servicing the mower deck, be careful not to cut yourself on the sharpened blades. The cutting blades must be kept sharp at all times. Sharpen the cutting edges of the blades evenly so that the blades remain balanced and the same angle of sharpness is maintained. If the cutting edge of a blade has already been sharpened many times, or if any metal separation is present, it is recommended that new blades be installed. New blades are available at your authorized dealer. The blades may be removed as follows. 1. Remove the deck from beneath the tractor, (refer to Deck Removal on page 26) then gently flip the deck over to expose its underside. 2. Use a 3⁄4" wrench to hold the hex nut on top of the spindle assembly when loosening the hex nut securing the blade. See Figure 7-13. Hex Washer Screw Hex Nut Figure 7-11 Draw Latches Spindle Assembly Blade Belt Keepers Flange Lock Nut Figure 7-13 Draw Latches 3. A block of wood may be placed between the deck housing and the cutting edge of the blade to help in breaking loose the hex nut securing the blade. 4. To reinstall the blades, reverse the above process and tighten nut to 100-120 lb. ft. 5. Reinstall the deck (refer to Deck Installation on page 27). Figure 7-12 NOTE: Add a small amount of multi-purpose grease to the 3. Remove the belt from the deck spindles. Refer to Figure 7-9 bolt threads to avoid corrosion and galvanic action. for Z-Force S60 and Figure 7-10 for the Z-Force S48. 4. Install the new belt around the spindle pulleys as shown in Figure 7-9 for Z-Force S60 and Figure 7-10 for the Z-Force S48 and reinstall the belt covers. WARNING!: Never mow with dull blades. Blades that are bent should be replaced. The cutting blades are sharp and can cause severe injury. Wrap the cutting surface of the blade with a rag to avoid 5. Reinstall the deck following the instructions in Deck injury. Installation on page 27. 28 Section 7- Service
-
 1
1 -
2
-
3
-
4
-
5
-
6
-
7
-
8
-
9
-
10
-
11
-
12
-
13
-
14
-
15
-
16
-
17
-
18
-
19
-
20
-
21
-
22
-
 23
23 -
 24
24 -
 25
25 -
 26
26 -
 27
27 -
 28
28 -
 29
29 -
 30
30 -
 31
31 -
 32
32 -
 33
33 -
34
-
35
-
36
 |
 |