D-Link DCS-934L User Manual - Page 20
Manual Installation
 |
View all D-Link DCS-934L manuals
Add to My Manuals
Save this manual to your list of manuals |
Page 20 highlights
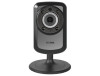
Section 2 - Installation Manual Installation If you prefer to set up your camera without using the Camera Setup Wizard, follow the steps below. Note: In order to use the mydlink features of this product, you should use either the Camera Setup Wizard or Zero Configuration Setup. To learn more about mydlink, refer to "What is mydlink?" on page 24. Connect the Power Cable and Ethernet Cable Step 1 Attach the power supply to the power receptor located on the back of the DCS-934L and connect it to a wall outlet or power strip. Power is confirmed when the Power LED is lit. Step 2 If using an Ethernet connection, connect the included Ethernet cable to the Ethernet port on the back of the camera. Plug the other end into an available port on your router. If your router supports Wi-Fi Protected Setup, you can initiate a wireless connection with your router using WPS. Refer to "WPS - Push Button Setup" on page 21. Configure Your Camera Step 3 Refer to "Configuration" on page 25 for instructions on how to configure your camera. D-Link DCS-934L User Manual 20
-
 1
1 -
2
-
3
-
4
-
5
-
6
-
7
-
8
-
9
-
10
-
11
-
12
-
13
-
14
-
 15
15 -
 16
16 -
 17
17 -
 18
18 -
 19
19 -
 20
20 -
 21
21 -
 22
22 -
 23
23 -
 24
24 -
 25
25 -
26
-
27
-
28
-
29
-
30
-
31
-
32
-
33
-
34
-
35
-
36
-
37
-
38
-
39
-
40
-
41
-
42
-
43
-
44
-
45
-
46
-
47
-
48
-
49
-
50
-
51
-
52
-
53
-
54
-
55
-
56
-
57
-
58
-
59
-
60
-
61
-
62
-
63
-
64
-
65
-
66
-
67
-
68
-
69
-
70
-
71
-
72
 |
 |
