D-Link DNS-G120 Installation Guide - Page 6
Installing the Hardware
 |
UPC - 790069281815
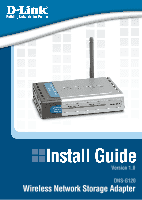
View all D-Link DNS-G120 manuals
Add to My Manuals
Save this manual to your list of manuals |
Page 6 highlights
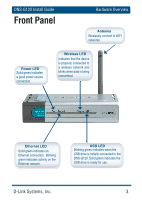
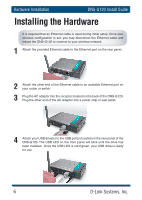
Hardware Installation DNS-G120 Install Guide Installing the Hardware It is required that an Ethernet cable is used during initial setup. Once your wireless configuration is set, you may disconnect the Ethernet cable and reboot the DNS-G120 to connect to your wireless network. 1 Attach the provided Ethernet cable to the Ethernet port on the rear panel. 2 Attach the other end of the Ethernet cable to an available Ethernet port on your router or switch. 3 Plug the AC adapter into the receptor located on the back of the DNS-G120. Plug the other end of the AC Adapter into a power strip or wall outlet. 4 Attach your USB drive(s) to the USB port(s) located on the rear panel of the DNS-G120. The USB LED on the front panel will blink until the drive has been installed. Once the USB LED is solid green, your USB drive is ready for use. 6 D-Link Systems, Inc.
-
 1
1 -
 2
2 -
 3
3 -
 4
4 -
 5
5 -
 6
6 -
 7
7 -
 8
8 -
 9
9 -
 10
10 -
 11
11 -
 12
12 -
13
-
14
-
15
-
16
-
17
-
18
-
19
-
20
 |
 |
