D-Link DSM-210 User Manual - Page 16
Configuration, Connect to a Wireless Network - 10 wireless internet photo frame
 |
UPC - 790069313578
View all D-Link DSM-210 manuals
Add to My Manuals
Save this manual to your list of manuals |
Page 16 highlights
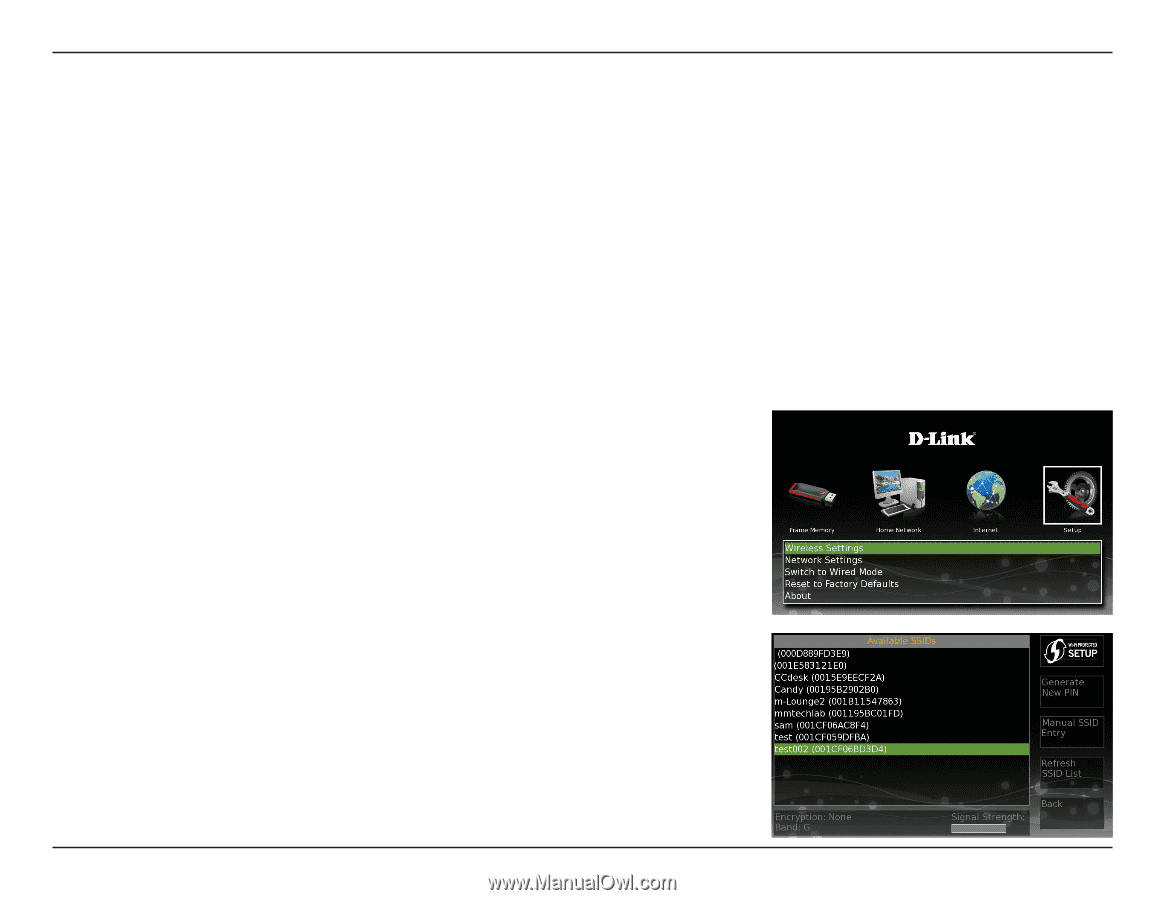
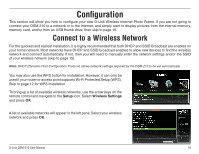
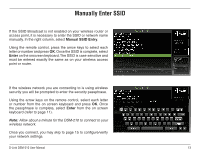
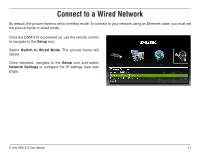
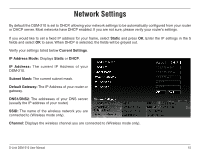
Configuration This section will show you how to configure your new D-Link Wireless Internet Photo Frame. If you are not going to connect your DSM-210 to a network or to the Internet, and simply want to display pictures from the internal memory, memory card, and/or from an USB thumb drive, then skip to page 16. Connect to a Wireless Network For the quickest and easiest installation, it is highly recommended that both DHCP and SSID Broadcast are enabled on your home network. Most networks have DHCP and SSID broadcast enabled to allow new devices to find the wireless network and connect automatically. If not, then you will need to manually enter the network settings and/or the SSID of your wireless network (skip to page 15). Note: DHCP (Dynamic Host Configuration Protocol) allows network settings required by the DSM-210 to be set automatically. You may also use the WPS button for installation. However, it can only be used if your router or access point supports Wi-Fi Protected Setup (WPS). Skip to page 12 for WPS installation. To bring up a list of available wireless networks, use the arrow keys on the remote control and navigate to the Setup icon. Select Wireless Settings and press OK. A list of available networks will appear in the left pane. Select your wireless network and press OK. D-Link DSM-210 User Manual 10
-
 1
1 -
2
-
3
-
4
-
5
-
6
-
7
-
8
-
9
-
10
-
 11
11 -
 12
12 -
 13
13 -
 14
14 -
 15
15 -
 16
16 -
 17
17 -
 18
18 -
 19
19 -
 20
20 -
 21
21 -
22
-
23
-
24
-
25
-
26
-
27
-
28
-
29
-
30
-
31
-
32
-
33
-
34
-
35
-
36
-
37
-
38
-
39
-
40
-
41
-
42
-
43
-
44
-
45
-
46
-
47
 |
 |