DELPHI NA10000-11B1 User Manual - Page 12
Suction or adhesive mount to dash - accessories
 |
UPC - 689604150672
View all DELPHI NA10000-11B1 manuals
Add to My Manuals
Save this manual to your list of manuals |
Page 12 highlights
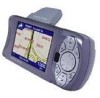
8. Snap Delphi Mobile Navigation onto the socket clip. First, position the two locating tabs (found on the bottom of the unit) into the corresponding slots on the socket clip. Then, snap the top side of Delphi Mobile Navigation onto the clip. To unclip Delphi Mobile Navigation from the mounting bracket, press down on the back of the upper plastic clip. Release the top of the unit. Then lift the unit out of the bottom two slots. 9. Flip the GPS antenna outward so that the antenna points horizontally. Antenna points up and out 10. Plug the 12/24V power adaptor into the cigarette lighter socket. 11. Plug the other end of the power cable into the socket on the left side of Delphi Mobile Navigation. 12. Verify that Delphi Mobile Navigation is positioned such that the GPS antenna has a clear view of the sky. Note: In most vehicles, you will need to have the engine idling in order to program your destination. You also can turn on the unit with just the accessory power (i.e., your ignition key turned to the ACC "on" position). When you turn on the engine, power may be interrupted to the unit but the programmed destination will be saved. In vehicles where accessory power is on permanently, the unit can be turned on and programmed as soon as the power adaptor is connected. Turning on the engine will not reset the unit. Suction or adhesive mount to dash Warning: To avoid personal injury, follow the safety guidelines and installation instructions provided so that Delphi Mobile Navigation does not obstruct the view of the driver, interfere with the operation of any airbags and safety features in the vehicle, or become airborne in the case of an accident. Do not attempt to install the Delphi Mobile Navigation unit while driving. 1. Choose a position on the dash where Delphi Mobile Navigation will be clearly visible to the driver without obstructing the driver's view. 2. Thoroughly clean and dry the suction cup and the mounting area of the dash. 3. Suction mount: If the location is flat enough, you can simply use the suction cup to mount the unit directly onto the dash. If the suction cup does not adhere, clean the mounting area with a cloth dampened with isopropyl alcohol. Let the area dry, then reapply the suction cup. Adhesive mount: If the location is not suitable to use the suction cup alone, use the suction pad to provide a flat surface for the suction cup. Peel the protective layer off the adhesive tape on the bottom of the suction pad. Press the suction pad onto the desired position on the dash and hold firmly for 30 seconds. You can remove the adhesive mount from your dash by taking the following steps: 1. Lift one edge of the suction pad gently with fingers or the rounded edge of a spoon. Once enough of the edge is loosened to grip with your fingers, pull the pad gently from the mounting surface at a 90-degree angle. Avoid using sharp tools that could damage the car interior. 2. If the pad fails to loosen, first warm it with a hair dryer for 2 minutes to 3 minutes to soften the adhesive. Be careful not to apply too much heat, which could damage the mounting surface. Caution: Never use a commercial heat gun or paint-stripping gun. This could result in damage to the unit or to your vehicle. 3. If any adhesive remains on the dash surface, the adhesive can easily be removed by rubbing your thumb or finger across it. 4. As necessary, use a mild household cleaner to clean the dash surface. 12
-
 1
1 -
2
-
3
-
4
-
5
-
6
-
 7
7 -
 8
8 -
 9
9 -
 10
10 -
 11
11 -
 12
12 -
 13
13 -
 14
14 -
 15
15 -
 16
16 -
 17
17 -
18
-
19
-
20
-
21
-
22
-
23
-
24
-
25
-
26
-
27
-
28
-
29
-
30
-
31
-
32
-
33
-
34
-
35
-
36
-
37
-
38
-
39
-
40
 |
 |
