Dacor EO127 Use & Care Manuals - Page 14
Deluxe Features
 |
View all Dacor EO127 manuals
Add to My Manuals
Save this manual to your list of manuals |
Page 14 highlights
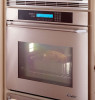
Deluxe Features Help Menu • To find out what each of the keys on the bake screen does, touch that key. For example, if you touch the DELAY key, the display tells you about what the The HELP key on your oven can help you to better under- DELAY OPTIONS mode does. stand how your oven works. The HELP key appears on the control panel display most of the time after you have • Touch OK to return to the BAKE screen or CANCEL/ selected one of your oven's features. If you want to find SECURE to return to the home screen. out more about the various choices available to you, touch the HELP key. DELAY OPTIONS Here is an example: THIS SELECTION PUTS YOU INTO THE DELAY OPTIONS EDIT SCREEN. THESE SETTINGS WILL BE SAVED IF FILE IS SAVED. SELECT OK TO RETURN TO THE EDIT SCREEN. • If you have a double oven, touch the UPPER ON/OFF OK MODE DELAY SAVE PROBE or LOWER ON/OFF key to select the oven you want to use. • Touch the BAKE key. ▲ UPPER 12:25 PM ▼ LOWER BAKE PURE PURE MAX CONV/SEAR CONVECTION BROIL DACOR GUIDE MAIN MENU Timers warning The timers on your oven do not turn the oven on or off. They are only for timing purposes. When you want to turn the oven on or off automatically, use the delay options (see page 23). • The BAKE screen appears. • Touch HELP. NOTE: Touching the CANCEL/SECURE key does NOT turn off the timers. Your wall oven is equipped with two built-in timers: ▲ UPPER 350°F BAKE DELAY OPTIONS SAVE 12:25 PM PRESS START MEAT PROBE HELP • You can use both of them at the same time. • They have distinctive alarm tones so that once time runs out, you can tell which one has beeped. • You may want to set each timer for a few seconds and let time run out so that you can hear the difference between the 2 tones. • The HELP screen appears with a description of how to To Use the Timers on Your Oven: use the bake mode (setting). • Touch the TIMER key. • The timer screen appears. BAKE USES BOTTOM HEAT THIS MODE IS THE STAND-BY NON-CONVECTION MODE. USE RACK 1 OR 2. OK MODE DELAY SAVE PROBE • Touch the TIMER 1 or TIMER 2 key. For example, touch TIMER 1. TIMER 1 00:00:00 12:25 PM PRESS START TIMER 1 DIRECTION HH:MM:SS DOWN CANCEL TIMER 1 TIMER 2 CANCEL DIRECTION TIMER 2 12
-
 1
1 -
2
-
3
-
4
-
5
-
6
-
7
-
8
-
 9
9 -
 10
10 -
 11
11 -
 12
12 -
 13
13 -
 14
14 -
 15
15 -
 16
16 -
 17
17 -
 18
18 -
 19
19 -
20
-
21
-
22
-
23
-
24
-
25
-
26
-
27
-
28
-
29
-
30
-
31
-
32
-
33
-
34
-
35
-
36
-
37
-
38
-
39
-
40
 |
 |
