Dell 1815dn Multifunction Mono Laser Printer User's Guide - Page 108
Scanning Using the Windows Image Acquisition WIA Driver, Scanning to a USB Memory Key
 |
View all Dell 1815dn Multifunction Mono Laser Printer manuals
Add to My Manuals
Save this manual to your list of manuals |
Page 108 highlights
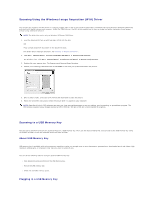
Scanning Using the Windows Image Acquisition (WIA) Driver Your printer also supports the WIA driver for scanning images. WIA is one of the standard components provided by Microsoft Windows XP/Server 2003/Vista and works with digital cameras and scanners. Unlike the TWAIN driver, the WIA driver enables you to scan an image and easily manipulate those images without using additional software. NOTE: The WIA driver works only on Windows XP/Server 2003/Vista. 1. Load the document(s) face up with top edge in first into the ADF. OR Place a single document face down on the document glass. For details about loading a document, see "Loading an Original Document". 2. Click Start Control Panel Printers and Other Hardware Scanners and Cameras. For Windows Vista, click Start Control Panel Hardware and Sound Scanners and Cameras. 3. Double click your scanner icon. The Scanners and Camera Wizard launches. 4. Choose your scanning preferences and click Preview to see how your preferences affect the picture. 5. Enter a picture name, and select a file format and destination to save the picture. 6. Follow the on-screen instructions to edit the picture after it is copied to your computer. NOTE: PaperPort's built-in OCR software can copy text from scanned documents to any text editing, word processing, or spreadsheet program. The OCR process requires textual images scanned at 150 to 600 dpi. 300 dpi or 600 dpi is recommended for graphics. Scanning to a USB Memory Key You can scan a document and save the scanned image on a USB memory key. There are two ways of doing this: you can scan to the USB memory key using the default settings, or you can manually select your own settings. About USB Memory Key USB memory key is available with various memory capacities to give you enough room to store documents, presentations, downloaded music and videos, high resolution photographs, or whatever other files you want to take with you. You can do the following features using an optional USB memory key: l Scan documents and save them on the USB memory key. l Format the USB memory key. l Check the available memory space. Plugging in a USB Memory Key
-
 1
1 -
2
-
3
-
4
-
5
-
6
-
7
-
8
-
9
-
10
-
11
-
12
-
13
-
14
-
15
-
16
-
17
-
18
-
19
-
20
-
21
-
22
-
23
-
24
-
25
-
26
-
27
-
28
-
29
-
30
-
31
-
32
-
33
-
34
-
35
-
36
-
37
-
38
-
39
-
40
-
41
-
42
-
43
-
44
-
45
-
46
-
47
-
48
-
49
-
50
-
51
-
52
-
53
-
54
-
55
-
56
-
57
-
58
-
59
-
60
-
61
-
62
-
63
-
64
-
65
-
66
-
67
-
68
-
69
-
70
-
71
-
72
-
73
-
74
-
75
-
76
-
77
-
78
-
79
-
80
-
81
-
82
-
83
-
84
-
85
-
86
-
87
-
88
-
89
-
90
-
91
-
92
-
93
-
94
-
95
-
96
-
97
-
98
-
99
-
100
-
101
-
102
-
 103
103 -
 104
104 -
 105
105 -
 106
106 -
 107
107 -
 108
108 -
 109
109 -
 110
110 -
 111
111 -
 112
112 -
 113
113 -
114
-
115
-
116
-
117
-
118
-
119
-
120
-
121
-
122
-
123
-
124
-
125
-
126
-
127
-
128
-
129
-
130
-
131
-
132
-
133
-
134
-
135
-
136
-
137
-
138
-
139
-
140
-
141
-
142
-
143
-
144
-
145
-
146
-
147
-
148
 |
 |
