Dell 3110cn Color Laser Printer User Guide - Page 93
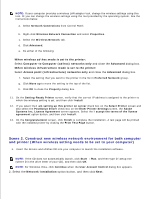
When wireless ad-hoc mode is set to the printer, Computer to Computer ad hoc networks only, Advanced
 |
View all Dell 3110cn Color Laser Printer manuals
Add to My Manuals
Save this manual to your list of manuals |
Page 93 highlights
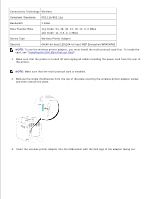
3. Select the Network Installation option button, and then click Next. 4. Select the Configure Wireless Printer using a USB connection (Recommended) option button, and then click Next. 5. Reset the wireless setting of the printer following the steps on the Reset Wireless Setting screen. 6. In the list on the Select Printer screen, check the check box of the target printer that you are making wireless setting for, and then click Next. NOTE: When you enter a fixed IP address, avoid the "169.254.xxx.xxx" address used by AutoIP. 7. On the Enter Wireless Network Settings screen, set each wireless setting item, and then click Next. When you select the Fixed IP option button for IP address assignment, click Settings... and enter the IP address and subnet mask on the screen. 8. Set each item on the Enter Printer Settings screen, and then click Next. 9. On the Printer Software screen, specify the software that you want to install and installation path, and then click Next. At this point, the wireless setting specified on the Enter Wireless Network Settings screen is sent to the printer. 10. On the Wireless configuration is now complete screen, create the wireless setting sent to the printer on your computer following the steps below, and then click Next. NOTE: If your computer provides a wireless LAN adapter tool, change the wireless settings using this tool. Or you can change the wireless settings using the tool provided by the operating system. See the instructions below. a. Select Network Connections from Control Panel. b. Right-click Wireless Network Connection and select Properties. c. Select the Wireless Network tab. d. Make sure the check box for Use Windows to configure my wireless network settings is checked. e. Click Advanced. f. Do either of the following: When wireless ad-hoc mode is set to the printer: Select Computer to Computer (ad hoc) networks only and close the Advanced dialog box. When wireless infrastructure mode is set to the printer: Select Access point (Infrastructure) networks only and close the Advanced dialog box. g. Click Add to display Wireless network properties. h. Enter the setting that you send to the printer and click OK. i. j.
-
 1
1 -
2
-
3
-
4
-
5
-
6
-
7
-
8
-
9
-
10
-
11
-
12
-
13
-
14
-
15
-
16
-
17
-
18
-
19
-
20
-
21
-
22
-
23
-
24
-
25
-
26
-
27
-
28
-
29
-
30
-
31
-
32
-
33
-
34
-
35
-
36
-
37
-
38
-
39
-
40
-
41
-
42
-
43
-
44
-
45
-
46
-
47
-
48
-
49
-
50
-
51
-
52
-
53
-
54
-
55
-
56
-
57
-
58
-
59
-
60
-
61
-
62
-
63
-
64
-
65
-
66
-
67
-
68
-
69
-
70
-
71
-
72
-
73
-
74
-
75
-
76
-
77
-
78
-
79
-
80
-
81
-
82
-
83
-
84
-
85
-
86
-
87
-
 88
88 -
 89
89 -
 90
90 -
 91
91 -
 92
92 -
 93
93 -
 94
94 -
 95
95 -
 96
96 -
 97
97 -
 98
98 -
99
-
100
-
101
-
102
-
103
-
104
-
105
-
106
-
107
-
108
-
109
-
110
-
111
-
112
-
113
-
114
-
115
-
116
-
117
-
118
-
119
-
120
-
121
-
122
-
123
-
124
-
125
-
126
-
127
-
128
-
129
-
130
-
131
-
132
-
133
-
134
-
135
-
136
-
137
-
138
-
139
-
140
-
141
-
142
-
143
-
144
-
145
-
146
-
147
-
148
-
149
-
150
-
151
-
152
-
153
-
154
-
155
-
156
-
157
-
158
-
159
-
160
-
161
-
162
-
163
-
164
-
165
-
166
-
167
-
168
-
169
-
170
-
171
-
172
-
173
-
174
-
175
-
176
-
177
-
178
-
179
-
180
-
181
-
182
-
183
-
184
-
185
-
186
-
187
-
188
-
189
-
190
-
191
-
192
-
193
-
194
-
195
-
196
-
197
-
198
-
199
-
200
-
201
-
202
-
203
-
204
-
205
-
206
-
207
-
208
-
209
-
210
-
211
-
212
-
213
-
214
-
215
-
216
-
217
-
218
-
219
-
220
-
221
-
222
-
223
-
224
-
225
-
226
-
227
-
228
-
229
-
230
-
231
-
232
-
233
-
234
-
235
-
236
-
237
-
238
-
239
-
240
-
241
-
242
-
243
-
244
-
245
-
246
-
247
-
248
-
249
-
250
-
251
-
252
-
253
-
254
-
255
-
256
-
257
-
258
-
259
-
260
-
261
-
262
-
263
-
264
-
265
-
266
-
267
-
268
-
269
-
270
-
271
-
272
-
273
-
274
-
275
-
276
-
277
-
278
-
279
-
280
-
281
-
282
-
283
-
284
-
285
-
286
-
287
-
288
-
289
-
290
-
291
-
292
-
293
-
294
-
295
-
296
-
297
-
298
-
299
-
300
-
301
-
302
-
303
-
304
-
305
-
306
-
307
-
308
-
309
-
310
-
311
-
312
-
313
-
314
-
315
-
316
-
317
-
318
-
319
-
320
-
321
-
322
-
323
-
324
-
325
-
326
-
327
-
328
-
329
-
330
-
331
-
332
-
333
-
334
-
335
-
336
-
337
-
338
-
339
-
340
-
341
-
342
-
343
-
344
-
345
-
346
-
347
-
348
-
349
-
350
-
351
-
352
-
353
-
354
-
355
-
356
-
357
-
358
-
359
-
360
-
361
-
362
-
363
-
364
-
365
-
366
-
367
-
368
-
369
-
370
-
371
-
372
-
373
-
374
-
375
-
376
-
377
-
378
-
379
-
380
-
381
-
382
-
383
-
384
-
385
-
386
-
387
-
388
-
389
-
390
-
391
-
392
-
393
-
394
-
395
-
396
-
397
-
398
-
399
-
400
-
401
-
402
-
403
-
404
-
405
-
406
-
407
-
408
-
409
-
410
-
411
-
412
-
413
-
414
-
415
-
416
-
417
-
418
-
419
-
420
-
421
-
422
-
423
-
424
-
425
-
426
-
427
-
428
-
429
-
430
-
431
-
432
-
433
-
434
-
435
-
436
-
437
-
438
-
439
-
440
-
441
-
442
-
443
-
444
-
445
-
446
-
447
-
448
-
449
-
450
-
451
 |
 |
