Dell 430-3113 User Guide - Page 13
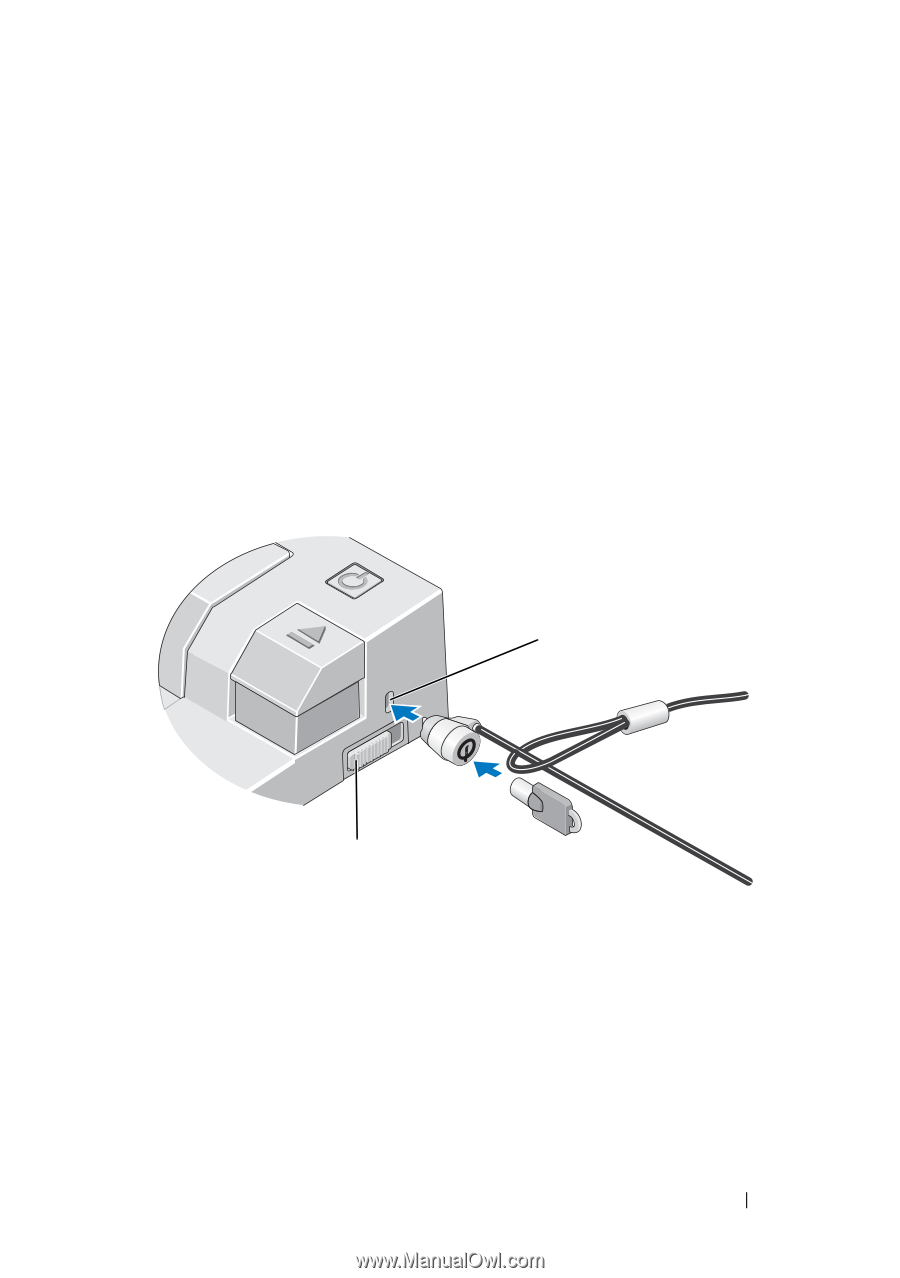
Securing the E-Port
 |
UPC - 880487211225
View all Dell 430-3113 manuals
Add to My Manuals
Save this manual to your list of manuals |
Page 13 highlights
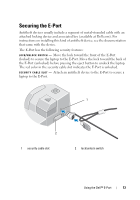
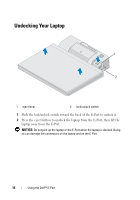
Securing the E-Port Antitheft devices usually include a segment of metal-stranded cable with an attached locking device and associated key (available at Dell.com). For instructions on installing this kind of antitheft device, see the documentation that came with the device. The E-Port has the following security features: LOCK/UNLOCK SWITCH - Move the lock toward the front of the E-Port (locked) to secure the laptop to the E-Port. Move the lock toward the back of the E-Port (unlocked) before pressing the eject button to undock the laptop. The red color in the security cable slot indicates the E-Port is unlocked. SECURITY CABLE SLOT - Attach an antitheft device to the E-Port to secure a laptop to the E-Port. 1 2 1 security cable slot 2 lock/unlock switch Using the Dell™ E-Port 13
-
 1
1 -
2
-
3
-
4
-
5
-
6
-
7
-
 8
8 -
 9
9 -
 10
10 -
 11
11 -
 12
12 -
 13
13 -
 14
14 -
 15
15 -
 16
16 -
 17
17 -
 18
18 -
19
-
20
-
21
-
22
 |
 |