Dell 5100cn Color Laser Printer ugtoc.html - Page 238
Uninstalling the UX Filter, About Uninstalling
 |
View all Dell 5100cn Color Laser Printer manuals
Add to My Manuals
Save this manual to your list of manuals |
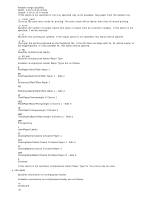
Page 238 highlights
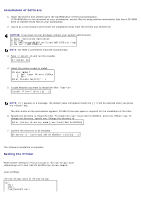
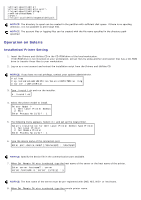
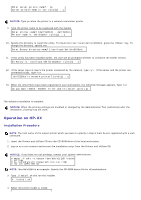
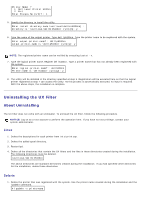
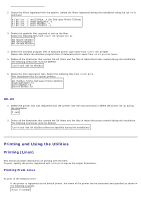
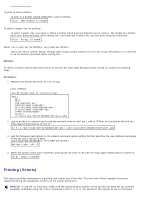
Printer Model ? 1. Dell Laser Printer 5100cn 2. Exit Enter Process No (1/2)? : 1 5. Specify the directory to install the utility. Enter install directory name /usr/local/dellbin5100cn] : directory is '/usr/local/dellbin5100cn' (y/n)[n]: y 6. Type the name of the output printer. Type delllp5100cn. Type the printer name to be registered with the system. Enter output-printer-name? : delllp5100cn output-printer-name is 'delllp5100cn' (y/n)[y]: y NOTE: The registered printer name can be verified by executing lpstat -v. 7. Type the logical printer name. Register dell5100cn. Type a printer name that has not already been registered with the system. Enter logical-printer-name? : dell5100cn Printer-name is 'dell5100cn' (y/n)[y]: y 8. The utility will be installed in the directory specified at step 5. Registration will be executed here so that the logical printer registered at step 7 can access the utility. As this process is automatically executed, no input is required. With the above steps, the installation is complete. Uninstalling the UX Filter About Uninstalling The UX filter does not come with an uninstaller. To uninstall the UX filter, follow the following procedure. NOTICE: Log on as a root account to perform the operation here. If you have no root privilege, contact your system administrator. Linux 1. Delete the descriptions for each printer from /etc/printcap. 2. Delete the added spool directory. 3. Restart lpd. 4. Delete all the directories that contain the UX filters and the files in these directories created during the installation. The following directories must be deleted. /usr/local/dellbin5100cn The above directories are standard directories created during the installation. If you had specified other directories for the installation, delete those directories. Solaris 1. Delete the printer that was registered with the system. Use the printer name created during the installation and the lpadmin command. # lpadmin -x printername
-
 1
1 -
2
-
3
-
4
-
5
-
6
-
7
-
8
-
9
-
10
-
11
-
12
-
13
-
14
-
15
-
16
-
17
-
18
-
19
-
20
-
21
-
22
-
23
-
24
-
25
-
26
-
27
-
28
-
29
-
30
-
31
-
32
-
33
-
34
-
35
-
36
-
37
-
38
-
39
-
40
-
41
-
42
-
43
-
44
-
45
-
46
-
47
-
48
-
49
-
50
-
51
-
52
-
53
-
54
-
55
-
56
-
57
-
58
-
59
-
60
-
61
-
62
-
63
-
64
-
65
-
66
-
67
-
68
-
69
-
70
-
71
-
72
-
73
-
74
-
75
-
76
-
77
-
78
-
79
-
80
-
81
-
82
-
83
-
84
-
85
-
86
-
87
-
88
-
89
-
90
-
91
-
92
-
93
-
94
-
95
-
96
-
97
-
98
-
99
-
100
-
101
-
102
-
103
-
104
-
105
-
106
-
107
-
108
-
109
-
110
-
111
-
112
-
113
-
114
-
115
-
116
-
117
-
118
-
119
-
120
-
121
-
122
-
123
-
124
-
125
-
126
-
127
-
128
-
129
-
130
-
131
-
132
-
133
-
134
-
135
-
136
-
137
-
138
-
139
-
140
-
141
-
142
-
143
-
144
-
145
-
146
-
147
-
148
-
149
-
150
-
151
-
152
-
153
-
154
-
155
-
156
-
157
-
158
-
159
-
160
-
161
-
162
-
163
-
164
-
165
-
166
-
167
-
168
-
169
-
170
-
171
-
172
-
173
-
174
-
175
-
176
-
177
-
178
-
179
-
180
-
181
-
182
-
183
-
184
-
185
-
186
-
187
-
188
-
189
-
190
-
191
-
192
-
193
-
194
-
195
-
196
-
197
-
198
-
199
-
200
-
201
-
202
-
203
-
204
-
205
-
206
-
207
-
208
-
209
-
210
-
211
-
212
-
213
-
214
-
215
-
216
-
217
-
218
-
219
-
220
-
221
-
222
-
223
-
224
-
225
-
226
-
227
-
228
-
229
-
230
-
231
-
232
-
 233
233 -
 234
234 -
 235
235 -
 236
236 -
 237
237 -
 238
238 -
 239
239 -
 240
240 -
 241
241 -
 242
242 -
 243
243 -
244
-
245
-
246
-
247
-
248
-
249
-
250
-
251
-
252
-
253
-
254
-
255
-
256
-
257
-
258
-
259
-
260
-
261
-
262
-
263
-
264
-
265
-
266
-
267
-
268
-
269
-
270
-
271
-
272
-
273
-
274
-
275
-
276
-
277
-
278
-
279
-
280
-
281
-
282
-
283
-
284
-
285
-
286
-
287
-
288
-
289
-
290
-
291
-
292
-
293
-
294
-
295
-
296
-
297
-
298
 |
 |