Dell 946 All In One Printer User Guide - Page 71
Arrow, Select, Start, Delay Sending Fax, Delay Until
 |
View all Dell 946 All In One Printer manuals
Add to My Manuals
Save this manual to your list of manuals |
Page 71 highlights
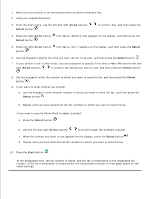
1. Make sure your printer is on and connected to an active telephone line. 2. Load your original document. 3. From the main menu, use the left and right Arrow buttons Select button . to scroll to Fax, and then press the 4. Press the right Arrow button Select button . until Delay Sending Fax appears on the display, and then press the 5. Press the right Arrow button button . until Delay Until appears on the display, and then press the Select 6. Use the keypad to specify the time you want the fax to be sent, and then press the Select button . 7. If your printer is not in 24hr mode, you are prompted to specify if this time is AM or PM. Use the left and right Arrow buttons to scroll to the setting you want to use, and then press the Select button . 8. Use the keypad to enter the number to which you want to send the fax, and then press the Select button . 9. If you want to enter another fax number: a. Use the keypad to enter another number to which you want to send the fax, and then press the Select button . b. Repeat until you have entered all the fax numbers to which you want to send the fax. If you want to use the Phone Book to select a contact: a. Press the Select button . b. Use the left and right Arrow buttons to scroll through the available contacts. c. When the contact you want to use appears on the display, press the Select button . d. Repeat until you have identified all the contacts to whom you want to send the fax. 10. Press the Start button . At the designated time, the fax number is dialed, and the fax is transmitted to the designated fax number. If the fax transmission is unsuccessful, the unsuccessful number is tried again based on the redial settings.
-
 1
1 -
2
-
3
-
4
-
5
-
6
-
7
-
8
-
9
-
10
-
11
-
12
-
13
-
14
-
15
-
16
-
17
-
18
-
19
-
20
-
21
-
22
-
23
-
24
-
25
-
26
-
27
-
28
-
29
-
30
-
31
-
32
-
33
-
34
-
35
-
36
-
37
-
38
-
39
-
40
-
41
-
42
-
43
-
44
-
45
-
46
-
47
-
48
-
49
-
50
-
51
-
52
-
53
-
54
-
55
-
56
-
57
-
58
-
59
-
60
-
61
-
62
-
63
-
64
-
65
-
 66
66 -
 67
67 -
 68
68 -
 69
69 -
 70
70 -
 71
71 -
 72
72 -
 73
73 -
 74
74 -
 75
75 -
 76
76 -
77
-
78
-
79
-
80
-
81
-
82
-
83
-
84
-
85
-
86
-
87
-
88
-
89
-
90
-
91
-
92
-
93
-
94
-
95
-
96
-
97
-
98
-
99
-
100
-
101
 |
 |
