Dell 946 All In One Printer User Guide - Page 73
Turning Fax Blocking On, Blocking Faxes Without Caller ID, Select, Arrow
 |
View all Dell 946 All In One Printer manuals
Add to My Manuals
Save this manual to your list of manuals |
Page 73 highlights
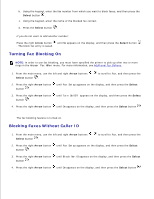
a. b. Using the keypad, enter the fax number from which you want to block faxes, and then press the Select button . c. Using the keypad, enter the name of the blocked fax contact. d. Press the Select button . If you do not want to add another number: Press the right Arrow button until No appears on the display, and then press the Select button . The block fax entry is saved. Turning Fax Blocking On NOTE: In order to use fax blocking, you must have specified the printer to pick up after two or more rings in the Answer Fax When menu. For more information, see Additional Fax Options. 1. From the main menu, use the left and right Arrow buttons Select button . to scroll to Fax, and then press the 2. Press the right Arrow button button . until Fax Setup appears on the display, and then press the Select 3. Press the right Arrow button button . until Turn On/Off appears on the display, and then press the Select 4. Press the right Arrow button . until On appears on the display, and then press the Select button The fax blocking feature is turned on. Blocking Faxes Without Caller ID 1. From the main menu, use the left and right Arrow buttons Select button . to scroll to Fax, and then press the 2. Press the right Arrow button button . until Fax Setup appears on the display, and then press the Select 3. Press the right Arrow button button . until Block No-ID appears on the display, and then press the Select 4. Press the right Arrow button . 5. until On appears on the display, and then press the Select button
-
 1
1 -
2
-
3
-
4
-
5
-
6
-
7
-
8
-
9
-
10
-
11
-
12
-
13
-
14
-
15
-
16
-
17
-
18
-
19
-
20
-
21
-
22
-
23
-
24
-
25
-
26
-
27
-
28
-
29
-
30
-
31
-
32
-
33
-
34
-
35
-
36
-
37
-
38
-
39
-
40
-
41
-
42
-
43
-
44
-
45
-
46
-
47
-
48
-
49
-
50
-
51
-
52
-
53
-
54
-
55
-
56
-
57
-
58
-
59
-
60
-
61
-
62
-
63
-
64
-
65
-
66
-
67
-
 68
68 -
 69
69 -
 70
70 -
 71
71 -
 72
72 -
 73
73 -
 74
74 -
 75
75 -
 76
76 -
 77
77 -
 78
78 -
79
-
80
-
81
-
82
-
83
-
84
-
85
-
86
-
87
-
88
-
89
-
90
-
91
-
92
-
93
-
94
-
95
-
96
-
97
-
98
-
99
-
100
-
101
 |
 |
