Dell 962 Owner's Manual - Page 65
Adding Fax Numbers From Which to Block Faxes, Using Auto Fax Convert, Select, Black, Color
 |
View all Dell 962 manuals
Add to My Manuals
Save this manual to your list of manuals |
Page 65 highlights
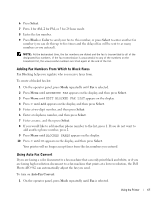
6 Press Select. 7 Press 1 for AM, 2 for PM, or 3 for 24 hour mode. 8 Enter the fax number. 9 Press Black or Color to send your fax to this number, or press Select to enter another fax number (you can do this up to five times and the delayed fax will be sent to as many numbers as you entered). NOTE: At the designated time, the fax numbers are dialed and the fax is transmitted to all of the designated fax numbers. If the fax transmission is unsuccessful to any of the numbers on the broadcast list, the unsuccessful numbers are tried again at the end of the list. Adding Fax Numbers From Which to Block Faxes Fax Blocking helps you regulate who you receive faxes from. To create a blocked fax list: 1 On the operator panel, press Mode repeatedly until Fax is selected. 2 Press Menu until ADVANCED FAX appears on the display, and then press Select. 3 Press Menu until EDIT BLOCKED FAX LIST appears on the display. 4 Press > until Add appears on the display, and then press Select. 5 Enter a two-digit number, and then press Select. 6 Enter a telephone number, and then press Select. 7 Enter a name, and then press Select. 8 If you would like to add another phone number to the list, press 1. If you do not want to add another phone number, press 2. 9 Press Menu until BLOCKED FAXES appears on the display. 10 Press > until On appears on the display, and then press Select. Your printer will no longer accept faxes from the fax numbers you entered. Using Auto Fax Convert If you are faxing a color document to a fax machine that can only print black and white, or if you are faxing high-resolution document to a fax machine that prints at a lower resolution, the Dell Photo AIO 962 can automatically adjust the fax you send. To turn on Auto Fax Convert: 1 On the operator panel, press Mode repeatedly until Fax is selected. Using the Printer 65
-
 1
1 -
2
-
3
-
4
-
5
-
6
-
7
-
8
-
9
-
10
-
11
-
12
-
13
-
14
-
15
-
16
-
17
-
18
-
19
-
20
-
21
-
22
-
23
-
24
-
25
-
26
-
27
-
28
-
29
-
30
-
31
-
32
-
33
-
34
-
35
-
36
-
37
-
38
-
39
-
40
-
41
-
42
-
43
-
44
-
45
-
46
-
47
-
48
-
49
-
50
-
51
-
52
-
53
-
54
-
55
-
56
-
57
-
58
-
59
-
 60
60 -
 61
61 -
 62
62 -
 63
63 -
 64
64 -
 65
65 -
 66
66 -
 67
67 -
 68
68 -
 69
69 -
 70
70 -
71
-
72
-
73
-
74
-
75
-
76
-
77
-
78
-
79
-
80
-
81
-
82
-
83
-
84
-
85
-
86
-
87
-
88
-
89
-
90
-
91
-
92
-
93
-
94
-
95
-
96
-
97
-
98
-
99
-
100
-
101
-
102
-
103
-
104
-
105
-
106
-
107
-
108
-
109
-
110
-
111
-
112
-
113
-
114
-
115
-
116
-
117
-
118
-
119
-
120
-
121
-
122
 |
 |