Dell Alienware Aurora R13 Service Manual - Page 57
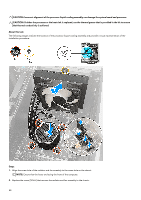
Installing the processor liquid-cooling assembly
 |
View all Dell Alienware Aurora R13 manuals
Add to My Manuals
Save this manual to your list of manuals |
Page 57 highlights
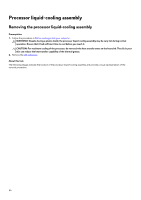
Steps 1. Lay the computer on the right side. 2. Remove the screw (M3x5) that secures the radiator and fan assembly to the chassis. 3. Disconnect the processor-cooling assembly cables from the system board. 4. Loosen the four captive screws that secure the processor cooler to the system board. 5. Lift the processor-cooling assembly along with the cables off the system board. Installing the processor liquid-cooling assembly Prerequisites If you are replacing a component, remove the existing component before performing the installation procedure. 57
-
 1
1 -
2
-
3
-
4
-
5
-
6
-
7
-
8
-
9
-
10
-
11
-
12
-
13
-
14
-
15
-
16
-
17
-
18
-
19
-
20
-
21
-
22
-
23
-
24
-
25
-
26
-
27
-
28
-
29
-
30
-
31
-
32
-
33
-
34
-
35
-
36
-
37
-
38
-
39
-
40
-
41
-
42
-
43
-
44
-
45
-
46
-
47
-
48
-
49
-
50
-
51
-
 52
52 -
 53
53 -
 54
54 -
 55
55 -
 56
56 -
 57
57 -
 58
58 -
 59
59 -
 60
60 -
 61
61 -
 62
62 -
63
-
64
-
65
-
66
-
67
-
68
-
69
-
70
-
71
-
72
-
73
-
74
-
75
-
76
-
77
-
78
-
79
-
80
-
81
-
82
-
83
-
84
-
85
-
86
-
87
-
88
-
89
-
90
-
91
-
92
-
93
-
94
-
95
-
96
-
97
-
98
-
99
-
100
-
101
-
102
-
103
-
104
-
105
 |
 |
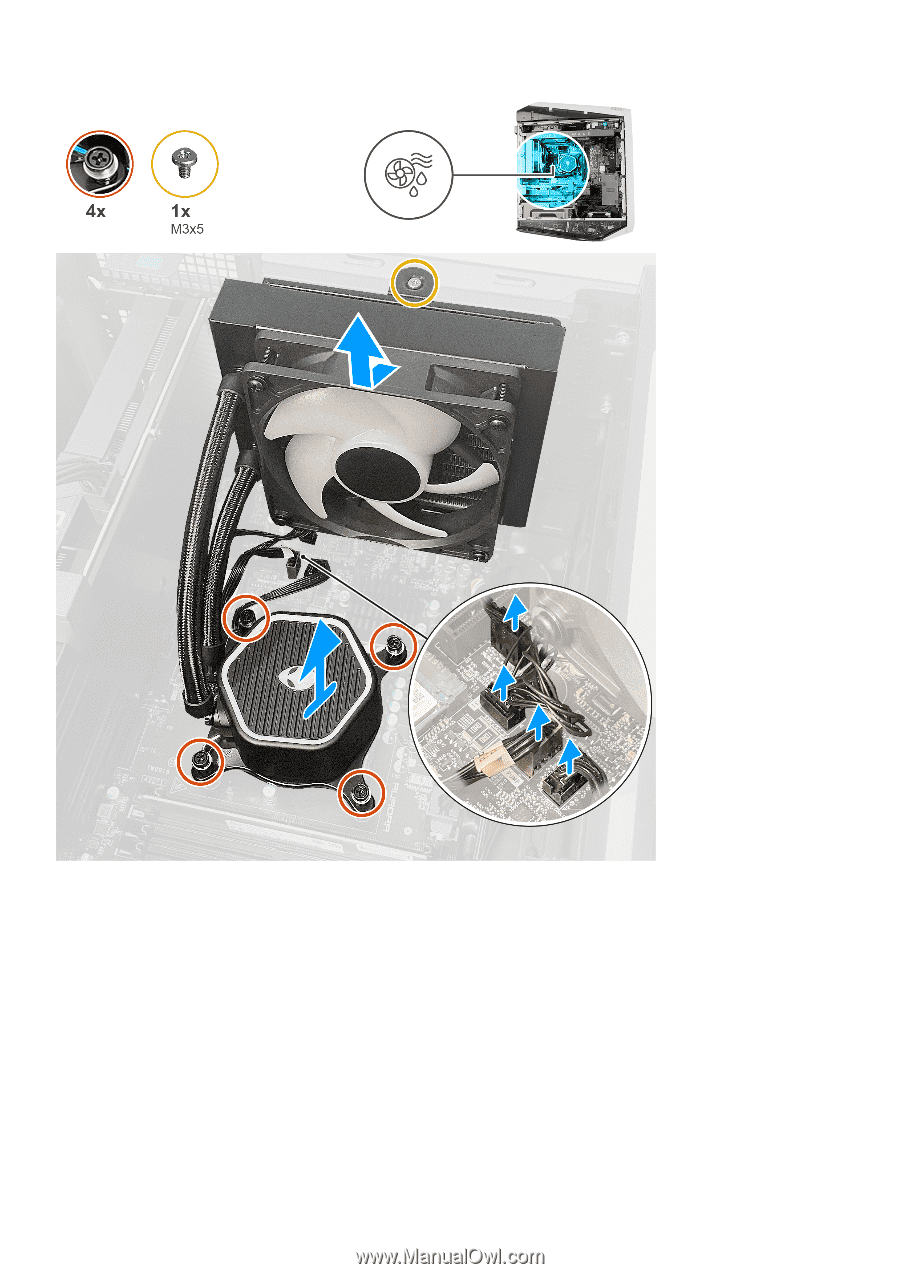
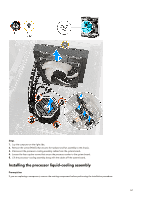
Steps
1.
Lay the computer on the right side.
2.
Remove the screw (M3x5) that secures the radiator and fan assembly to the chassis.
3.
Disconnect the processor-cooling assembly cables from the system board.
4.
Loosen the four captive screws that secure the processor cooler to the system board.
5.
Lift the processor-cooling assembly along with the cables off the system board.
Installing the processor liquid-cooling assembly
Prerequisites
If you are replacing a component, remove the existing component before performing the installation procedure.
57