Dell B2360dn Mono Laser Printer User Guide - Page 23
Networking, Preparing to set up the printer on an Ethernet network
 |
View all Dell B2360dn Mono Laser Printer manuals
Add to My Manuals
Save this manual to your list of manuals |
Page 23 highlights
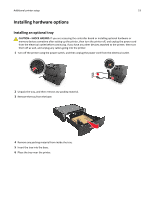
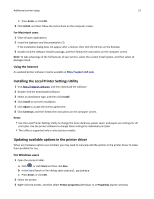
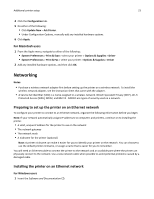
Additional printer setup 23 4 Click the Configuration tab. 5 Do either of the following: • Click Update Now ‑ Ask Printer. • Under Configuration Options, manually add any installed hardware options. 6 Click Apply. For Macintosh users 1 From the Apple menu, navigate to either of the following: • System Preferences > Print & Scan > select your printer > Options & Supplies > Driver • System Preferences > Print & Fax > select your printer > Options & Supplies > Driver 2 Add any installed hardware options, and then click OK. Networking Notes: • Purchase a wireless network adapter first before setting up the printer on a wireless network. To install the wireless network adapter, see the instruction sheet that came with the adapter. • A Service Set Identifier (SSID) is a name assigned to a wireless network. Wired Equivalent Privacy (WEP), Wi-Fi Protected Access (WPA), WPA2, and 802.1X - RADIUS are types of security used on a network. Preparing to set up the printer on an Ethernet network To configure your printer to connect to an Ethernet network, organize the following information before you begin: Note: If your network automatically assigns IP addresses to computers and printers, continue on to installing the printer. • A valid, unique IP address for the printer to use on the network • The network gateway • The network mask • A nickname for the printer (optional) Note: A printer nickname can make it easier for you to identify your printer on the network. You can choose to use the default printer nickname, or assign a name that is easier for you to remember. You will need an Ethernet cable to connect the printer to the network and an available port where the printer can physically connect to the network. Use a new network cable when possible to avoid potential problems caused by a damaged cable. Installing the printer on an Ethernet network For Windows users 1 Insert the Software and Documentation CD.
-
 1
1 -
2
-
3
-
4
-
5
-
6
-
7
-
8
-
9
-
10
-
11
-
12
-
13
-
14
-
15
-
16
-
17
-
 18
18 -
 19
19 -
 20
20 -
 21
21 -
 22
22 -
 23
23 -
 24
24 -
 25
25 -
 26
26 -
 27
27 -
 28
28 -
29
-
30
-
31
-
32
-
33
-
34
-
35
-
36
-
37
-
38
-
39
-
40
-
41
-
42
-
43
-
44
-
45
-
46
-
47
-
48
-
49
-
50
-
51
-
52
-
53
-
54
-
55
-
56
-
57
-
58
-
59
-
60
-
61
-
62
-
63
-
64
-
65
-
66
-
67
-
68
-
69
-
70
-
71
-
72
-
73
-
74
-
75
-
76
-
77
-
78
-
79
-
80
-
81
-
82
-
83
-
84
-
85
-
86
-
87
-
88
-
89
-
90
-
91
-
92
-
93
-
94
-
95
-
96
-
97
-
98
-
99
-
100
-
101
-
102
-
103
-
104
-
105
-
106
-
107
-
108
-
109
-
110
-
111
-
112
-
113
-
114
-
115
-
116
-
117
-
118
-
119
-
120
-
121
-
122
-
123
-
124
-
125
-
126
-
127
-
128
-
129
-
130
-
131
-
132
-
133
-
134
-
135
-
136
-
137
-
138
-
139
-
140
-
141
-
142
-
143
-
144
-
145
-
146
-
147
-
148
-
149
-
150
-
151
-
152
-
153
-
154
-
155
-
156
-
157
-
158
 |
 |
