Dell DS-32M2 Installation Guide - Page 17
Installing the DS-16M2 and DS-32M2 Switches, Mounting Bracket Installation
 |
View all Dell DS-32M2 manuals
Add to My Manuals
Save this manual to your list of manuals |
Page 17 highlights
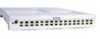
Installing the DS-16M2 and DS-32M2 Switches Installing the DS-16M2 and DS-32M2 Switches This section describes the procedures for installing the DS-16M2 and DS-32M2 switches in a rack/cabinet, including attaching the brackets on the switch. Both switches are installed in the rack/cabinet the same way. Note, however, that the DS-16M should be positioned at the top of the rack/cabinet, above the DS-32M. Mounting Bracket Installation NOTE: The mounting brackets are the same for both the DS-16M2 and DS-32M2. You must attach mounting brackets to the switch before installing it on the rails. The mounting brackets slide into the C channel of the rails. Follow the steps below to attach the mounting brackets to the switch. 1. Orient the L-shaped end of the bracket upward and to the fan end of the switch as shown in the figure below. At the fan end of the switch 2. Place the bracket against the switch with the counter-sunk screw holes facing outward. Align the five screw holes in the bracket with the five screw holes on the side of the switch. To guarantee that all the screw holes in the bracket orient correctly with the screw holes in the switch, first align the bracket's middle screw hole with the middle screw hole in the switch. EMC Departmental Switches DS-16M2 and DS-32M2 Installation Guide 17
-
 1
1 -
2
-
3
-
4
-
5
-
6
-
7
-
8
-
9
-
10
-
11
-
 12
12 -
 13
13 -
 14
14 -
 15
15 -
 16
16 -
 17
17 -
 18
18 -
 19
19 -
 20
20 -
 21
21 -
 22
22
 |
 |
