Dell DS-32M2 Installation Guide - Page 19
rack/cabinet., Secure the brackets to the rails with two M3 x 8 mm pan-head
 |
View all Dell DS-32M2 manuals
Add to My Manuals
Save this manual to your list of manuals |
Page 19 highlights
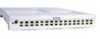
Installing the DS-16M2 and DS-32M2 Switches 5. Push the switch further into the rack/cabinet until the hole in the front part of each bracket (the "L"-shaped end) aligns with the hole on the fixed rail. See the figure below. C channel Align hole in bracket with hole in the fixed rail 6. Tighten the front screws securing the rails to the front of the rack/cabinet. 7. Secure the brackets to the rails with two M3 x 8 mm pan-head screws (see the table on page 3), one on each side, as shown below. EMC Departmental Switches DS-16M2 and DS-32M2 Installation Guide 19
-
 1
1 -
2
-
3
-
4
-
5
-
6
-
7
-
8
-
9
-
10
-
11
-
12
-
13
-
 14
14 -
 15
15 -
 16
16 -
 17
17 -
 18
18 -
 19
19 -
 20
20 -
 21
21 -
 22
22
 |
 |

EMC Departmental Switches DS-16M2 and DS-32M2
Installation Guide
19
Installing the DS-16M2 and DS-32M2 Switches
5.
Push the switch further into the rack/cabinet until the hole in the
front part of each bracket (the “L”-shaped end) aligns with the
hole on the fixed rail. See the figure below.
6.
Tighten the front screws securing the rails to the front of the
rack/cabinet.
7.
Secure the brackets to the rails with two M3 x 8 mm pan-head
screws (see the table on page 3), one on each side, as shown
below.
C channel
Align hole in bracket
with hole in the fixed rail