Dell Force10 S2410-01-10GE-24P SFTOS Configuration Guide - Page 29
Connecting to the Console Port
 |
View all Dell Force10 S2410-01-10GE-24P manuals
Add to My Manuals
Save this manual to your list of manuals |
Page 29 highlights
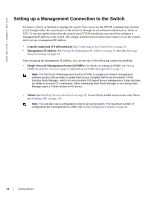
Connecting to the Console Port To access the console port, follow the procedure below: Step 1 Task Caution: Install a straight-through RJ-45 copper cable (for example, an Ethernet cable) into the console port. This is different from many other implementations that require a crossover (rollover) cable. If connecting to a terminal server and using an Ethernet crossover cable, daisychain another crossover cable to effectively get a straight-through cable connection. Many console terminal servers use octopus cables that are crossover cables. As above, connect an additional crossover cable. fn00162s50 2 Connect the RJ-45/DB-9 adapter that is shipped with the switch to the RJ-45 cable. Note: The console port pinout: Pin 1 = NC Pin 2 = NC Pin 3 = RXD Pin 4 = GND Pin 5 = GND Pin 6 = TXD Pin 7 = NC Pin 8 = NC 3 Connect the adapter to a laptop. 4 Once a connection is established, ensure the following terminal settings (default settings) at both ends: 9600 baud rate, no parity, 8 data bits, 1 stop bit, no flow control (console port only). If you want to change the settings (such as if you want to download software at a higher speed), you must change the serial configuration on both the switch and computer. See the command options in the following step. For more on changing settings, see the hardware guide or the Quick Reference. Getting Started | 29
-
 1
1 -
2
-
3
-
4
-
5
-
6
-
7
-
8
-
9
-
10
-
11
-
12
-
13
-
14
-
15
-
16
-
17
-
18
-
19
-
20
-
21
-
22
-
23
-
 24
24 -
 25
25 -
 26
26 -
 27
27 -
 28
28 -
 29
29 -
 30
30 -
 31
31 -
 32
32 -
 33
33 -
 34
34 -
35
-
36
-
37
-
38
-
39
-
40
-
41
-
42
-
43
-
44
-
45
-
46
-
47
-
48
-
49
-
50
-
51
-
52
-
53
-
54
-
55
-
56
-
57
-
58
-
59
-
60
-
61
-
62
-
63
-
64
-
65
-
66
-
67
-
68
-
69
-
70
-
71
-
72
-
73
-
74
-
75
-
76
-
77
-
78
-
79
-
80
-
81
-
82
-
83
-
84
-
85
-
86
-
87
-
88
-
89
-
90
-
91
-
92
-
93
-
94
-
95
-
96
-
97
-
98
-
99
-
100
-
101
-
102
-
103
-
104
-
105
-
106
-
107
-
108
-
109
-
110
-
111
-
112
-
113
-
114
-
115
-
116
-
117
-
118
-
119
-
120
-
121
-
122
-
123
-
124
-
125
-
126
-
127
-
128
-
129
-
130
-
131
-
132
-
133
-
134
-
135
-
136
-
137
-
138
-
139
-
140
-
141
-
142
-
143
-
144
-
145
-
146
-
147
-
148
-
149
-
150
-
151
-
152
-
153
-
154
-
155
-
156
-
157
-
158
-
159
-
160
-
161
-
162
-
163
-
164
-
165
-
166
-
167
-
168
-
169
-
170
-
171
-
172
-
173
-
174
-
175
-
176
-
177
-
178
-
179
-
180
-
181
-
182
-
183
-
184
-
185
-
186
-
187
-
188
-
189
-
190
-
191
-
192
-
193
-
194
-
195
-
196
-
197
-
198
-
199
-
200
-
201
-
202
-
203
-
204
-
205
-
206
-
207
-
208
-
209
-
210
-
211
-
212
-
213
-
214
-
215
-
216
-
217
-
218
-
219
-
220
-
221
-
222
-
223
-
224
-
225
-
226
-
227
-
228
-
229
-
230
-
231
-
232
-
233
-
234
-
235
-
236
-
237
-
238
-
239
-
240
-
241
-
242
-
243
-
244
-
245
-
246
-
247
-
248
-
249
-
250
-
251
-
252
-
253
-
254
-
255
-
256
-
257
-
258
-
259
-
260
-
261
-
262
-
263
-
264
-
265
-
266
-
267
-
268
-
269
-
270
-
271
-
272
-
273
-
274
-
275
-
276
-
277
-
278
-
279
-
280
-
281
-
282
-
283
-
284
-
285
-
286
-
287
-
288
-
289
-
290
-
291
-
292
-
293
-
294
-
295
-
296
-
297
-
298
-
299
-
300
-
301
-
302
-
303
-
304
-
305
-
306
 |
 |
