Dell Inspiron 1318 Dell™ Technology Guide - Page 93
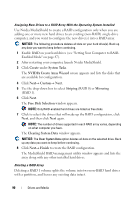
Recovering From a Single Hard Drive Failure RAID 1
 |
View all Dell Inspiron 1318 manuals
Add to My Manuals
Save this manual to your list of manuals |
Page 93 highlights
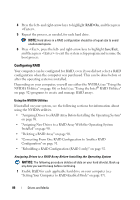
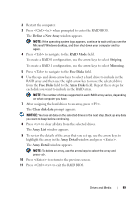
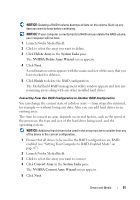
• "Creating a RAID Level 0 Configuration With the Operating System Installed" on page 94. • "Creating a RAID Level 0 Configuration With the Operating System Installed" on page 94. • "Creating a RAID Level 1 Configuration With the Operating System Installed" on page 95. • "Recovering From a Single Hard Drive Failure (RAID 1)" on page 95. • "Migrating to a RAID Level 0 Configuration" on page 96. • "Migrating to a RAID Level 1 Configuration" on page 97. Configuring a RAID 0 or RAID 1 Array Before Installing the Operating System NOTICE: You lose any data on your hard drives when you create a RAID configuration using the following procedure. Back up data that you want to keep before continuing. NOTICE: Use the following procedure only if you are reinstalling your operating system. Do not use the following procedure to migrate an existing storage configuration to RAID level 0 configuration. 1 Set your computer to RAID-enabled mode (see "Setting Your Computer to RAID-Enabled Mode" on page 87). 2 Press when you are prompted to enter the Intel RAID Option ROM utility. 3 Press the up- and down-arrow keys to highlight Create RAID Volume, and press . 4 Enter a RAID volume name or accept the default, and press . For RAID 0 a Press the up- and down-arrow keys to select RAID0 (Stripe). NOTE: Select the stripe size closest to the size of the average file that you want to store on the RAID volume. If you do not know the average file size, choose 128 KB as your stripe size. b Press the up- and down-arrow keys to change the stripe size and press . Drives and Media 93
-
 1
1 -
2
-
3
-
4
-
5
-
6
-
7
-
8
-
9
-
10
-
11
-
12
-
13
-
14
-
15
-
16
-
17
-
18
-
19
-
20
-
21
-
22
-
23
-
24
-
25
-
26
-
27
-
28
-
29
-
30
-
31
-
32
-
33
-
34
-
35
-
36
-
37
-
38
-
39
-
40
-
41
-
42
-
43
-
44
-
45
-
46
-
47
-
48
-
49
-
50
-
51
-
52
-
53
-
54
-
55
-
56
-
57
-
58
-
59
-
60
-
61
-
62
-
63
-
64
-
65
-
66
-
67
-
68
-
69
-
70
-
71
-
72
-
73
-
74
-
75
-
76
-
77
-
78
-
79
-
80
-
81
-
82
-
83
-
84
-
85
-
86
-
87
-
 88
88 -
 89
89 -
 90
90 -
 91
91 -
 92
92 -
 93
93 -
 94
94 -
 95
95 -
 96
96 -
 97
97 -
 98
98 -
99
-
100
-
101
-
102
-
103
-
104
-
105
-
106
-
107
-
108
-
109
-
110
-
111
-
112
-
113
-
114
-
115
-
116
-
117
-
118
-
119
-
120
-
121
-
122
-
123
-
124
-
125
-
126
-
127
-
128
-
129
-
130
-
131
-
132
-
133
-
134
-
135
-
136
-
137
-
138
-
139
-
140
-
141
-
142
-
143
-
144
-
145
-
146
-
147
-
148
-
149
-
150
-
151
-
152
-
153
-
154
-
155
-
156
-
157
-
158
-
159
-
160
-
161
-
162
-
163
-
164
-
165
-
166
-
167
-
168
-
169
-
170
-
171
-
172
-
173
-
174
-
175
-
176
-
177
-
178
-
179
-
180
-
181
-
182
-
183
-
184
-
185
-
186
-
187
-
188
-
189
-
190
-
191
-
192
-
193
-
194
-
195
-
196
-
197
-
198
-
199
-
200
-
201
-
202
-
203
-
204
-
205
-
206
-
207
-
208
-
209
-
210
-
211
-
212
-
213
-
214
-
215
-
216
-
217
-
218
-
219
-
220
-
221
-
222
-
223
-
224
-
225
-
226
-
227
-
228
-
229
-
230
-
231
-
232
-
233
-
234
-
235
-
236
-
237
-
238
-
239
-
240
-
241
-
242
-
243
-
244
-
245
-
246
-
247
-
248
-
249
-
250
-
251
-
252
-
253
-
254
-
255
-
256
-
257
-
258
-
259
-
260
-
261
-
262
-
263
-
264
-
265
-
266
-
267
-
268
-
269
-
270
-
271
-
272
-
273
-
274
-
275
-
276
-
277
-
278
-
279
-
280
-
281
-
282
-
283
-
284
-
285
-
286
-
287
-
288
-
289
-
290
-
291
-
292
-
293
-
294
-
295
-
296
-
297
-
298
-
299
-
300
-
301
-
302
-
303
-
304
-
305
-
306
-
307
-
308
-
309
-
310
-
311
-
312
-
313
-
314
-
315
-
316
-
317
-
318
-
319
-
320
-
321
-
322
-
323
-
324
-
325
-
326
-
327
-
328
-
329
-
330
-
331
-
332
-
333
-
334
-
335
-
336
-
337
-
338
-
339
-
340
-
341
-
342
-
343
-
344
-
345
-
346
-
347
-
348
-
349
-
350
-
351
-
352
-
353
-
354
 |
 |