Dell Inspiron 5370 Inspiron 13 5000 Service Manual - Page 120
Flashing BIOS (USB key), Fixing a no-boot issue caused by USB-boot support
 |
View all Dell Inspiron 5370 manuals
Add to My Manuals
Save this manual to your list of manuals |
Page 120 highlights
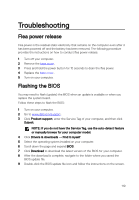
Flashing BIOS (USB key) 1 Follow the procedure from step 1 to step 7 in "Flashing the BIOS" to download the latest BIOS setup program file. 2 Create a bootable USB drive. For more information see the knowledge base article SLN143196 at www.dell.com/support. 3 Copy the BIOS setup program file to the bootable USB drive. 4 Connect the bootable USB drive to the computer that needs the BIOS update. 5 Restart the computer and press F12 when the Dell logo is displayed on the screen. 6 Boot to the USB drive from the One Time Boot Menu. 7 Type the BIOS setup program filename and press Enter. 8 The BIOS Update Utility appears. Follow the instructions on the screen to complete the BIOS update. Fixing a no-boot issue caused by USB-boot support Sometimes the computer does not boot to the operating system when USB devices are connected to the computer during startup. This behavior occurs because the computer is looking for bootable files in connected USB devices. Either disconnect USB devices before booting or follow these steps to fix the noboot issue. 1 Turn on or restart your computer. 2 Press F2 when the Dell logo is displayed on the screen to enter the BIOS setup program. The BIOS setup program is displayed. 3 On the left pane, select Settings → System Configuration → USB Configuration. The USB configuration is displayed on the right pane. 4 Clear the Enable Boot Support check box to disable it. 5 Save the settings and exit. 120
-
 1
1 -
2
-
3
-
4
-
5
-
6
-
7
-
8
-
9
-
10
-
11
-
12
-
13
-
14
-
15
-
16
-
17
-
18
-
19
-
20
-
21
-
22
-
23
-
24
-
25
-
26
-
27
-
28
-
29
-
30
-
31
-
32
-
33
-
34
-
35
-
36
-
37
-
38
-
39
-
40
-
41
-
42
-
43
-
44
-
45
-
46
-
47
-
48
-
49
-
50
-
51
-
52
-
53
-
54
-
55
-
56
-
57
-
58
-
59
-
60
-
61
-
62
-
63
-
64
-
65
-
66
-
67
-
68
-
69
-
70
-
71
-
72
-
73
-
74
-
75
-
76
-
77
-
78
-
79
-
80
-
81
-
82
-
83
-
84
-
85
-
86
-
87
-
88
-
89
-
90
-
91
-
92
-
93
-
94
-
95
-
96
-
97
-
98
-
99
-
100
-
101
-
102
-
103
-
104
-
105
-
106
-
107
-
108
-
109
-
110
-
111
-
112
-
113
-
114
-
 115
115 -
 116
116 -
 117
117 -
 118
118 -
 119
119 -
 120
120 -
 121
121 -
 122
122 -
 123
123 -
 124
124 -
 125
125
 |
 |
