Dell Latitude 13 3380 Latitude 3380 Owners Manual
Dell Latitude 13 3380 Manual
 |
View all Dell Latitude 13 3380 manuals
Add to My Manuals
Save this manual to your list of manuals |
Dell Latitude 13 3380 manual content summary:
- Dell Latitude 13 3380 | Latitude 3380 Owners Manual - Page 1
Latitude 3380 Owner's Manual Regulatory Model: P80G Regulatory Type: P80G001 - Dell Latitude 13 3380 | Latitude 3380 Owners Manual - Page 2
of data and tells you how to avoid the problem. WARNING: A WARNING indicates a potential for property damage, personal injury, or death. © 2018 Dell Inc. or its subsidiaries. All rights reserved. Dell, EMC, and other trademarks are trademarks of Dell Inc. or its subsidiaries. Other trademarks may be - Dell Latitude 13 3380 | Latitude 3380 Owners Manual - Page 3
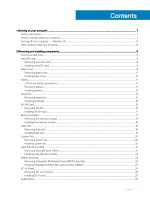
Contents 1 Working on your computer...7 Safety instructions...7 Before working inside your computer...7 Turning off your computer - cover...9 Installing base cover...10 Battery...11 Lithium-ion battery precautions...11 Removing battery...11 Installing battery...12 Keyboard...12 Removing keyboard... - Dell Latitude 13 3380 | Latitude 3380 Owners Manual - Page 4
audio board...27 Coin cell battery...27 Removing the coin cell battery...27 Installing coin cell battery...28 Speakers...29 Removing speaker... Chipsets...38 Identifying the chipset in Device Manager on Windows 10 38 Intel HD Graphics ...38 Display options...39 Identifying the display adapter...39 - Dell Latitude 13 3380 | Latitude 3380 Owners Manual - Page 5
...60 Port and connector specifications...60 Display specifications...61 Keyboard specifications...61 Touchpad specifications...61 Battery specifications...62 AC adapter specifications...62 Physical specifications...63 Environmental specifications...63 6 Troubleshooting...64 Contents 5 - Dell Latitude 13 3380 | Latitude 3380 Owners Manual - Page 6
Real Time Clock (RTC) reset...64 Enhanced Pre-Boot System Assessment (ePSA) diagnostics 64 Running the ePSA diagnostics...65 7 Contacting Dell...66 6 Contents - Dell Latitude 13 3380 | Latitude 3380 Owners Manual - Page 7
only perform troubleshooting and simple repairs as authorized in your product documentation, or as directed by the online or telephone service and support team. Damage due to servicing that is not authorized by Dell is not covered by your warranty. Read and follow the safety instructions that came - Dell Latitude 13 3380 | Latitude 3380 Owners Manual - Page 8
turning on your computer. CAUTION: To avoid damage to the computer, use only the battery designed for this particular Dell computer. Do not use batteries designed for other Dell computers. 1 Replace the battery. 2 Replace the base cover. 3 Connect any external devices, such as a port replicator or - Dell Latitude 13 3380 | Latitude 3380 Owners Manual - Page 9
screw driver is for screws 0-1 and the #1 screw driver is for screws 2-4 microSD card Removing microSD card 1 Press in on the microSD card to release it from the computer. 2 Remove the microSD card from the computer. Installing microSD card Slide the microSD card into its slot until it clicks into - Dell Latitude 13 3380 | Latitude 3380 Owners Manual - Page 10
Installing base cover 1 Align the base cover with the screw holders on the computer. 2 Press the edges of the cover until it clicks into place. 3 Tighten the M2.5xL8.5 screws to secure the base cover to the computer. 4 Install the microSD card. 5 Follow the procedure in After working inside your - Dell Latitude 13 3380 | Latitude 3380 Owners Manual - Page 11
the entire system should be replaced. Contact https://www.dell.com/support for assistance and further instructions. • Always purchase genuine batteries from https://www.dell.com or authorized Dell partners and re-sellers. Removing battery 1 Follow the procedure in Before working inside your computer - Dell Latitude 13 3380 | Latitude 3380 Owners Manual - Page 12
procedure in After working inside your computer. Keyboard Removing keyboard 1 Follow the procedure in Before working inside your computer. 2 Remove the: a microSD card b base cover c battery 3 Disconnect the keyboard cable from the system board. 12 Removing and installing components - Dell Latitude 13 3380 | Latitude 3380 Owners Manual - Page 13
holes using a plastic scribe. NOTE: It takes some force to push out the keyboard through the two release holes. Please exercise due caution. NOTE: Picture for representational purpose to show exact location of keyboard latches. It is not necessary to remove the heat - Dell Latitude 13 3380 | Latitude 3380 Owners Manual - Page 14
5 Gently pry up the lower edge of the keyboard from the computer. 14 Removing and installing components - Dell Latitude 13 3380 | Latitude 3380 Owners Manual - Page 15
6 Remove the keyboard away from the computer. Removing and installing components 15 - Dell Latitude 13 3380 | Latitude 3380 Owners Manual - Page 16
the tabs on the computer and press it until it clicks into place . 2 Connect the keyboard cable on the system board. 3 Install the: a battery b base cover c microSD card 4 Follow the procedure in After working inside your computer. WLAN Card Removing WLAN 1 Follow the procedure in Before working - Dell Latitude 13 3380 | Latitude 3380 Owners Manual - Page 17
the metal bracket on the WLAN. 4 Tighten the M2xL3 screw to secure the WLAN card and bracket to the system board. 5 Install the: a battery b base cover c microSD card 6 Follow the procedure in After working inside your computer. Memory Module Removing the memory module 1 Follow the procedure in - Dell Latitude 13 3380 | Latitude 3380 Owners Manual - Page 18
memory module into its connector on the system board. 2 Gently push the memory module until the latches snap it into place. 3 Install the: a battery b base cover c microSD card 4 Follow the procedure in After working inside your computer. Heat sink Removing heat sink 1 Follow the procedure in Before - Dell Latitude 13 3380 | Latitude 3380 Owners Manual - Page 19
computer. NOTE: Follow the diagonal pattern to tighten the screws, similar to the pattern followed to loosen the screws in "Removing heat sink". 3 Install the: a battery b base cover c microSD card 4 Follow the procedure in After working inside your computer. Removing and installing components 19 - Dell Latitude 13 3380 | Latitude 3380 Owners Manual - Page 20
System Fan Removing system fan 1 Follow the procedure in Before working inside your computer. 2 Remove the: a microSD card b base cover c battery 3 To remove the system fan: a Unroute the WLAN cable from the connector on the system board [1]. b Pry out the cable from its hook [2]. 4 Disconnect the - Dell Latitude 13 3380 | Latitude 3380 Owners Manual - Page 21
to the system board. 3 Connect the fan cable to the system board. 4 Route the WLAN cable onto its hook on the system board. 5 Install the: a battery b base cover c microSD card 6 Follow the procedure in After working inside your computer. Hard disk drive (HDD) Removing hard disk drive (HDD) 1 Follow - Dell Latitude 13 3380 | Latitude 3380 Owners Manual - Page 22
4 Disconnect the HDD cable interposer. 5 Then, remove the M3xL3 screws to detach the metal bracket from the HDD [1]. 22 Removing and installing components - Dell Latitude 13 3380 | Latitude 3380 Owners Manual - Page 23
Removing Embedded Multimedia Card (eMMC) assembly 1 Follow the procedure in Before working inside your computer. 2 Remove the: a microSD card b base cover c battery 3 Disconnect the interposer cable from the system board, remove the M2.0L3 screws that secure the bracket to the chassis and gently - Dell Latitude 13 3380 | Latitude 3380 Owners Manual - Page 24
4 Disconnect the hard drive interposer from the eMM card. 5 Flip the hard drive bracket, remove the screws (M2.0) and take out the eMM card from the bracket. 24 Removing and installing components - Dell Latitude 13 3380 | Latitude 3380 Owners Manual - Page 25
0L3 screws that secure the eMMC assembly to the chassis. 3 Connect the interposer cable to its connector on the system board. 4 Install the: a battery b base cover c microSD card 5 Follow the procedure in After working inside your computer. DC-In Board Removing DC in connector 1 Follow the procedure - Dell Latitude 13 3380 | Latitude 3380 Owners Manual - Page 26
computer. 2 Tighten the M2.5xL5 screw of the hinge to secure port. 3 Connect the DC-in cable to the system board. 4 Install the: a battery b base cover c microSD card 5 Follow the procedure in After working inside your computer. Audio board Removing the audio board 1 Follow the procedure in Before - Dell Latitude 13 3380 | Latitude 3380 Owners Manual - Page 27
the audio board cable to its connector on the system board. 5 Install the: a battery b base cover c microSD card 6 Follow the procedure in After working inside your computer. Coin cell battery Removing the coin cell battery 1 Follow the procedure in Before working inside your computer. 2 Remove the - Dell Latitude 13 3380 | Latitude 3380 Owners Manual - Page 28
to the system and release the cable [2]. c Lift and remove the coin cell from the system [3]. NOTE: A strong adhesive is used on the coin battery; a bit of force is needed to peel up the battery from the palmrest. Installing coin cell battery 1 Place the coin cell battery into the system. 2 Route - Dell Latitude 13 3380 | Latitude 3380 Owners Manual - Page 29
working inside your computer. 2 Remove the: a microSD card b base cover c battery 3 To remove the speaker: a Disconnect the speaker cable from the connector on the system board [1]. b Lift the speaker cable off from the cable guide [2]. c Remove the adhesive tape that secures the speaker cable to - Dell Latitude 13 3380 | Latitude 3380 Owners Manual - Page 30
process is for both nontouch and touch LCDs 1 Follow the procedure in Before working inside your computer. 2 Remove the: a microSD card b base cover c battery d WLAN Card e DC-IN board 3 Remove the screw that secures the metal bracket of the display cable [1] and remove it from the system [2]. Then - Dell Latitude 13 3380 | Latitude 3380 Owners Manual - Page 31
4 Remove the M1.6xL2 screws [1] and lift the display assembly away from the computer [2]. Removing and installing components 31 - Dell Latitude 13 3380 | Latitude 3380 Owners Manual - Page 32
over the connector and tighten the screw to secure the display cable to the computer. 6 Install the: a WLAN card b DC-IN board c battery d base cover e microSD card 7 Follow the procedure in After working inside your computer System board Removing system board 1 Follow the procedure in Before - Dell Latitude 13 3380 | Latitude 3380 Owners Manual - Page 33
4 Disconnect the following cables and connectors: a Audio board cable connector [1] b Audio board cable tape [2] c Speaker cable connector [3] d HDD cable connector [4] e Touchpad cable connector [5] f Keyboard cable connector [6] Removing and installing components 33 - Dell Latitude 13 3380 | Latitude 3380 Owners Manual - Page 34
5 Remove the M2xL3 screws [1] and lift the system board away from the computer [2]. 34 Removing and installing components - Dell Latitude 13 3380 | Latitude 3380 Owners Manual - Page 35
the system board to the computer. 3 Connect the audio board; audio board cable tape, speaker cable, HDD cable, touchpad cable, coin cell battery cable, and the keyboard cables to their respective connectors. 4 Connect the display cable to the connector. 5 Place the metal bracket over the connector - Dell Latitude 13 3380 | Latitude 3380 Owners Manual - Page 36
Palm rest Replacing palm rest 1 Follow the procedure in Before working inside your computer. 2 Remove the: a microSD card b base cover c battery d WLAN card e memory module f heat sink g fan h DCin i system board The component you are left with is the palm rest. 3 Install the: a system board b DCin - Dell Latitude 13 3380 | Latitude 3380 Owners Manual - Page 37
may cause fire or equipment damage. Processors This laptop is shipped with the following processors: Table 1. Intel Processor List 6th Generation (Skylake) 7th Generation (Kaby Lake) Intel Core i3-6006U Processor (15W, 3M cache, 2.0GHz) • Intel Celeron Processor G3865U (15W, 2M cache, 1.60 GHz - Dell Latitude 13 3380 | Latitude 3380 Owners Manual - Page 38
. The processor performance details are displayed. 4 Click Open Resource Monitor. Chipsets All laptops or notebooks communicate with the CPU through the chipset. This laptop is shipped with the Intel Skylake and Intel Kabylake series chipset. Identifying the chipset in Device Manager on Windows 10 - Dell Latitude 13 3380 | Latitude 3380 Owners Manual - Page 39
Changing the screen resolution 1 Right-click on the laptop and select Display Settings. 2 Tap or click slider to adjust the brightness manually. Connecting to external display devices requires 1.5 volts of electrical power to operate. DDR4 also supports a new, deep power-down mode that allows the - Dell Latitude 13 3380 | Latitude 3380 Owners Manual - Page 40
on the system display the new ON-FLASH-FLASH or ON-FLASH-ON failure code. If all memory fails, the LCD does not turn on. Troubleshoot for possible memory failure by trying known good memory modules in the memory connectors on the bottom of the system or under the keyboard, as - Dell Latitude 13 3380 | Latitude 3380 Owners Manual - Page 41
laptop supports actions after the Dell logo is displayed: laptop is shipped with the following graphics chipset: • Intel HD Graphics 610 • Intel Corei3-6606U Intel HD graphics 520 • Intel Celeron 3865U Intel HD graphics 610 • Intel Pentium 4415U Intel HD graphics 610 • Intel Core i5-7200U Intel - Dell Latitude 13 3380 | Latitude 3380 Owners Manual - Page 42
bus power and increased device current draw to better accommodate power-hungry devices • New power management features • Full-duplex data transfers and support for new transfer types • Backward USB 2.0 compatibility • New connectors and cable The topics below cover some of the most commonly asked - Dell Latitude 13 3380 | Latitude 3380 Owners Manual - Page 43
on USB 3.0/USB 3.1 Gen 1 cables and only come into contact when connected to a proper SuperSpeed USB connection. Windows 8/10 will be bringing native support for USB 3.1 Gen 1 controllers. This is in contrast to previous versions of Windows, which continue to require separate drivers for USB 3.0/USB - Dell Latitude 13 3380 | Latitude 3380 Owners Manual - Page 44
support, perhaps not on its immediate release, but in a subsequent Service Pack or update. It is not out of the question to think that following a successful release of USB 3.0/USB 3.1 Gen 1 support in Windows 7, SuperSpeed support drive options This laptop supports : • 2.5", When the Dell logo - Dell Latitude 13 3380 | Latitude 3380 Owners Manual - Page 45
and confusion of multiple cables currently used in A/V systems • HDMI supports communication between the video source (such as a DVD player) and the DTV, enabling new functionality Realtek ALC3246 This laptop is shipped with integrated Realtek ALC3246 controller High Definition audio codec designed - Dell Latitude 13 3380 | Latitude 3380 Owners Manual - Page 46
2 Select Camera from the apps list. 3 If the Camera App is not available in the apps list, search for it. 46 Technology and components - Dell Latitude 13 3380 | Latitude 3380 Owners Manual - Page 47
boot device order and boot directly to a specific device (for example: optical drive or hard drive). During the Power-on Self Test (POST), when the Dell logo appears. you can: • Access System Setup by pressing F2 key • Bring up the one-time boot menu by pressing F12 key The one-time - Dell Latitude 13 3380 | Latitude 3380 Owners Manual - Page 48
Then, shut down or restart your computer and try again. NOTE: After the Dell logo appears, you can also press F12 and then select BIOS setup. General Information: Displays BIOS Version, Service Tag, Asset Tag, Ownership Tag, Ownership Date, Manufacture Date, Express Service Code, the Signed Firmware - Dell Latitude 13 3380 | Latitude 3380 Owners Manual - Page 49
date and time. System Configuration screen options Option Drives Description Allows you to configure the SATA drives on board. • SATA-0 enabled by default • eMMC (System Default) USB Configuration This is an optional feature. This field configures the integrated USB controller. If Boot Support - Dell Latitude 13 3380 | Latitude 3380 Owners Manual - Page 50
screen options Option LCD Brightness Description Allows you to set the display brightness depending up on the power source-On Battery and On AC. The LCD brightness is independent for battery and AC adapter. It can be set using the slider. NOTE: The video setting is visible only when a video card - Dell Latitude 13 3380 | Latitude 3380 Owners Manual - Page 51
disable the feature and no further changes will be allowed. Allows you to enable the Execute Disable mode of the processor. Enable CPU XD Support-enabled by default Admin Setup Lockout Allows you to prevent users from entering Setup when an Administrator password is set. System setup options 51 - Dell Latitude 13 3380 | Latitude 3380 Owners Manual - Page 52
cores are enabled. If you disable Multi-Core Support, one core is enabled. • Enable Multi-Core Support Default setting: The option is enabled. Intel SpeedStep Allows you to enable or disable the Intel SpeedStep feature. • Enable Intel SpeedStep Default setting: The option is enabled. C-States - Dell Latitude 13 3380 | Latitude 3380 Owners Manual - Page 53
enabled. Intel TurboBoost Allows you to enable or disable the Intel TurboBoost mode of the processor. • Enable Intel TurboBoost setup removes power from all the USB ports to conserve battery power. • Enable USB Wake Support • Wake on Dell USB-C dock Default setting: The option is disabled. - Dell Latitude 13 3380 | Latitude 3380 Owners Manual - Page 54
Sleep mode Allows you to select the charging mode for the battery. The options are: • Adaptive-enabled by default • Standard-Fully charges your battery at a standard rate. • ExpressCharge-The battery charges over a shorter time using Dell's fast charging technology This option is enabled by default - Dell Latitude 13 3380 | Latitude 3380 Owners Manual - Page 55
devices. • WLAN - enabled by default • Bluetooth All the options are enabled by default. Maintenance screen options Option Service Tag Asset Tag BIOS Downgrade Data Wipe Description Displays the Service Tag of your computer. Allows you to create a system asset tag if an asset tag is not already - Dell Latitude 13 3380 | Latitude 3380 Owners Manual - Page 56
updating the system BIOS, and then re-enabled after the BIOS update is completed. 1 Restart the computer. 2 Go to Dell.com/support. • Enter the Service Tag or Express Service Code and click Submit. • ClickDetect Product and follow the instructions on screen, 3 If you are unable to detect or find the - Dell Latitude 13 3380 | Latitude 3380 Owners Manual - Page 57
CAUTION: Anyone can access the data stored on your computer if it is not locked and left unattended. NOTE: Your computer is shipped with the system and setup password feature disabled. Assigning a system password and setup password You can assign a new System Password only when the status is in Not - Dell Latitude 13 3380 | Latitude 3380 Owners Manual - Page 58
Battery specifications • AC adapter specifications • Physical specifications • Environmental specifications System specifications Feature Chipset Specification Intel Types Specification 6th Generation (Skylake) • Intel Core i3-6006U Processor (15W, 3M cache, 2.0GHz) 58 Technical specifications - Dell Latitude 13 3380 | Latitude 3380 Owners Manual - Page 59
Feature Specification 7th Generation (Kaby Lake) • Intel Celeron Processor 3865U (15W, 2M cache, 1.8 GHz) • Intel Pentium Processor 4415U (15W, 2M cache, 2.3 GHz) • Intel Core i5-7200U Processor (15W, 3M cache, up to 2.5 GHz) Memory specifications Feature Memory connector Memory capacity Memory - Dell Latitude 13 3380 | Latitude 3380 Owners Manual - Page 60
Feature Graphic card Specification • Intel HD Graphics Data bus Integrated video External display support 19-pin HDMI connector Camera specifications Feature (uSIM) card One internal (optional) Docking Docking has two options: • Dell D3100 USB 3.0 Dock 60 Technical specifications - Dell Latitude 13 3380 | Latitude 3380 Owners Manual - Page 61
Dell D1000 Dual Video USB 3.0 Docking Station AC adapter port One AC adapter Security port Noble cable lock slot Display specifications Feature Type Specification • 13.3" HD 16:9 (1366 X 768) Anti Glare, non touch • 13 62.40 mm (2.45 inches) Supports five fingers Technical specifications 61 - Dell Latitude 13 3380 | Latitude 3380 Owners Manual - Page 62
Non-operating - 40°C to 65°C (- 40°F to 149°F) Coin cell battery 3 V CR2032 lithium coin cell AC adapter specifications Feature Type Specification • E4 BFR/PVC Free) • Dell Portable Power Companion (12000 mAh) PW7015M (Power Companion 43 Wh (Dura Ace)) • Dell Portable Power Companion (18000 - Dell Latitude 13 3380 | Latitude 3380 Owners Manual - Page 63
Physical specifications Feature Front height Specification 231.8 mm (9.126 inches) Width 332.90 mm (13.106 inches) Starting weight 3.63 lb (1.648 kg) NOTE: System weight and shipping weight is based on a typical configuration and may vary based on the - Dell Latitude 13 3380 | Latitude 3380 Owners Manual - Page 64
6 Troubleshooting Real Time Clock (RTC) reset The Real Time Clock (RTC) reset function allows you or the service technician to recover the recently launched model Dell Latitude and Precision systems from select No POST/No Boot/No Power situations. You can initiate the RTC reset on the system from a - Dell Latitude 13 3380 | Latitude 3380 Owners Manual - Page 65
ePSA diagnostics 1 Power-on the computer. 2 As the computer boots, press the F12 key as the Dell logo appears. 3 On the boot menu screen, select the Diagnostics option. The Enhanced Pre-boot System are displayed. Note the error code and validation number and contact Dell. Troubleshooting 65 - Dell Latitude 13 3380 | Latitude 3380 Owners Manual - Page 66
options. Availability varies by country and product, and some services may not be available in your area. To contact Dell for sales, technical support, or customer service issues: 1 Go to Dell.com/support. 2 Select your support category. 3 Verify your country or region in the Choose a Country
-
 1
1 -
 2
2 -
 3
3 -
 4
4 -
 5
5 -
 6
6 -
 7
7 -
8
-
9
-
10
-
11
-
12
-
13
-
14
-
15
-
16
-
17
-
18
-
19
-
20
-
21
-
22
-
23
-
24
-
25
-
26
-
27
-
28
-
29
-
30
-
31
-
32
-
33
-
34
-
35
-
36
-
37
-
38
-
39
-
40
-
41
-
42
-
43
-
44
-
45
-
46
-
47
-
48
-
49
-
50
-
51
-
52
-
53
-
54
-
55
-
56
-
57
-
58
-
59
-
60
-
61
-
62
-
63
-
64
-
65
-
66
 |
 |

Latitude 3380
Owner's Manual
Regulatory Model: P80G
Regulatory Type: P80G001