Dell Latitude CSx H Service Manual - Page 23
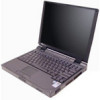
Samsung LCD panel.
 |
View all Dell Latitude CSx H manuals
Add to My Manuals
Save this manual to your list of manuals |
-
 1
1 -
2
-
3
-
4
-
5
-
6
-
7
-
8
-
9
-
10
-
11
-
12
-
13
-
14
-
15
-
16
-
17
-
 18
18 -
 19
19 -
 20
20 -
 21
21 -
 22
22 -
 23
23 -
 24
24 -
 25
25 -
 26
26 -
 27
27 -
 28
28 -
29
-
30
-
31
-
32
-
33
-
34
-
35
-
36
-
37
-
38
-
39
-
40
-
41
-
42
-
43
-
44
 |
 |

Dell Latitude CS Portable Computers Service Manual
15
127,&(±²$²PDJQHW²LV²PRXQWHG²RQ²WKH²EDFN²VLGH²RI²WKH²EH]HO²EHKLQG²
WKH²OHIW²KLQJH²H[WHQVLRQ²FRYHU³².HHS²GLVNHWWHV²DQG²RWKHU²PDJQHWLF²
VWRUDJH²PHGLD²DZD\²IURP²WKLV²DUHD²WR²DYRLG²WKH²SRWHQWLDO²IRU²GDWD²
ORVV³
’LVSOD\º$VVHPEO\±/DWFK
127,&(±²7R²DYRLG²GDPDJLQJ²WKH²V\VWHP²ERDUG´²\RX²PXVW²UHPRYH²WKH²
PDLQ²EDWWHU\²EHIRUH²\RX²VHUYLFH²WKH²FRPSXWHU³
1.
Remove the Sharp display-assembly bezel (seeFigure 11), or the Samsung
display-assembly bezel (see Figure 12).
2.
Remove the display-assembly latch by sliding the latch from the inside of
the display-assembly bezel (see Figure 11).
/&’±3DQHO±±±
127,&(±²7R²DYRLG²GDPDJLQJ²WKH²V\VWHP²ERDUG´²\RX²PXVW²UHPRYH²WKH²
PDLQ²EDWWHU\²EHIRUH²\RX²VHUYLFH²WKH²FRPSXWHU³
NOTE: This computer contains an LCD panel manufactured by Sharp or Sam-
sung. The display-assembly bezel and the display-assembly top cover are
unique for each manufacturer±s LCD panel. When viewed from the back of the
computer, there is a notch on the lower-right corner of the hinged edge of the
Samsung display assembly (see Figure 12). Close the LCD display assembly
and view the back of the computer to identify the Samsung notch.
5HSODFLQJ±D±6KDUS±/&’±SDQHO±ZLWK±D±6KDUS±/&’±
SDQHO±RU±5HSODFLQJ±D±6DPVXQJ±/&’±SDQHO±ZLWK±D±
6DPVXQJ±/&’±SDQHO
1.
Ground yourself by touching the unpainted metal surface of the I/O panel
on the back of the computer.
2.
Remove the status indicator panel (see Figure 9).
3.
Remove the display assembly (see Figure 10).
4.
Remove the display assembly bezel (see Figure 11 for a Sharp LCD panel or
Figure 12 for a Samsung LCD panel).
5.
Remove the inverter (see Figure 11 for a Sharp LCD panel or Figure 12 for a
Samsung LCD panel).
If you have a Sharp or Samsung LCD panel, the inverter is held in place by
two plastic clips located at the top and bottom of the inverter. Press down
on the top of the inverter, and then rotating the top up and slide the
inverter out of the bottom clip.