Dell Latitude CSx H Service Manual - Page 26
keyboard see
 |
View all Dell Latitude CSx H manuals
Add to My Manuals
Save this manual to your list of manuals |
-
 1
1 -
2
-
3
-
4
-
5
-
6
-
7
-
8
-
9
-
10
-
11
-
12
-
13
-
14
-
15
-
16
-
17
-
18
-
19
-
20
-
 21
21 -
 22
22 -
 23
23 -
 24
24 -
 25
25 -
 26
26 -
 27
27 -
 28
28 -
 29
29 -
 30
30 -
 31
31 -
32
-
33
-
34
-
35
-
36
-
37
-
38
-
39
-
40
-
41
-
42
-
43
-
44
 |
 |

18
Dell Latitude CS Portable Computers Service Manual
3.
Make sure that the six hooks on the shipping bezel hold the LCD panel
firmly in place behind.
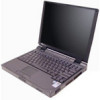
.H\ERDUG±$VVHPEO\
±
)LJXUH±µ¸¶±±5HPRYLQJ±WKH±.H\ERDUGº$VVHPEO\±6FUHZV
To remove the keyboard assembly, perform the following steps.
127,&(±²7R²DYRLG²GDPDJLQJ²WKH²V\VWHP²ERDUG´²\RX²PXVW²UHPRYH²WKH²
PDLQ²EDWWHU\²EHIRUH²\RX²VHUYLFH²WKH²FRPSXWHU³
127,&(±²0DNH²VXUH²WKDW²WKH²ZRUN²VXUIDFH²LV²FOHDQ²WR²SUHYHQW²
VFUDWFKLQJ²WKH²FRPSXWHU²FRYHU³
1.
Remove the status indicator panel (see Figure 9).
2.
Remove the two black M2 x 16-mm screws located at the top of the
keyboard (see Figure 13).
3.
Carefully disconnect the keyboard cable connector from the system board.
127,&(±²7KH²NH\FDSV²RQ²WKH²NH\ERDUG²DUH²IUDJLOH´²HDVLO\²GLVORGJHG´²
DQG²WLPHµFRQVXPLQJ²WR²UHSODFH³²%H²FDUHIXO²ZKHQ²UHPRYLQJ²DQG²
KDQGOLQJ²WKH²NH\ERDUG³
4.
Release the keyboard from the palmrest assembly by lifting the top edge
of the keyboard up and sliding it toward the back of the computer.
M2 x 16-mm black screws (
2)
keyboard
assembly