Dell OptiPlex 3020M Dell OptiPlex 3020M Owners Manual - Page 23
Removing and Installing Components, Front and Back View, Removing the Cover
 |
View all Dell OptiPlex 3020M manuals
Add to My Manuals
Save this manual to your list of manuals |
Page 23 highlights
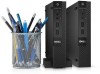
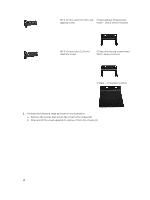
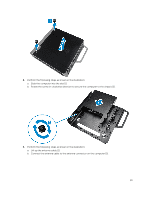
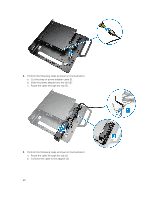
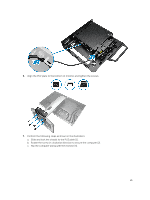
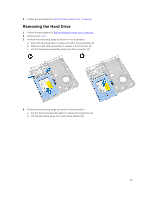
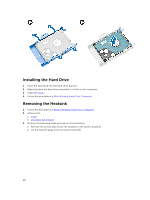
3 Removing and Installing Components This section provides detailed information on how to remove or install the components from your computer. Front and Back View Figure 1. Front and Back View 1. power button or power light 3. headset connector 5. Wi-Fi antenna connector (optional) 7. USB 2.0 connector (hibernate wake-up) 9. USB 2.0 connectors 11. USB 3.0 connectors 13. service tag 15. VGA connector 17. power cable connector 2. hard-drive activity light 4. microphone connector 6. serial and PS2 connector (optional) 8. security-cable slot 10. padlock ring 12. cable holder 14. network connector (Integrated Connector Module) 16. DisplayPort connector Removing the Cover 1. Follow the procedures in Before Working Inside Your Computer. 2. Rotate the power cable clip to the position as shown in the illustration. 23
-
 1
1 -
2
-
3
-
4
-
5
-
6
-
7
-
8
-
9
-
10
-
11
-
12
-
13
-
14
-
15
-
16
-
17
-
 18
18 -
 19
19 -
 20
20 -
 21
21 -
 22
22 -
 23
23 -
 24
24 -
 25
25 -
 26
26 -
 27
27 -
 28
28 -
29
-
30
-
31
-
32
-
33
-
34
-
35
-
36
-
37
-
38
-
39
-
40
-
41
-
42
-
43
-
44
-
45
-
46
-
47
-
48
-
49
-
50
-
51
-
52
-
53
 |
 |
