Dell OptiPlex GX100 Service Manual - Page 25
-Inch Diskette Drive, Removing a Diskette Drive, From a Drive Bay, 25-Inch Drive,
 |
View all Dell OptiPlex GX100 manuals
Add to My Manuals
Save this manual to your list of manuals |
Page 25 highlights
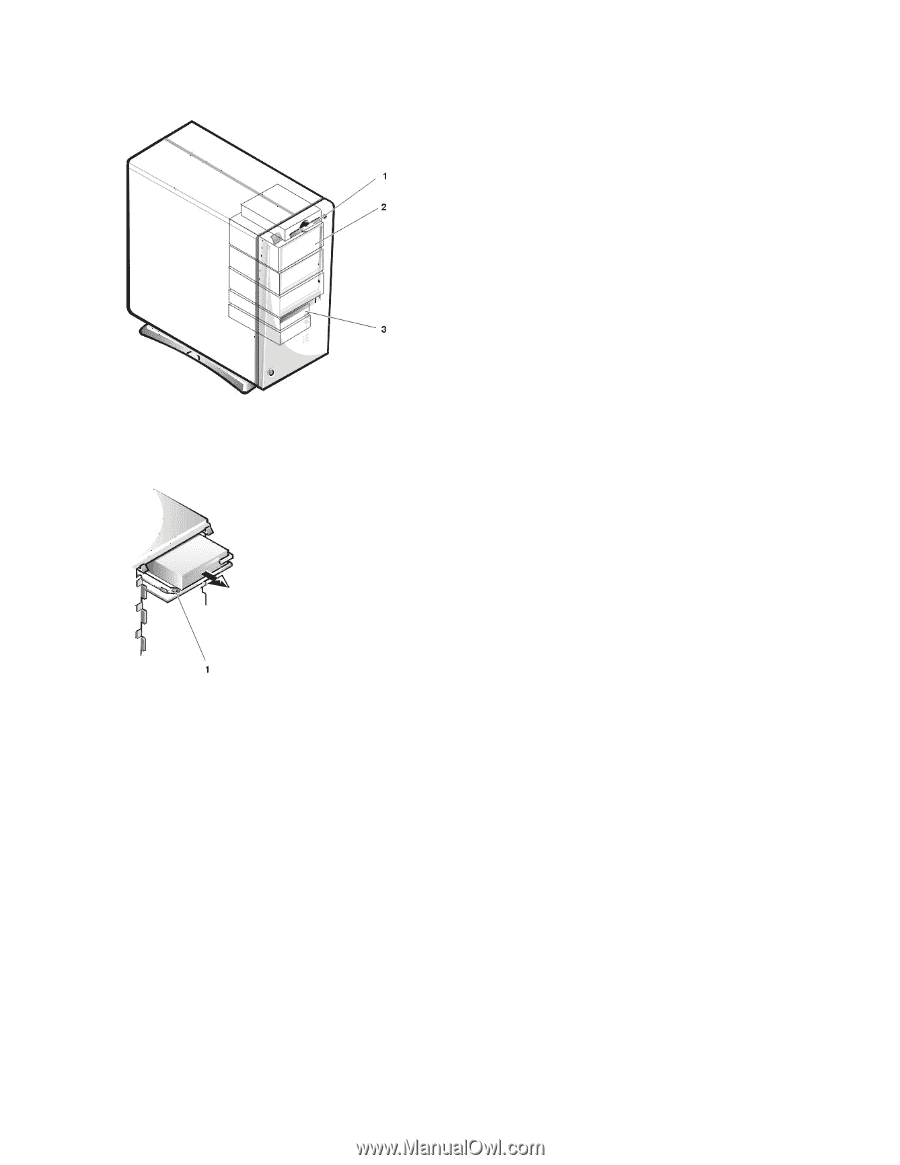
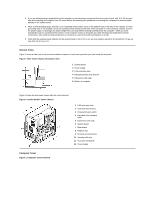
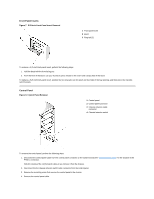
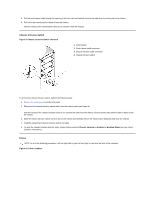
1 3.5-inch diskette drive 2 5.25-inch drive slots (3) 3 3.5-inch internal bay for hard-disk drives (2) 3.5-Inch Diskette Drive Figure 11. Removing a Diskette Drive From a Drive Bay 1 Release tab To remove the 3.5-inch diskette drive from the drive bay, perform the following steps: 1. Disconnect the DC power and diskette interface cable from the back of the drive. 2. Press the release tab on the left side of the diskette drive, and pull the diskette drive/bracket out of the chassis. 3. Remove the drive-mounting screw from the left side of the drive, and remove the drive from the bracket. to the bottom of the bracket (see Figure 11). When you replace the 3.5-inch diskette drive, be sure that the two hooks on the right side of the bracket engage the mounting holes in the side of the 3.5-inch diskette drive. 5.25-Inch Drive Figure 12. Removing a 5.25-Inch Drive From a Drive Bay
-
 1
1 -
2
-
3
-
4
-
5
-
6
-
7
-
8
-
9
-
10
-
11
-
12
-
13
-
14
-
15
-
16
-
17
-
18
-
19
-
 20
20 -
 21
21 -
 22
22 -
 23
23 -
 24
24 -
 25
25 -
 26
26 -
 27
27 -
 28
28 -
 29
29 -
 30
30 -
31
-
32
-
33
-
34
-
35
-
36
-
37
-
38
-
39
-
40
-
41
-
42
-
43
-
44
-
45
-
46
-
47
-
48
-
49
-
50
-
51
-
52
-
53
-
54
-
55
-
56
-
57
-
58
-
59
 |
 |