Dell OptiPlex GX100 Service Manual - Page 49
CD-ROM Drive, CD-ROM Drive Removal, CD-ROM Drive Replacement, CD-
 |
View all Dell OptiPlex GX100 manuals
Add to My Manuals
Save this manual to your list of manuals |
Page 49 highlights
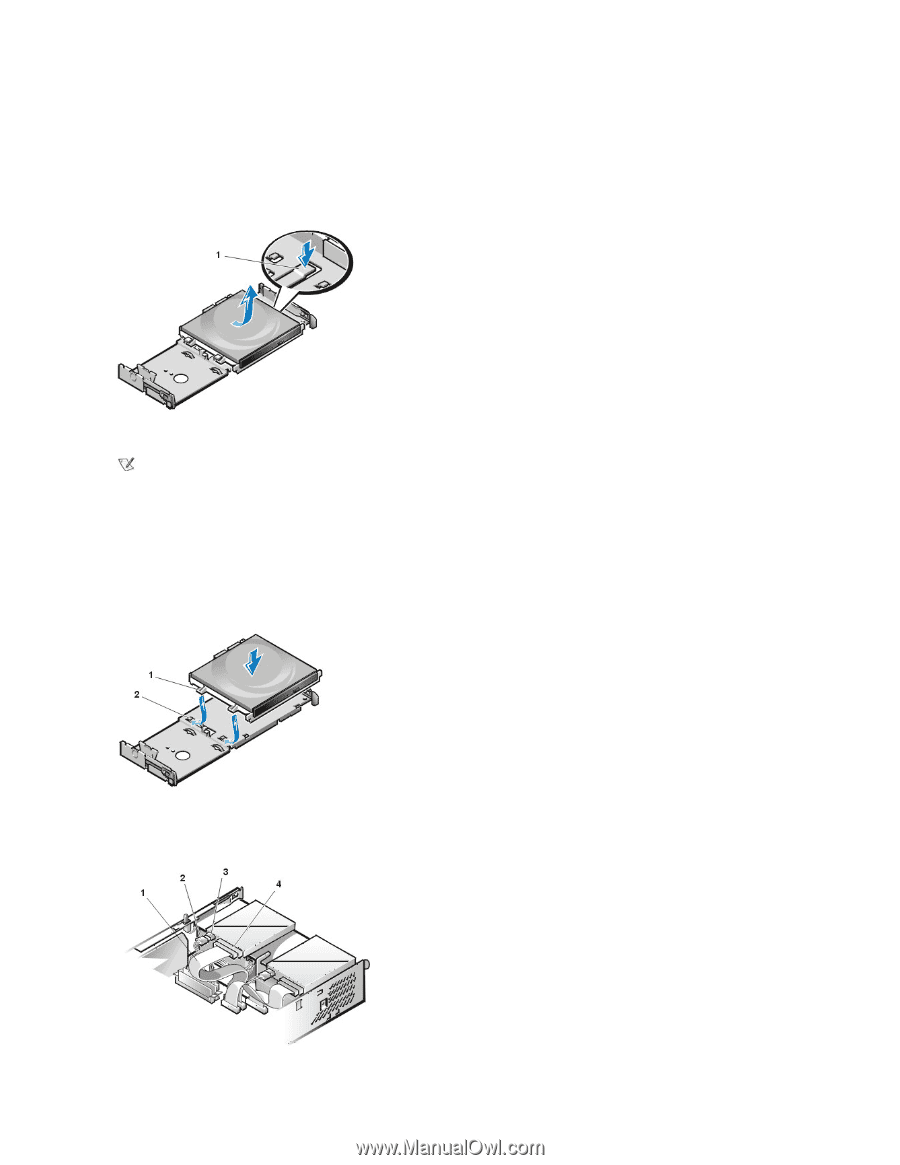
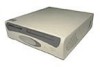
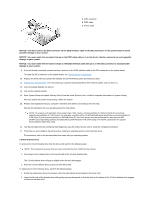
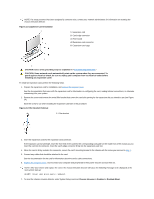
3. Ensure that the latch on the left side of the 3.5-inch diskette drive engages the top of the diskette drive. If necessary, press on the latch from the bottom of the drive shelf. 4. Replace the drive shelf and connect the interface and power cable connectors. CD-ROM Drive Figure 14. CD-ROM Drive Removal 1 Drive release tab To remove a CD-ROM drive, perform the following steps. NOTE: This procedure assumes that you have removed the drive shelf from the chassis. 1. Push down on the drive release tab on the right side of the drive (see Figure 14). 2. Slide the CD-ROM drive assembly forward and up and out of the chassis. To replace a CD-ROM drive, perform the following steps: 1. Align the tabs on the bottom of the CD-ROM drive with the notches on the drive shelf, and slide the drive toward the back of the shelf until it snaps into place (see Figure 15). Figure 15. CD-ROM Drive Replacement 1 Tabs (2) 2 Notches (2) 2. Connect a power cable and an interface cable to the appropriate connectors on the back of the drive (see Figure 16). Figure 16. CD-ROM Drive Cable Attachment 1 Interface cable 2 Power cable 3 Power input connector 4 Interface connector
-
 1
1 -
2
-
3
-
4
-
5
-
6
-
7
-
8
-
9
-
10
-
11
-
12
-
13
-
14
-
15
-
16
-
17
-
18
-
19
-
20
-
21
-
22
-
23
-
24
-
25
-
26
-
27
-
28
-
29
-
30
-
31
-
32
-
33
-
34
-
35
-
36
-
37
-
38
-
39
-
40
-
41
-
42
-
43
-
 44
44 -
 45
45 -
 46
46 -
 47
47 -
 48
48 -
 49
49 -
 50
50 -
 51
51 -
 52
52 -
 53
53 -
 54
54 -
55
-
56
-
57
-
58
-
59
 |
 |